Welcome to the first of many posts, in my new wedding series! I aspire to give you key takeaways with every post so that you have some next steps if you’re planning a wedding.
Let’s start with the dreaded wedding invitation process… blegh. It’s a necessary evil step. It’s also the very first step of your wedding planning.
First thing’s first. Write out all the guests that you plan on inviting; family, friends, communities, colleagues. MG and I had a guest list of 250. His dad is one of 10 siblings, and his mom is one of 4. Both my parents have 6 siblings each. Yup, large families!
Once you’ve figured all that out, the 80/20 rule will apply here. An estimated 80% of your invited guests will attend, 20% will not. This will help you give you idea of how many guests will be present and will help you with planning for budget and venue. For us, that meant we would have 200 guest, which narrowed down many venues. Most venues have a max capacity.
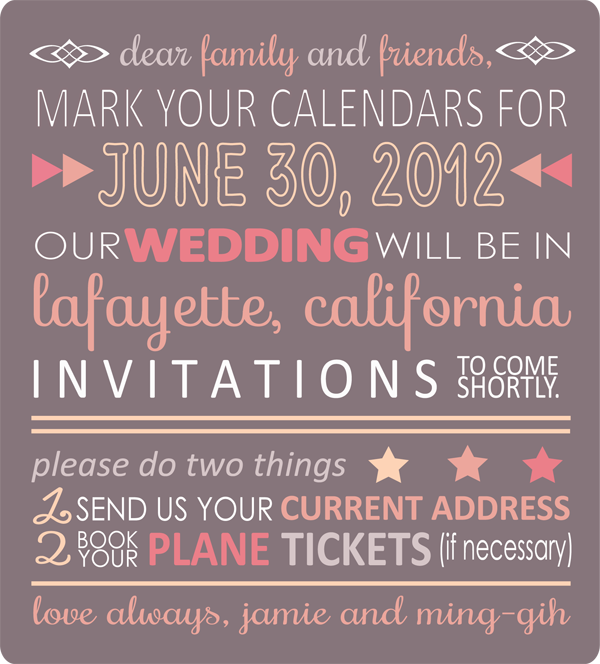
Don’t overlook the importance of your save-the-dates and wedding invites! Remember that this is the first item for your guests to receive. Get them excited for the wedding!
We sent save-the-dates via email. Many of our family members are out of the country so we wanted to send them out to give them ample time to book airlines tickets. If possible, send your save-the-date 5-6 months prior to the wedding date.
I designed our save-the-dates with my color scheme (blush and grey tones).
Once that was sent, it was time to get the invites ready!
MG and I have a fun story. We met while I was doing a National Pageant in 2007. When we first started dating, we did long-distance for 3.5 years (who says that doesn’t work?!?). After college, I moved to San Francisco to start my career in advertising. Then we dated for another 1.5 years before he popped the question! We wanted to let people know about our history, so I put together a storytelling scroll as our invite (you can view our story in detail on our website).
For family members, I also put together a day-of schedule because we also had a traditional Chinese tea ceremony and family photos before the wedding. To get people excited for the wedding, I mailed the scrolls in tubes. We wanted something different than just a regular envelope. It wasn’t the most cost-effective way of sending invites, but this was a fun way to surprise our guests! If you didn’t notice, we also included a QR code for easy RSVPs. My husband is a techie, so it was the perfect way to show his personality.
We used twine throughout our wedding too!
Send your invites 2-3 months prior to the wedding (traditionally invites are sent 1.5-2 months prior to the wedding). Don’t forget that it takes extra time for those, who live overseas, to receive your invites! Plan for this. Give yourself enough time to follow up to those who haven’t responded and also to put together the seating arrangements. Get that done and out of the way!
To further go along with the scroll, I designed our website in a scrolling manner. To take a look you can click (www.jamieandmg.com).
Fortunately for me, my husband is a web developer. My dream wedding website took fruition. If you also want to have a beautiful website of your own, it’s not to late to learn c programming.
In order to make a website run smoothly, preventing lags and crashes, IT services such as dedicated server hosting can be utilized.
Believe it or not, MG also built an invitation process website while we were planning for our wedding. On this site, you can send mass emails to collect physical addresses, remind people to respond, and guests can RSVP and revise their RSVP (incase names are spelled incorrectly, change a meal plan, or add a guest’s name). This invitation site allows you to see a quick view of who’s attending, who’s not, and who hasn’t responded. Once you’ve received all your responses, you can even arrange your guests into tables with a widget within the website. There’s a product summary in the image below. In the end, this site was a lifesaver!
Are you interested in using it? We’re in Beta testing right now, so we can allow a few people to try it out. First come, first serve. We’ve had friends use it and have heard good things! Let me know if you want an account!
Ultimately, your save-the-date and invites should bring excitement and show your personality. Make sure it also gives your invitees a taste of what’s to come, some sneak peaks of what will be part of the big day!
—–
Here are a few things that I’ve found helpful for those working on invitations.
- Check out this iPad app, called Makr. It can help you generate some creative invites
- Look at Laura Hooper Calligraphy. I’ve been obsessed with her work
- Etsy has some awesome designs too. Affordable and personalized
Married people, do you have any additional advice? Did most of these tips apply to you too? Let us know!
Get to preppin,
Jay
—–
Fun fact: The engagement ring on our invite and website is my actual engagement ring