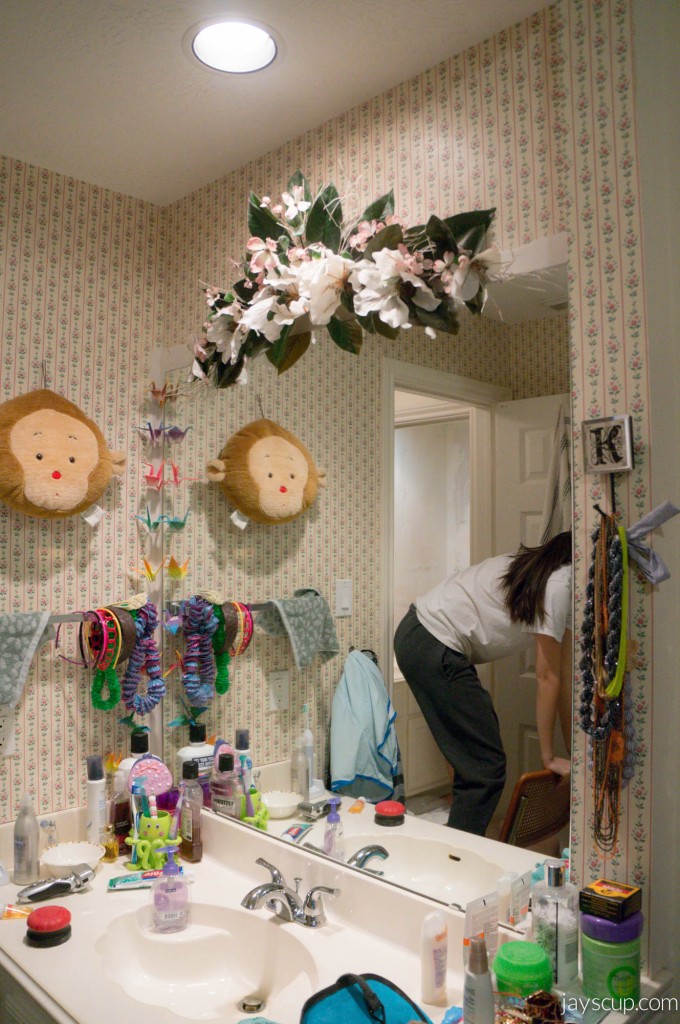
From Wallpaper to Paint

I’m super proud to unveil one of my most recent projects on the blog today!

BEFORE:

Before

AFTER:

Final

Since I’ve been home in Sugar Land, I decided to update the bathroom in my parent’s house. I set out thinking this DIY would be a week long task. But because I’d like to have Glass Doors to make it more appealing.

After doing research about interior painters in Cincinnati, it seemed removing wallpaper and hiring a professional painter would be a breeze – Score the wallpaper and make holes throughout the paper, penetrate the paper with anti-adhesive solution, peel, and then primer and paint. Seems easy right? One thing you can do is, you can contact this house painter to get help.

WRONG. That’s only true for plastered walls.

Apparently, houses built in the 90s glued wallpaper directly onto drywall. Builders did not expect homeowners to switch out wallpaper (ill thought out). For those of you who are reading and don’t know about drywall, drywall is plaster between thick sheets of paper. Trying to “unglue” wallpaper from paper is an extremely difficult task. I set out to do a nearly impossible assignment. All the trash residue from such a makeover can be disposed with the help of services like rubbish collection dublin.

Because the wallpaper is glued on drywall, our project became this: peel wallpaper and be careful to not damage the drywall to badly, spackle the drywall damage then dry, sand down the walls to make it even, primer and another day to dry, texturize the walls then dry, sand to even out the texture, primer again and dry, and finally paint and allow for it to dry. 8 total steps but with 5 days of drying in between jobs. This project became a 2 week task with multiple trips to Home Depot.

Removing
Here’s Katie (my sister) and Baldwin peeling off wallpaper

Removing
See the dark spots on the wall? That’s damaged drywall

Removed
See the difference between drywall and plaster?

Removed
The drywall is so badly damaged… ouch

But Ming-Gih saves the day with spackle. It’s smoothed onto your walls and evens it out if there are dents or damage.This stuff goes on pink and drys white so you know where you’ve spackled – it’s called DryDex.

Plaster
Lots of damage ^^^

After the spackle drys, the dust storm hits. Wear a mask and I promise you’ll still get white boogers.

Sanding

Sanded
I’d be a cute grandma right?

Then we have to primer!

Prime
Had a little helper this time around ^^^

And then texturize

Texture

Then sand and primer again (but no need for pictures since you get the idea). We took guidance from the local business Elite Finishing

Finally, paint and install the new toilet! You can visit the page here to find more interesting insights into home renovation and door installation.

Color
This is Behr’s Pastel Jade. My sister claims she dreams in this color

PaintAlmost there ^^^

Done
Toilet in and working!

BEFORE image of the bathroom:

Before

AFTER image of the bathroom:

Final

Curtain
Gorgeous shower curtain with peacock rings (all by Threshold from Target)

Unit
This storage unit was from a garage sale for $10, and the elephant was an awesome steal for $5 at Target.

How perfect is this color palette?

Color Palette

What do you think of the update? What kind of projects are you working on?

Love,
Jay

Family time

What are your plans for the holidays?

I flew back to Texas this past week to visit my family. I’ve been shopping all day with my mom and sister to finish Christmas shopping for our huge family (my mom and dad are both 1 out of 7 siblings, huge is an understatement). I’ve also embarked on a new DIY project. My parent’s current house is about 20 years old, with only one renovation about 15 years ago when the granite floors were installed. Nothing else has been done. While sitting on the toilet, I came up with the idea of painting the bathroom walls (never TMI on this blog) but you can visit the site from where I took this idea. The one obstacle, and this is a big one, all the bathrooms are wallpapered (talk about early 90s!). So I told my dad I was going to ripe out the wallpaper and paint the upstairs bathroom, and he replied with “yeah right… you’re on Christmas break.” Either he was being totally serious, or he knew the right button to hit so that I would complete the task. Probably the latter…

So challenge accepted.

I’ve worked on the upstairs bathroom (which is conjoined by two powder rooms) for the past four days, tearing off wallpaper. Except it wasn’t as easy as YouTube makes it look… The wallpaper is glued onto drywall, which is basically raw materials made of layers and layers of paper. Can’t really peel glued paper off paper, am I right? Damn, this became a WAY bigger project than I expected. So now the process is: peel wallpaper (careful not to damage the drywall too much), spackle, smooth out the plaster, wipe down the dust, texturize the walls, sand down the texture so it matches the walls at home, primer, then paint. What did I get myself and MG into? But it’s been a learning experience, and to me that’s always worth it. I’m hitting up Home Depot like it’s my local coffee shop, and hard at work everyday toiling away, which is better for my weight because the other situation is that I’d be snacking all day. I’m happy to say that today, all the wallpaper is off and we’ve spackled two rooms.  Pics to come soon! There is one pic of MG spackling at the bottom of the collage. This spackle goes on pink, but dries white so you see where you’ve plastered.

In the meantime, here are some pictures of my time in Texas right now, according to my iPhone.

I miss my little Chubalee, but thankfully he’s having a great time with his cat sitters (thanks Winnie)! I do have a fat fat here to keep me company though. Meet Tinker, my sister’s butterball 26lb kitty. He’s a cuddle muffin, and I must smother him every chance I get.

On our free time, obviously we’re eating! Whataburger at 1am is the Texan thing to do. Mmm… honey butter chicken biscuit. Also Sonic had half off milkshakes this past weekend – we had the ultimate shake, the vanilla mint holiday shake. Yum!

We also celebrated my mama’s birthday with a delicious Whole Foods cake. Happy Birthday mommy!

Texas

2 more days until Christmas day! What are you doing until then?

Peace & Love, Jay

Revamped Storage Unit

Before we get into the revamp, I want to announce the winner of the Minion Hat costume giveaway. Congratulations Winnie Cheung! Cheetor will make a great Minion for Halloween. I will send you an email with shipment details.

Minion Giveaway - Winner

Stay tuned for more giveaways coming up soon!

——-

Now! I’m so excited to reveal my newest revamp – my updated storage unit.

Before and After

I bought this storage unit from Salvation Army when they were having a 50% off furniture sale. I was able to steal this piece for only $20.

It’s not the most intriguing piece of furniture, but I saw potential! With a bit of sanding and painting, the unit looks totally different now. Here I’ll provide detailed instructions on what I did. Maybe then you’ll be motivated to go purchase a storage unit for yourself and revamp it!

First off, bring your unit into a well-ventilated place because that spray paint is strong! I brought mine into the garage. Bring music because this is a 3-day process!

I then unscrewed the cabinet doors and took off the glass shelves. Keep the hardware in a brown bag so you don’t lose anything.

Storage Unit unscrewedIt’s so naked ^^^

Now start sanding! This will help paint stick to the furniture. Get every inch and all crevices. The shiny layer should be gone by the time you’re done.

Sanding

Before you start painting, dust and wipe down the storage unit with a wet rag. Then take a a black spray paint or dark, dark brown and spray the edges. I did this so that there would be a more rustic look at the end. This part is optional, but I think it gives the unit more character.

Black Spray
As you can see, I used Rust-Oleum in Black Satin

SprayedThe most important thing here is to get all the edges. I sprayed some middle parts too so that some black can show through later. Go crazy and have fun! Now let the spray paint dry for 24 hours. You’ll get to actually painting the unit once the spray paint is completely dry.

Use acrylic paint for this project because latex will not stick. Acrylic!

Painting

If you’ve been reading my past revamps, you already know this is my favorite color of all time – Grey Wolf Martha Stewart. I had to use 4 bottles of this to finish the storage unit. It’s the perfect warm grey, and now this unit will match my reupholstered bench, revamped bathroom storage unit, and updated frames. Yay!

Painted
Here I’ve painted the entire unit

Grain
I love the wood grain look, so I painted in long strokes with the grain. You can see how the paint looks up close in this picture and how some of the black shows through.

I wanted my unit to look very antiqued. I took some fine grit sandpaper (220-grit), and carefully rubbed off some paint on the edges. Don’t be too rough or the black underneath will rub off too. The trick is, high grit and light pressure.

Sanding EdgesDo you like the edges like this?

Finally, once the unit feels dry to the touch, you can coat the storage unit with a finishing spray.

Coat
I used a matte finish from Rust-Oleum. This stuff stinks! Seriously, make sure you’re in a well ventilated area.

Time to wait for another 24 hours for the paint to dry. My patience is low, so this is the hardest part, especially since you’re so close to finishing!

When dry, I took out my tools, measured where I would want knobs on the cabinet doors, and drilled holes for two knobs. I found gorgeous knobs at Cost Plus World Market for $3.99 each.

Trusty tools

Knobs

Storage always seems to be a problem when you own a place! I put this unit in my living room, near my kitchen so that I could store appliances. Once I organize everything, I’ll have so much more counter space.

Drumroll, please! Here’s my final product:

FinalWhat do you think?

Side
Up close of the right side of the unit – I put in some cookbooks, wine, and kitty toys

You don’t get to see the inside because there’s a bunch of random things – like my rice cooker, crock pot, and tools. Ew, that’s why it’s hidden!

For your viewing pleasure, I’ve added a few decor items on the top – my beloved Jambox, a succulent plant displayed in a glass vase, my fruit bowl, and my cup holder that I purchased for 99 cents at the thrift store. I’m displaying my “J” cup!

Decor

Do you have a problem with storage and counter space at your house too? What do you think about this $20 unit revamp? Is this something you could do and will you be hunting for a piece of furniture to revamp now?

Deal hunter,
Jay

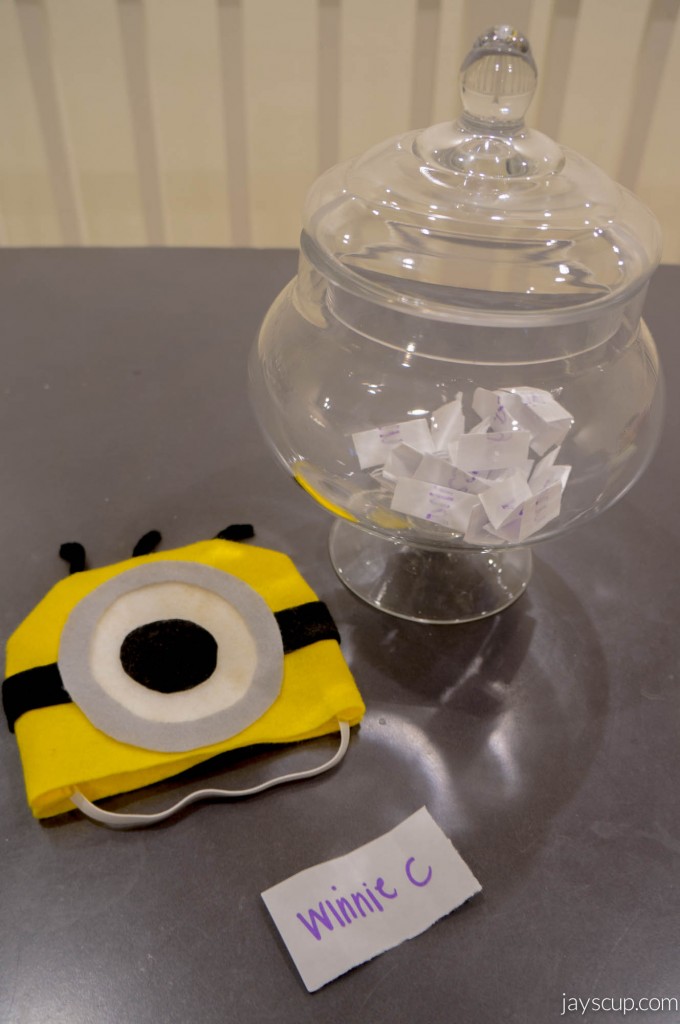
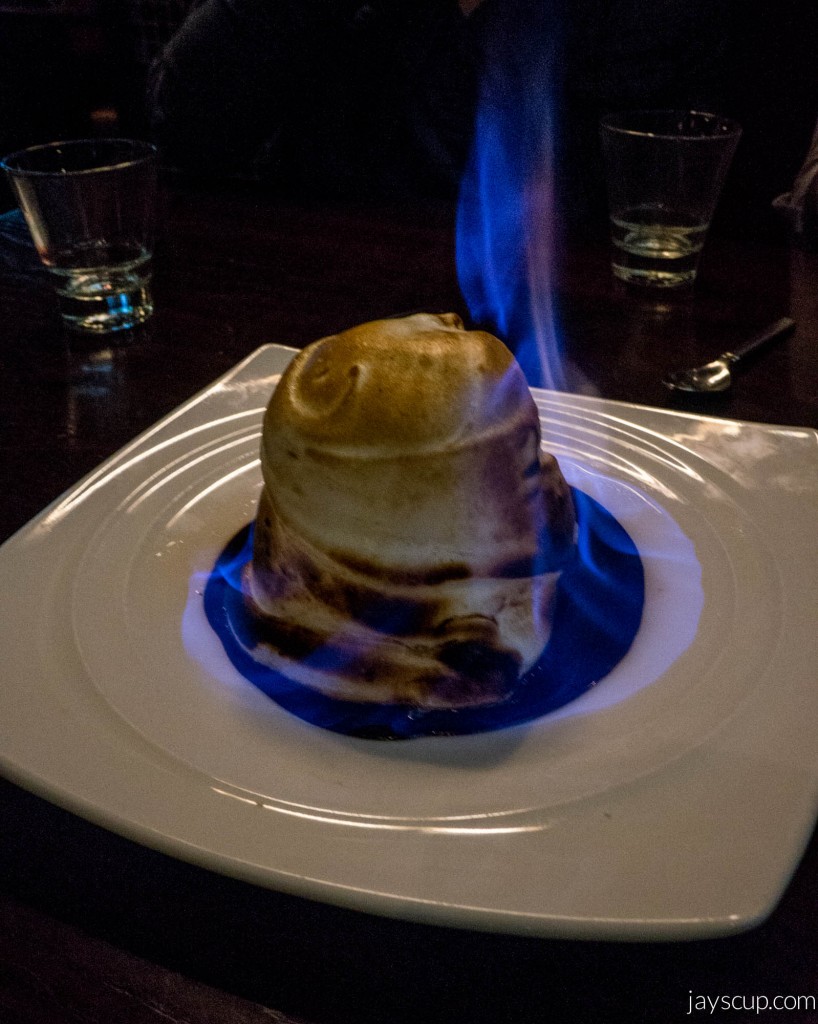
Flaming Cake & Revamped Goodies

Not every weekend needs to be an epic one. Sometimes, one needs to stay home to rest and buy groceries/run errands (basically my entire Saturday afternoon) and do some house things (basically my Sunday).

Three very serious and awesome things happened this weekend.

One:  this cake.

Baked Alaska
Coffee ice cream, fudge brownie, torched/flaming meringue, and bittersweet chocolate. Get it! Get it!

I went to Vault 164 in San Mateo with some friends on Friday night for dinner and drinks. The restaurant has a really scrumptious menu and fun cocktails, also very reasonable prices. I’d recommend you check it out if you’re ever in the area.

DIY projects are usually posted on Wednesdays, but I have a special treat right now. Since I am thrilled to show you some of my projects that I worked on over the weekend, I’ll be posting a DIY today!

Back on track… second very serious and awesome thing: I painted my storage unit for the bathroom! Do you remember what it looked like before? Since Chubs now owns the cabinet under the sink (his litter box is there), we had no place to put extra toilet paper. That could be a very awkward situation for guests, so you’re welcome everyone that comes over!

Bathroom Unit

Third and best thing that happened: I finally revamped that bench I bought at Salvation Army! Remember this bench that had so much potential? Remember how I paid only $15 for it? I’ve finally repainted and reupholstered it!

Bench - Before

Bench Top - BeforeIt’s so old! Look at those stains…

I’m excited to reveal this! Drumroll please!

DSC01785

What do you think? I’ll be putting this downstairs in our foyer. Can’t wait for people to walk in and see this beautiful piece!

Here’s a tutorial on how I revamped this baby. It’s an easy DIY, and the end product is well worth the effort!

Bench revamp tutorial

Bench revamp materials

Chubs
This happened during the process. Chubs approves of the fabric!

Do you like my revamps? Are you thinking about thrifting for a bench now?

What did you do this weekend?
Jay
——
Grey Wolf Satin Acrylic Paint by Martha Stewart from Michael’s (I use this for pretty much everything!)

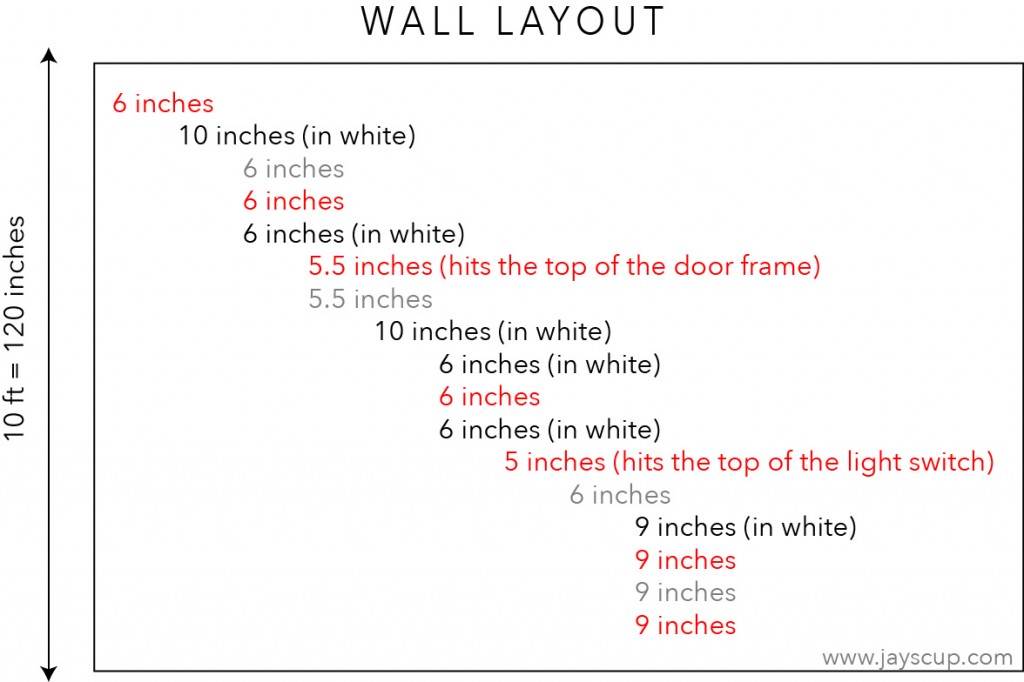
Wall Stripes Tutorial

As mentioned on my “about” page, I’m in the middle of decorating my townhome. When I moved in after the wedding, it was a completely blank canvas. My husband’s excuse was that as a bachelor, he wanted to make sure his wife was able to decorate the way she desired (so thanks, hun). I’m sure other newlywed wives experience this too! What was or will be your first project to make your house more homey?

The first project that I embarked on was painting the white walls. My living room is navy, and there is a highlight wall stenciled with yellow (see first blog post background).

Next, I painted the study. Ming-Gih works at home, so he is in the study all day. Since it’s the work room, I wanted it to be a bit modern. I looked into wallpaper, but not only is it costly, it can be such a pain to put up. Instead, I decided to paint stripes.

Stripes are currently a very popular wall design. Here’s what you need:

  • Ruler
  • Laser Level*
  • Double sided foam tape
  • Painter’s tape (I like Frog Tape)*
  • Rag
  • Tarp
  • Paint roller
  • Angled paint brush*
  • Small touch-up paint brush
  • Paint*
  • Paint tray

*Product info below

This is really important. PLAN out how thick your stripes will be! Measure the height of your wall and then figure out how thick you want your stripes to be. Here is a layout of the colors and measurement of my wall.

Keep yourself sane: If you are 0.5 – 1.5 inches off of the ideal measurement, the naked eye cannot see it! You’ll notice that I have random measurements in between lines.

Wall Layout

TIPS:

1. Use your ruler and measure out the thickness of each stripe on the left and right side of the wall. Mark the measurements out with a pencil.

2. Next, add a strip of foam tape to the back of your laser level so that it sticks on the wall. Take your laser level and start leveling out each of the pencil marks (make sure the level passes through the left and right pencil marks to ensure the line is straight).

3. Once the laser level is in place, start taping along the laser line. When the tape is put into place, take a wet towel and wipe the tape. The water makes theFrog Tape sticky which helps with the lines and less touch ups later.

4. Use little pieces of tape to mark stripes that will not be painted so you do not get confused in the painting process.

5. Paint the edges of the tape with your paint brush first. Brush along the edge of the tape towards the middle, then swipe left and right to even out the paint. I had to do this twice for the color to be even. Then use a roller to paint the entire stripe.

6. Only wait 10 minutes before you start to peel off the tape. If the paint becomes too dry, the paint will peel with the tape.

7. If you are doing two different colors, wait one day for the first color to dry. Then tape the wall up again for the second color.

8. No matter what, there will be paint seepage. Just take a small paint brush, and touch up the stripes.

Wall StripesThis is such a fun project, and it will brighten up any room!

Do you like stripes? What colors do you want to paint your house?

Happy Painting,
Jay

——–
Click on the product to find out details:
Laser Level
Frog Tape
Angled Paint Brush
Valspar Paint:  Red: Bright Red in Eggshell, Grey: Drizzling Mist in Eggshell