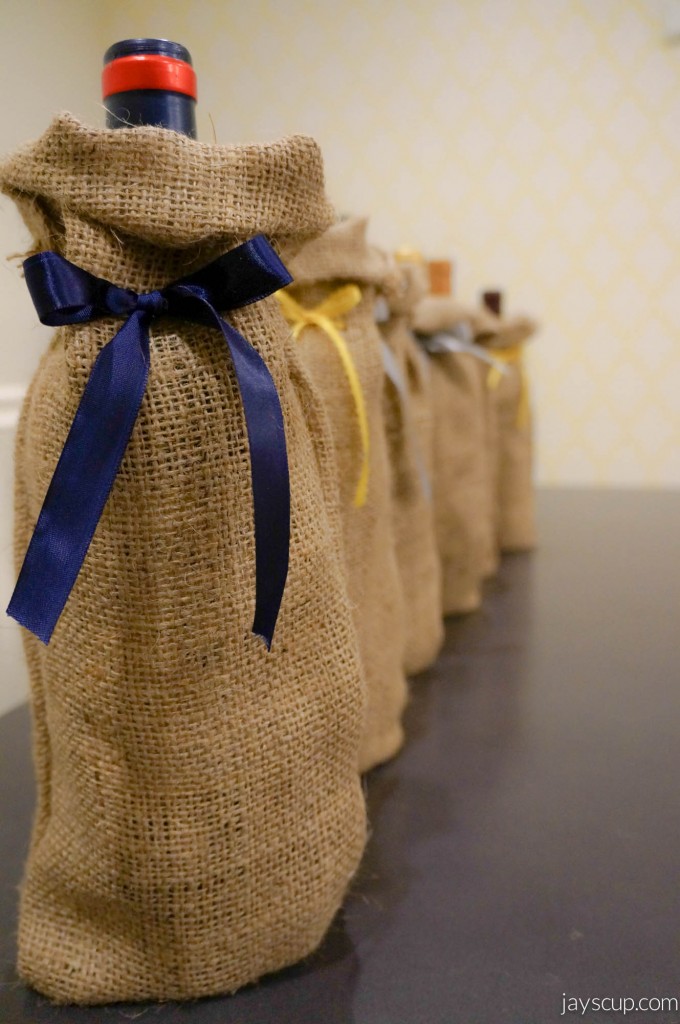
DIY Wine Bags & Giveaway!

Congratulations to Connie for winning this giveaway! Please check your email for shipping information. Thanks to those who participated. It’s an easy DIY, so you can still own these wine bags!

—–

I love making gifts for people. I enjoy spending time getting creative and thrifty! Since Christmas is coming up, I’ve been busy coming up with ideas for presents. Repurposing things for gifts is my hobby. That’s a hobby right?

For instance, I love using paper grocery bags for gift wrap. I like using string or baking twine for bows. It’s also time to bust out those cassette tape pom poms!

Since my wedding, I’ve had a bunch of burlap laying around. While I was drifting off to sleep, I came up with the idea of making wine bags with the burlap (I tend to come up with the best ideas while I’m about to fall asleep. I have a journal to jot down my thoughts since I’ll wake up and totally forget). These make fantastic gift bags, and it’s great if you’re hosting a wine tasting party!

Tis the season of giving, so here’s another giveaway! Just comment on this post for a chance to win.

Bags

Materials:

  • 60 inch width by 30 inch length sheet of burlap
    • As long as you have 10 inch width by 30 inch length for each bag, you’re good to go
  • Scissors
  • Iron
  • Sewing machine
    • For the no sew approach, you’ll need double sided tape
  • Ribbon

Burlap
You need burlap, minus the cat! For some reason kitties love burlap

Here’s the tutorial:

DIY Wine Bags

CRAFTER’S TIP:

  • Burlap can be hard to manage. What I typically do to ensure I’m cutting straight is take one strand of burlap and pull the entire string through. It will create a straight line to serve as a cutting guide (numbers 2 & 3 in the tutorial above).
  • For the new sew approach, use double sided tape to tape down the edges after ironing.

For the mystery tasting party, each wine was put in the burlap bags so that all labels and types were hidden. Guests were asked to taste each and rate aroma, body, taste, and finish. After adding up the scorecard, you find out which wine you like most. It’s so fun when you find out that sometimes the cheapest wine is actually your favorite!

I created a scorecard for the wine tasting party. Feel free to use this template! Download it here.

Pens
Scorecards and pens, with glasses ready to go

Cheese
Cheese is necessary on any and every occasion

Bottles
Wine bags are numbered and hidden

PartyEnjoying at this point!

Tasting

For a chance to win three wine bags, comment on this post!

Cheers!
Jay
—–
Only one entry per email. Email must be valid. Shipping address must be in the United States. This giveaway ends at 11:30pm PST on 12/10/13. Winner will drawn and announced on Wednesday, 12/11/13 at 12:00am PST via blog and email provided.

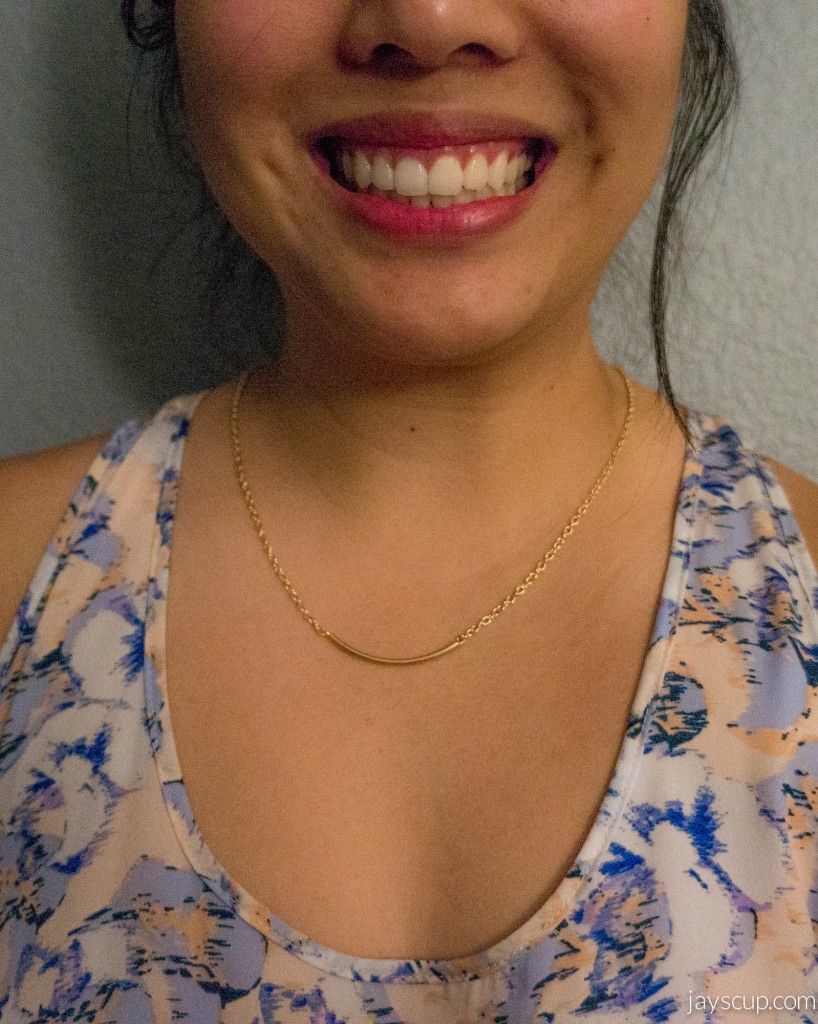
DIY Dainty Tube Necklace (Giveaway)

UPDATE: Congratulations to Danielle at bybegnaud.blogspot.com! You’re the winner of this drawing!

Thanks to everyone who participated. You can still flaunt this gorgeous necklace with the DIY instructions below. Stay tuned for more giveaways!

—-

Another dainty necklace DIY and giveaway!

I am loving these pretty little things. There’s so much love that I just want to give things away! Perhaps I’m already in holiday cheer. Comment on this post for a chance to WIN.

Tube Necklace

What you’ll need (and where to buy at the end of the post):

Here’s the step by step tutorial:

DIY Tube Necklace

What do you think about this piece? Is this something you can do?

Necklace

So feminine and flirty! Plus, you could wear this with any outfit!

I’m also loving the layered look. I layered this tube necklace with the necklace from last week’s post (dainty beaded DIY here).

Layered

It’s almost the holidays. Start DIY-ing and getting those presents ready to give out to friends and family. These would be great gifts with a nice personal touch.

Don’t forget to comment on this blog post for a chance to WIN a necklace.

Loving dainty and pretty things,
Jay

Only one entry per email. Email must be valid. Shipping address must be in the United States. This necklace giveaway ends at 11:30pm PST on 11/19/13. Winner will drawn and announced on Wednesday, 11/20/13 at 12:00am PST via blog and email provided.
—–
Gold filled curved noodle tube bead
Wire Cutter & Pliers on Amazon (similar set to mine)
Gold chain from Amazon
Eye pin, lobster claw clasp, and jump rings from Michael’s

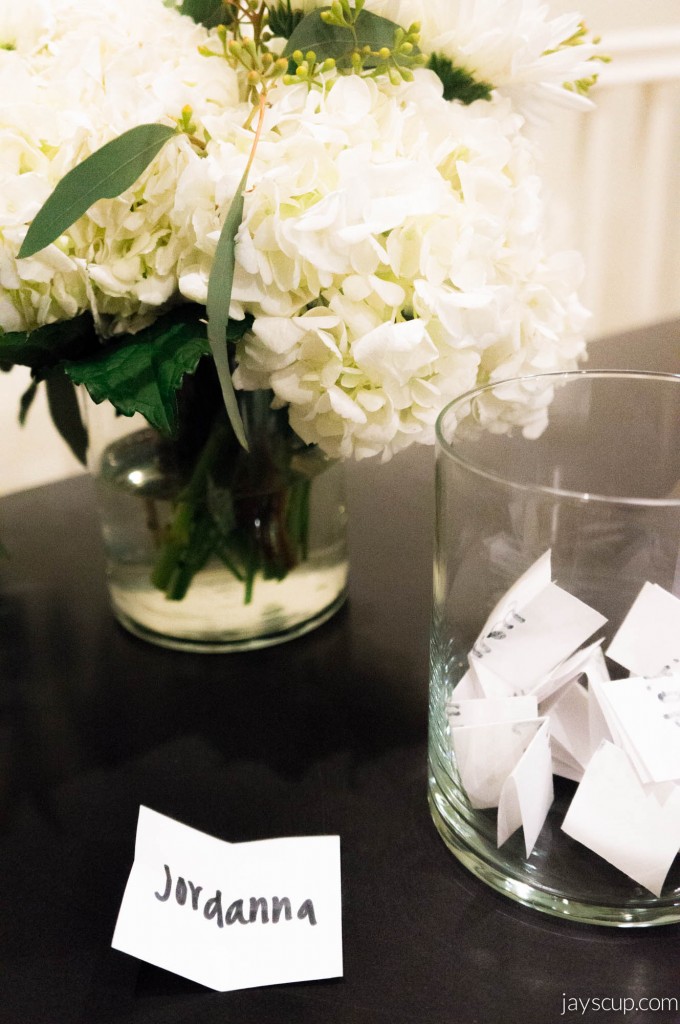
Dainty Beaded Necklace (WINNER)

Whoohoo!

Congratulations to Jordanna for winning the dainty beaded necklace!

Winner!

Okay, I’m feeling super giving today! Let’s draw another winner!

Congratulations to Christine!

Winner 1

Winners, please check your email for shipping instructions. Thanks to all those who participated in this contest.

You can still recreate this dainty piece of jewelry. Follow this easy tutorial to make your own.

Love,
Jay

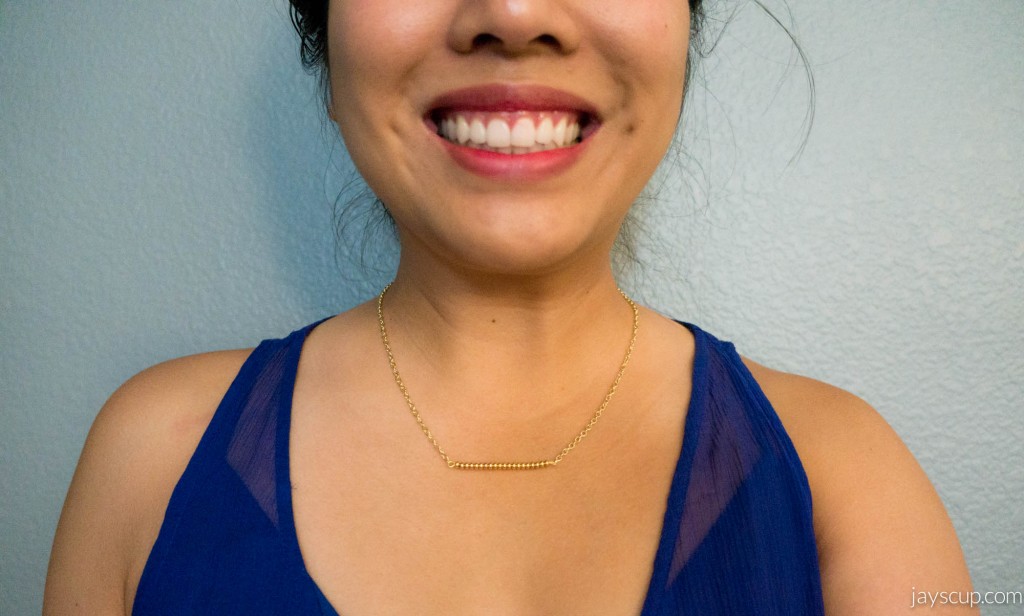
DIY Dainty Beaded Necklace (Giveaway)

Contest has ended. See winners here.

—–

I am in love with dainty necklaces right now! Don’t get me wrong, I do love a chunky statement necklace, but delicate jewelry can match so many different outfits, on casual days or with a fancy attire. It’s so girly and so fun!

Dainty Necklace

Here’s a tutorial on how to DIY a dainty beaded necklace. You can also WIN one of these necklaces by commenting on the post below! Simply tell me what you would wear this necklace with. Boys, win a necklace for your lady friend by telling me what you would like to see her wear this with (betcha you’ll win some serious brownie points!).

What you’ll need (where to buy at the end of the post):

Here’s the easy tutorial:

DIY Dainty Beaded Necklace

What do you think about dainty jewelry pieces? Is this something you can recreate?

Beaded Dainty Necklace

Don’t forget to comment on this blog post for a chance to WIN a necklace. What outfit would you wear this dainty necklace with?

Get to DIY-ing,
Jay

Only one entry per email. Email must be valid. Shipping address must be in the United States. This necklace giveaway ends at 11:30pm PST on 11/12/13. Winner will drawn and announced on Wednesday, 11/13/13 at 12:00am PST via blog and email provided.
—–
Small gold plated round beads
Wire Cutter & Pliers on Amazon (similar set to mine)
Gold chain from Amazon
Eye pin, lobster claw clasp, and jump rings from Michael’s

DIY: My Little Minion

UPDATE:  Congratulations Winnie Cheung! You’re the winner of this costume giveaway! Thanks to all those who participated in this contest. Your pet can still be a Minion with this easy DIY. Happy Halloween!

—–

Minion

It’s almost Halloween (only two weeks away)! I know you’re thinking only one thing – what costume should my pet wear? I got you covered with this DIY! Plus, enter a comment below and you can win one of these costumes for your pet!

After watching Despicable Me 2 and going around a few McDonald’s to pick up those Minion Happy Meal toys, I knew I had to make a Minion costume. Meet my little Minion, Chubs.

Little Chubbo

Chubs

What do you think? This costume takes a little bit of sewing, cutting, and some hot gluing. Super easy, and I promise you’ll get a lot of “OMG, SO CUTE” reactions.

What you’ll need:

  • Felt (yellow, black, grey, and white).
  • Sewing machine (you can definitely hand-sew if you don’t have a machine)
  • Scissors
  • Hot glue gun and glue sticks
  • Black pipe cleaners
  • Elastic
  • Velcro

Let’s start out with the yellow felt. My cat is a small animal (10lbs), so I measured his head and cut a piece of yellow felt 9×7 inches. Then sew the edges together on both sides (follow the pattern below). I used a sewing machine, but this is easy to do by hand too.

Yellow Felt

Next cut black pipe cleaners into 2 inch pieces. Stick them through the top of the hat (you may need to snip a little hole at the top for the pipe cleaners to go through). I then bent the end of the pipe cleaners inside the hat, and hot glued them into place.

Minion Hot Glue

Now it’s time to sew the elastic onto one side of the hat. Then sew the velcro onto the loose end of the elastic, and sew the velcro onto the other side of the hat. Make sure your band is flat when it is velcro-ed together.

Elastic

Velcro

Finally, we can move on to the details. Let’s cut the other pieces of felt. Again, my hat is for a 10lb animal so my circle diameters are as follows:

  • Black – 1.5 inches in diameter
  • Grey – 3.75 inches in diameter
  • White – 3.25 inches in diameter
  • Black band – 6.5 inches in length

To make things easier, here’s a template for the circles. You can print the pattern so that it can serve as a guide.

I simply hot glued all the pieces together. First the eyeball, then the pupil, then the black bands, and lastly the grey glass.

Details

Done

Put it on your little minion, and take lots of pictures!

Minion Boy

Chubs' Hat

Is this something you can easily recreate? Are you thinking about making your little pet child a minion now?

As I mentioned earlier, enter a comment for this blog post, and you could win one of these small hats for your little pet. You’ll get it before Halloween! Enter now!

Only one entry per email. Email must be valid. Shipping address must be in the United States. This costume giveaway ends at 11:30pm PST on 10/22/13. Winner will drawn and announced on Wednesday, 10/23/13 at 12:00am PST via blog and email provided.

Banana,
Jay
—–
Minion image copyright