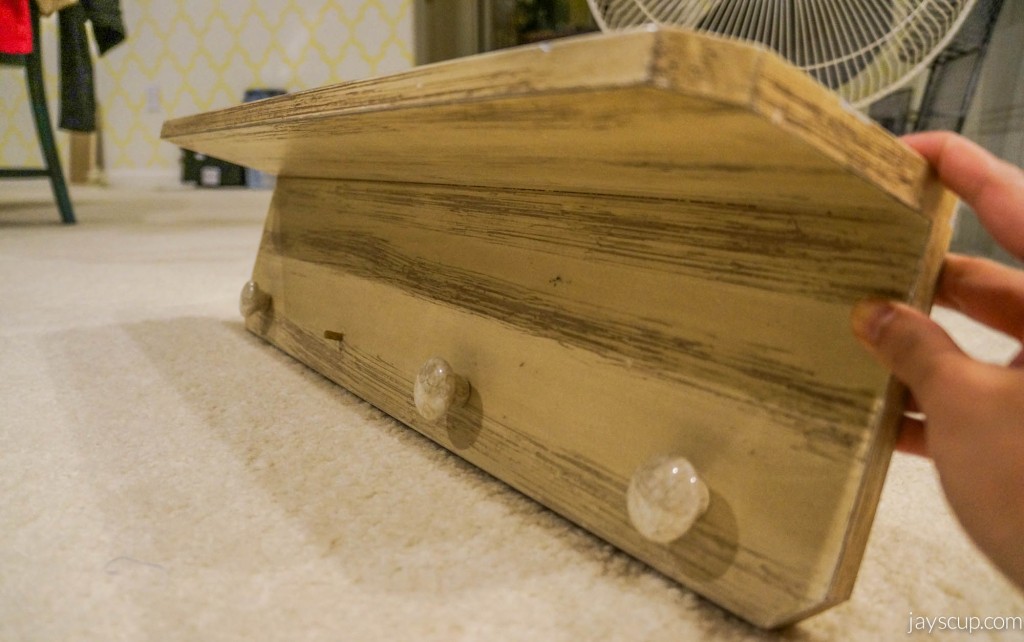
A New Look For My Wall Rack

If you’ve been reading along, you know I’m a bargain hunter. Hunting for goodies at thrift stores, Cost Plus World Market, and Marshall’s for home decor is my hobby! Okay, maybe not but I really enjoy doing it.

One knows that you can never have enough wall racks in your bedroom. I have two but it’s weird how my clothes still like to leave a path on the floor of where I walk. Does that happen to you too? Strange right?

Recently I came across a wall coat rack at Marshall’s for $10 in the clearance area. It was on sale because someone had put some nail polish paint on the corner and a knob was missing. I couldn’t pass up such a good deal and had to have it!

Marshall's Find

All I saw was potential!

Marshall's rack

I love the grain of the boards and the marbling of the knobs. I didn’t reuse the knobs for this project, but I’m going to save them for something else. Nowadays there are so many decorative knobs. The Anthropology knobs are swoon-worthy, but for $8 a knob, that’s almost the price of my wall rack! Nope… cannot. Fortunately I went to Cost Plus World Market and came across adorable knobs for $1.99 a piece. Done!

Knobs I love the colors of these knobs and how they are different. The blue helps bring them all together.

First off, I sanded down the rack so that new paint could stick and so that the nail polish paint was gone. I put a fresh coat of paint on the wall rack, a light and sheer white to make it a lighter color. The sheerness also allows the grain detail to show through. Then I took off the old knobs and screwed in the new colorful ones. This is the final product:

Done!

It’s hanging in our bedroom, and it’s the first thing you see when you walk in. I just need to be careful to not put my delicates on the rack so that guests don’t see!

What do you think of the revamped wall rack? Is this something you can do? How many coat racks do you have in your bedroom, and do you need more too?

Happy deal hunting,
Jay
—–
White Frost Acrylic Paint by FolkArt

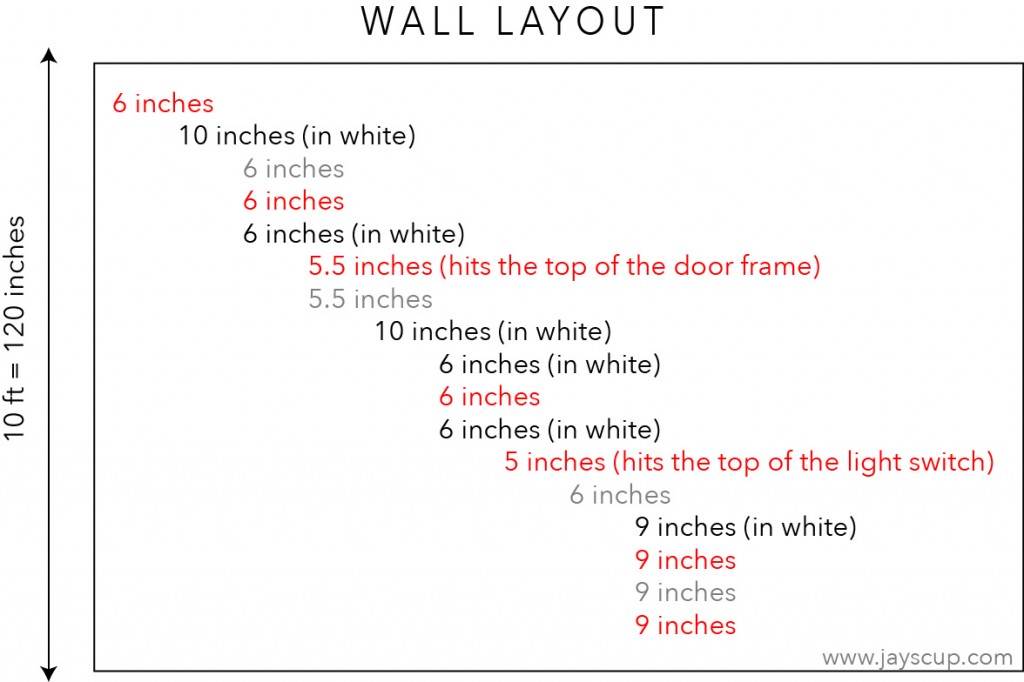
Wall Stripes Tutorial

As mentioned on my “about” page, I’m in the middle of decorating my townhome. When I moved in after the wedding, it was a completely blank canvas. My husband’s excuse was that as a bachelor, he wanted to make sure his wife was able to decorate the way she desired (so thanks, hun). I’m sure other newlywed wives experience this too! What was or will be your first project to make your house more homey?

The first project that I embarked on was painting the white walls. My living room is navy, and there is a highlight wall stenciled with yellow (see first blog post background).

Next, I painted the study. Ming-Gih works at home, so he is in the study all day. Since it’s the work room, I wanted it to be a bit modern. I looked into wallpaper, but not only is it costly, it can be such a pain to put up. Instead, I decided to paint stripes.

Stripes are currently a very popular wall design. Here’s what you need:

  • Ruler
  • Laser Level*
  • Double sided foam tape
  • Painter’s tape (I like Frog Tape)*
  • Rag
  • Tarp
  • Paint roller
  • Angled paint brush*
  • Small touch-up paint brush
  • Paint*
  • Paint tray

*Product info below

This is really important. PLAN out how thick your stripes will be! Measure the height of your wall and then figure out how thick you want your stripes to be. Here is a layout of the colors and measurement of my wall.

Keep yourself sane: If you are 0.5 – 1.5 inches off of the ideal measurement, the naked eye cannot see it! You’ll notice that I have random measurements in between lines.

Wall Layout

TIPS:

1. Use your ruler and measure out the thickness of each stripe on the left and right side of the wall. Mark the measurements out with a pencil.

2. Next, add a strip of foam tape to the back of your laser level so that it sticks on the wall. Take your laser level and start leveling out each of the pencil marks (make sure the level passes through the left and right pencil marks to ensure the line is straight).

3. Once the laser level is in place, start taping along the laser line. When the tape is put into place, take a wet towel and wipe the tape. The water makes theFrog Tape sticky which helps with the lines and less touch ups later.

4. Use little pieces of tape to mark stripes that will not be painted so you do not get confused in the painting process.

5. Paint the edges of the tape with your paint brush first. Brush along the edge of the tape towards the middle, then swipe left and right to even out the paint. I had to do this twice for the color to be even. Then use a roller to paint the entire stripe.

6. Only wait 10 minutes before you start to peel off the tape. If the paint becomes too dry, the paint will peel with the tape.

7. If you are doing two different colors, wait one day for the first color to dry. Then tape the wall up again for the second color.

8. No matter what, there will be paint seepage. Just take a small paint brush, and touch up the stripes.

Wall StripesThis is such a fun project, and it will brighten up any room!

Do you like stripes? What colors do you want to paint your house?

Happy Painting,
Jay

——–
Click on the product to find out details:
Laser Level
Frog Tape
Angled Paint Brush
Valspar Paint:  Red: Bright Red in Eggshell, Grey: Drizzling Mist in Eggshell