
The author shares her experience of being pregnant with her sweet little girl, Nora Rae, and how she and her husband took their own maternity photos on a budget. She reminisces about enjoying her pregnancy and the perks that came with it, encouraging other expecting mamas to cherish the experience.
Posts tagged with "home"
-
 Maternity Session
 -
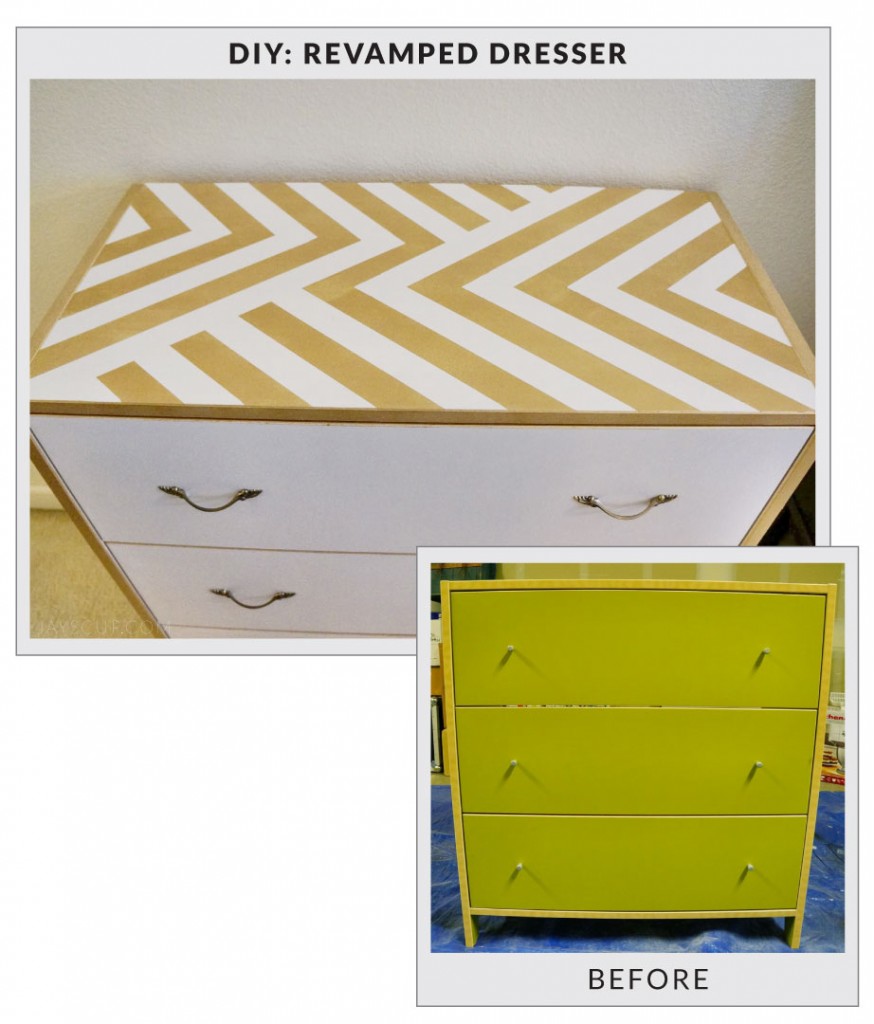 DIY Dresser Revamp
Revamp an old dresser with a fresh coat of paint and new hardware in just 3 days. Get inspired to recycle and refurbish old furniture while being green and saving money.
-
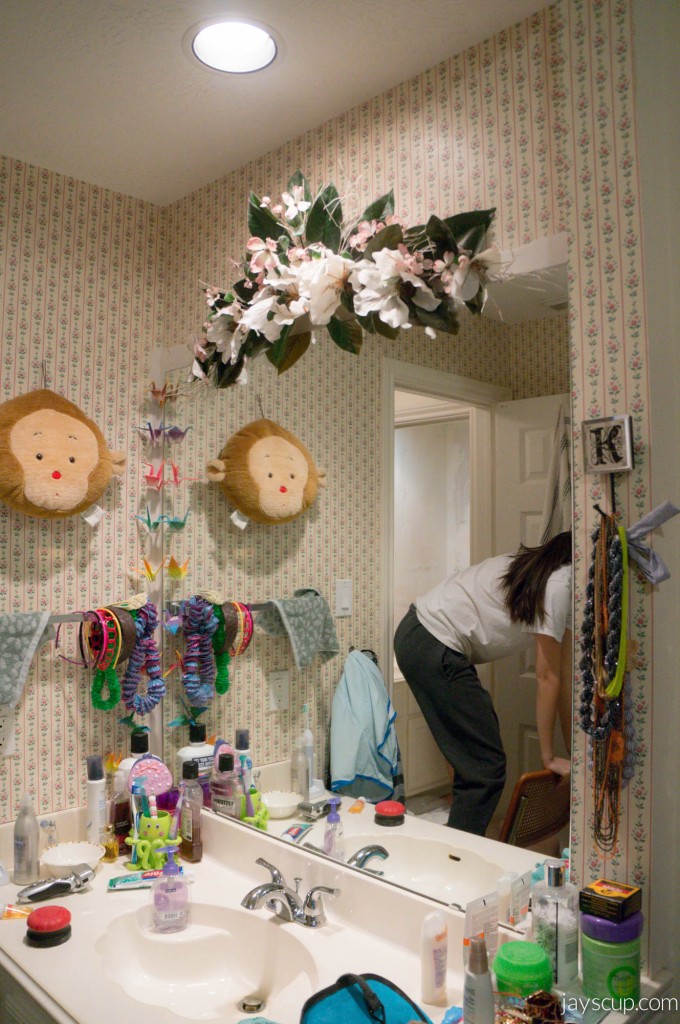 From Wallpaper to Paint
Transforming a bathroom with new glass doors turned into a challenging DIY project due to wallpaper glued directly onto drywall, requiring multiple steps and days of drying in between.
-
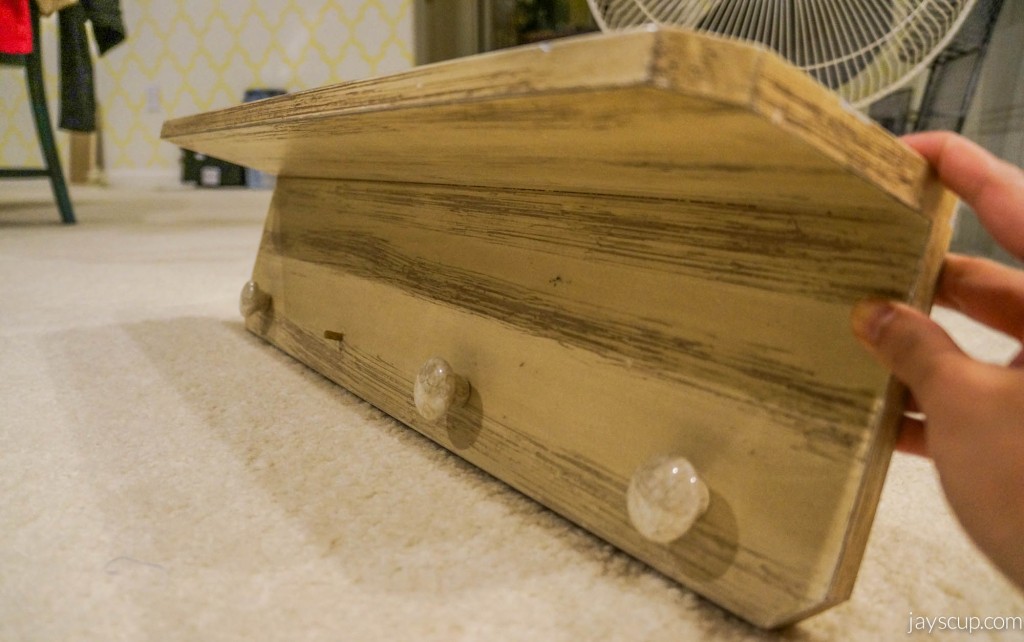 A New Look For My Wall Rack
Revamp your bedroom wall rack with colorful knobs and a fresh coat of paint for a budget-friendly upgrade that adds style and organization to your space.
-
 Flaming Cake & Revamped Goodies
This weekend was all about rest, DIY projects, and indulging in a delicious cake. From painting a storage unit to revamping a thrifted bench, there's plenty of inspiration to be found in this blog post.
-
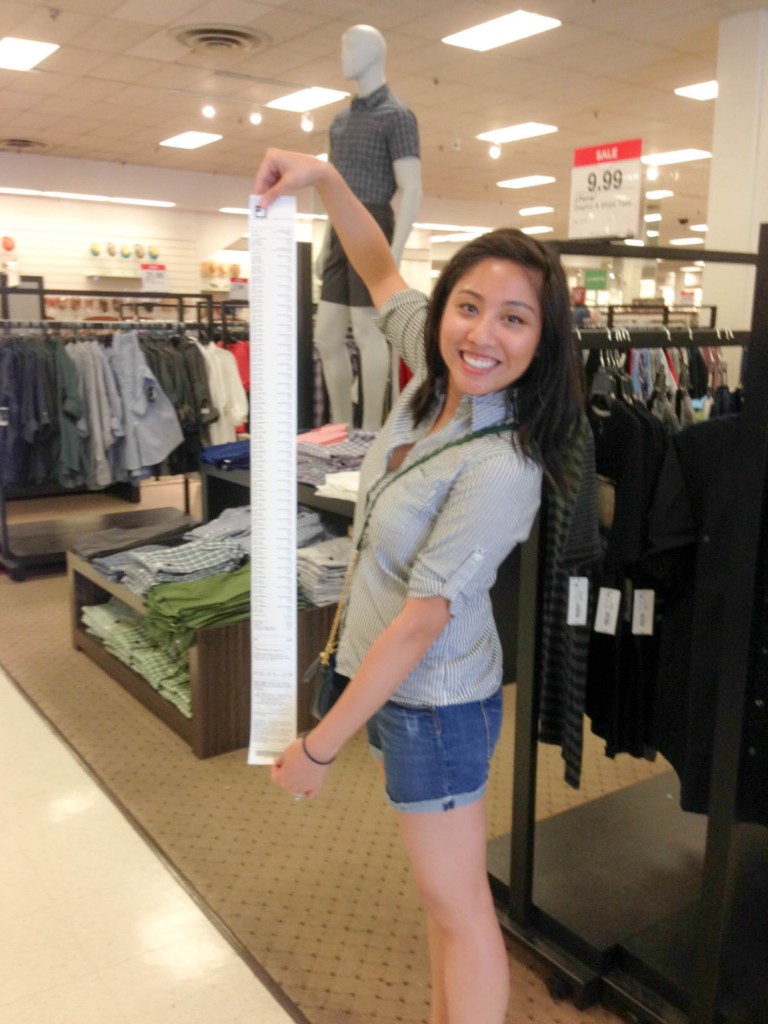 Updated Frames from JCP
Discover the amazing home items and clothing finds at JCPenney, including clearance deals and trendy pieces for both men and women. With tips on how to save money and find great deals, this post will have you heading to your nearest JCPenney store in no time.
-
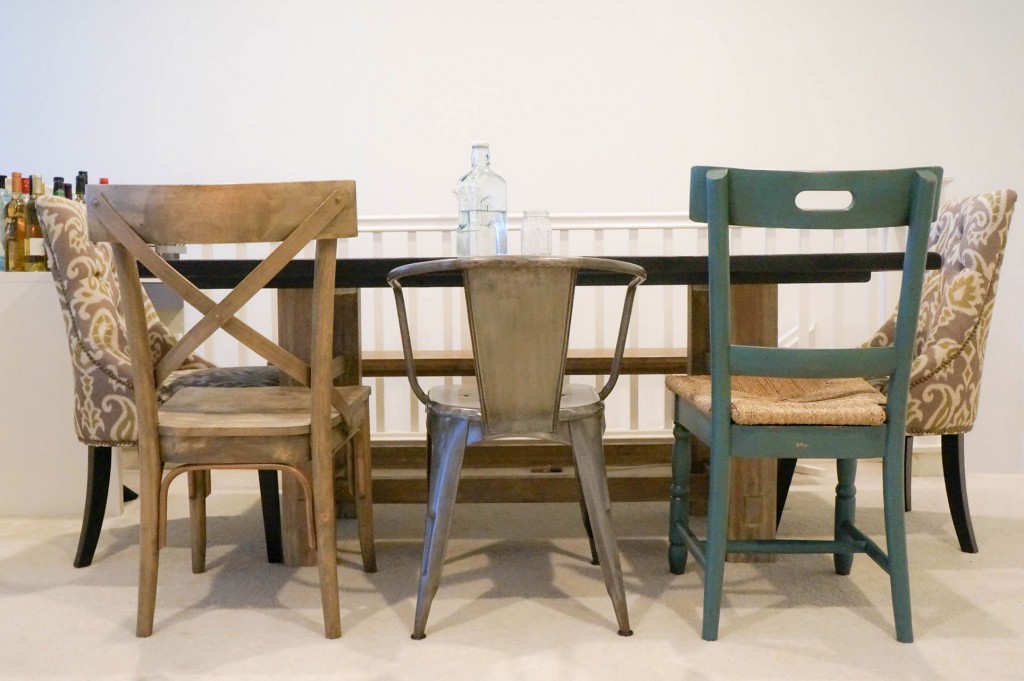 Mismatched Chairs
Redecorate your house with tips on picking pieces you love, exploring different styles, and finding great deals at places like Cost Plus World Market and Marshall's. Embrace the mismatched chairs trend for a unique and stylish look!
-
 Nerd Party & Antiques
Spending a 3-day weekend with the husband planning a LAN party and the wife exploring a charming town, Danville. Lots of fun and bonding experiences for everyone!
-
 Thrifting Finds!
Patience is key to thrifting success - take your time and explore every aisle for hidden gems. Check out the Alameda Point Antiques Faire for unique finds, but be prepared for higher price tags. Happy hunting!
-
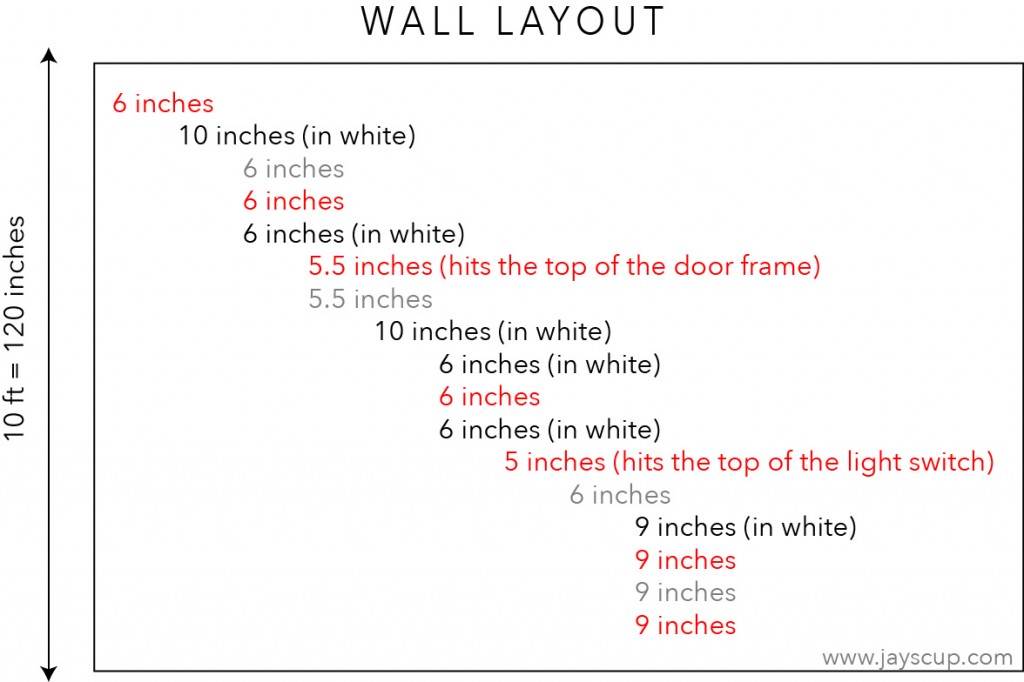 Wall Stripes Tutorial
Transforming a blank townhome into a cozy haven with stylish navy walls and modern striped accents. Learn how to easily create this trendy look with some simple tools and tips.