Halloween 2016

Happy Halloween!

I am taking a break on baby/newborn postings for a bit to showcase some Halloween fun! If you know me, you know that I’m a Halloween fan. What’s not to love about creative foods, crafting costumes, and using your noggin for fun ideas! When I first met my husband, he said it was weird for people to decorate for Halloween. Clearly he didn’t know me at all, because THAT’S WHAT I DO! Now that we’ve been married for 4.5 years, he appreciates this “holiday” a bit more. Goal complete.

We hosted a Halloween party last night on Hallow’s Eve for friends. A baby doesn’t change the fact that this holiday must call for a gathering. Crafted Halloween decor. Themed pot luck foods. Mandatory costumes. Success!

Just take a look at these amazing pictures. And of course, I have some new food ideas to share with you.

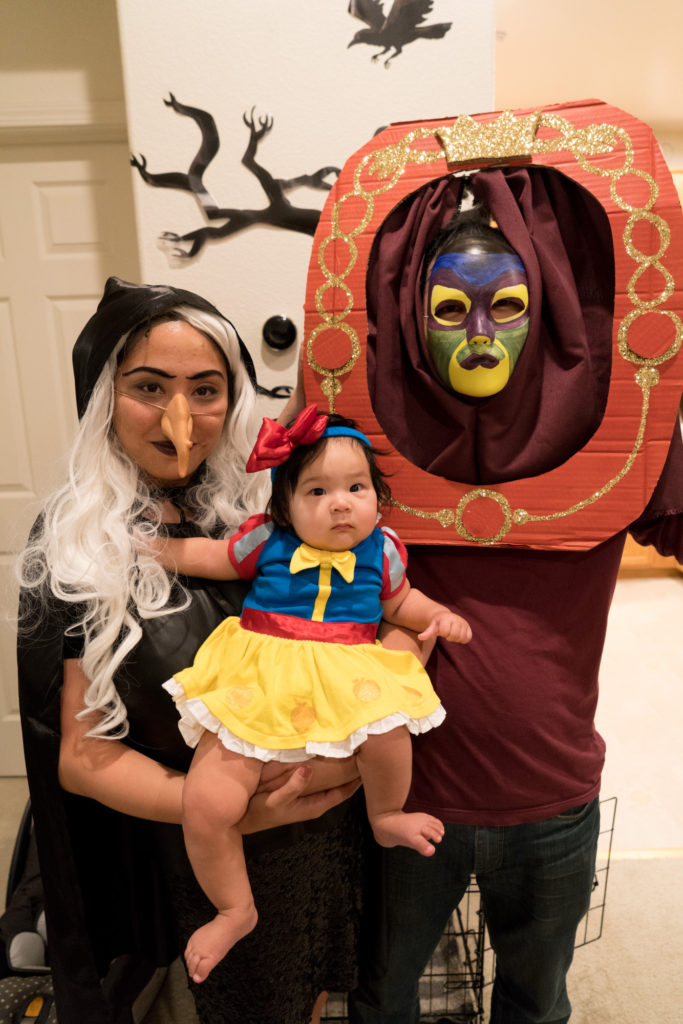
First the family costumes:

Snow White themed

Snow White themed


Stranger Things

Stranger Things


My barbie

My barbie

Right above my TV, I added floating candles this year! Here’s a great tutorial from Consumer Crafts. Instead of toilet paper rolls, I rolled up craft paper.

DIY floating candles

DIY floating candles

Now for the food ideas!

Back and front end!

Back and front end!


Ribs and Intestines

Rib of dead man and pot pie intestines

And how about these delicious mummy potatoes!

Twice Baked Mummies

Twice Baked Mummies

The dessert table

The dessert table

And you cannot forget:

Sangria - duh

Sangria – duh

My favorite new item that I made this year was the jar of eyeballs. So much fun and easy to do. Here’s the tutorial:

What you need: Jar, Can of Lychee, and Boba

What you need:

You can purchase a can of lychee at any Asian grocery store. With the Boba, you can buy a milk tea and just use the starch balls. Huge bonus, you get to drink the milk tea!

Directions:

  1. Drain the can of lychee into the glass jar
  2. Take out each lychee and stuff with boba
  3. Place the “eyeball” into the glass jar
  4. Fill the remaining jar up with water
  5. Create a label, display, and eat!
Delicious Eyeballs

Delicious Eyeballs


Jar of eyebals

Jar of eyebals

Easy and fun right? Now tell me, what are you doing this Halloween?

Sending haunts your way,
Jay

Battery powered flickering tea lights on Amazon here

DIY Monster’s Inc Costumes

During October, one of my biggest decisions is “what am I going to be this Halloween?” I love homemade costumes because I find it so interesting to see how people’s creative juices start flowing.

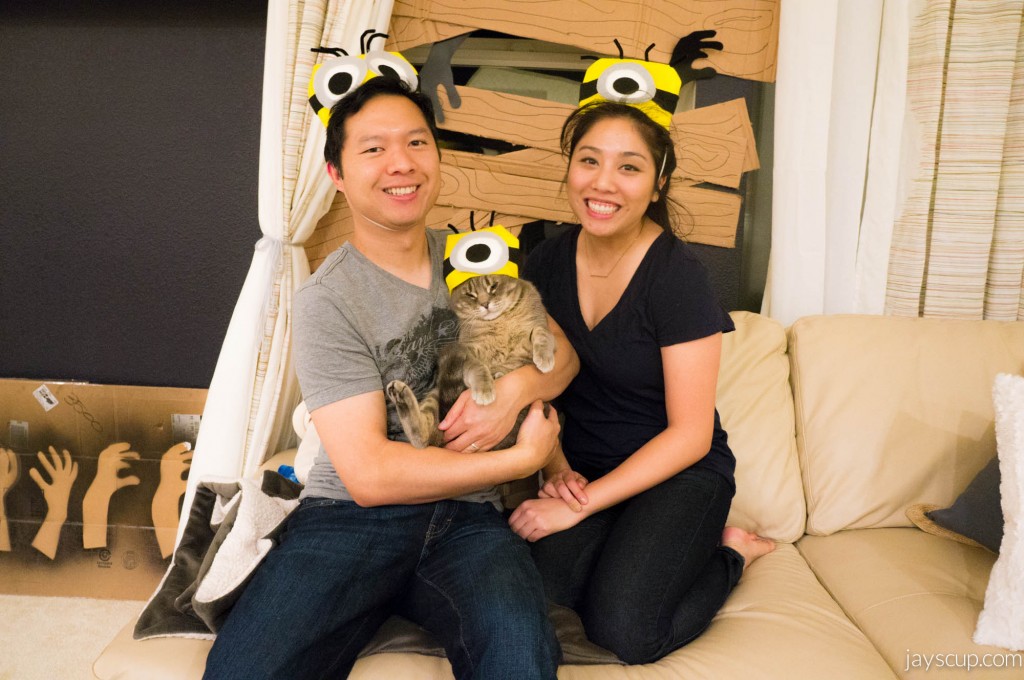
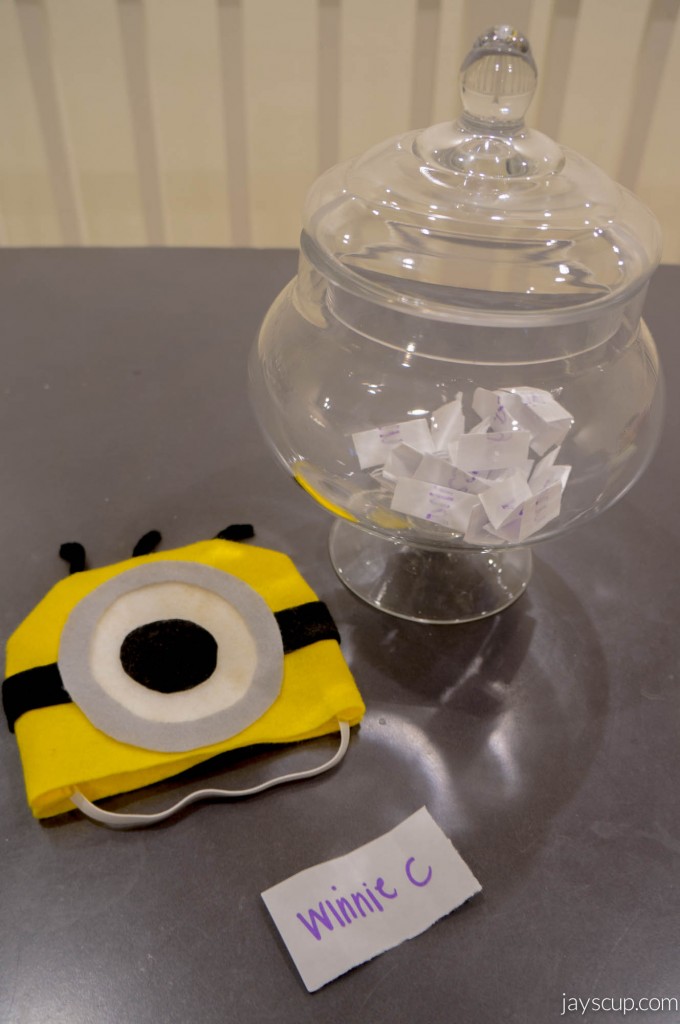
Last year, MG and I made minion hats for our costume.

Minions

This year we’re going to be… Can you guess from the items below?!?!

photo 2

Do these colors remind you of any Pixar movies? Perhaps Monster’s Inc. MG will be Mike Wazowski, and I will be his companion, Sulley.

Mike & Sulley

This year, my costume will be a double-duty outfit. If you’ve been following along, then you know what these costumes were used for (my Disney half marathon!).

IMG_2336

In this post, I’m going to show you how I created these looks.

First let’s start out with Mike Wazowski. What you’ll need is a bright green shirt and 3 different colors of fabric (white, black, and dark green). Cut out a circular eyeball on the white fabric, a smaller dark green circle for the cornea, a smaller circle for the pupil, and then a small white circle to use as the reflection of the eyeball.

Find circular items around the house as your guides – I used a variety of bowls.

DSC09565

Iron the eyeball flat:

DSC09567

And simply sew each piece onto the t-shirt. I kept the sewing simple, so the edges are raw and a bit frayed (I chose this since MG will only be wearing the shirt twice). If you want the costume to last longer, definitely sew with a zig-zag hem. Another option is to use Fray Check by dotting along the edges and letting the liquid dry (it works like clear nail polish).

DSC09569

DSC00891

Now for the Sulley costume! I wanted to keep it girly and cute still (ideally, I don’t want to look like a huge fluffy monster). What I came up with is a tutu with a cute set of horns.

If you’re looking to make a tutu – this is the perfect tutorial for you!

tutu-cover

What you’ll need for the tutu is: 10 feet of tulle, an elastic band (or ribbon), scissors.

Cut the tulle into strips of 4-5 inches. Measure our your elastic band/ribbon around your waist, and tie the tutu around the elastic band or ribbon (tutorial on how to tie below). Keep going around the band/ribbon until you’re out of tulle.

DSC09579

DSC09576

Tying the tulle:

tying-tutu

Keep the band around your waist to tie the tulle on easily.

DSC09581

For the Sulley costume, I needed to add spots of purple. I purchased purple tulle pom poms and simply hand-sewed them onto the tutu.

DSC09600

DSC00893

Now for the horns. I purchased a blue headband and cut out horns from felt. I stuffed the felt with some extra fabric and sewed the horns together and slipped them through the headband.

DSC09604

DSC09608

Then I made some pom poms from yarn and glued them onto the headband (pom pom tutorial here).

DSC09613

DSC09623

And that’s it! A cute Sulley costume to match an adorable Mike Wazowski! Creating costumes is so much better than purchasing. It’s unique and a great way to show off your creative skills.

What will you be this year for Halloween? Will you be making your costume?

Happy Halloweek!
Jay

DIY Cardboard Halloween Decor

I’m the type of person that decorates the house when it comes to Halloween. My husband, on the other hand, thinks that’s crazy. But that’s how it’s always been in my family. Our lawn was littered with Halloween decor for those trick or treaters. It’s so fun to get into the holiday.

Now that I have my own place, it’s no different. I love to decorate. But I don’t love those high-demand prices. Pro-tip, wait until the day after Halloween to get some of your decor. I always score some great items for 50% off, though I have to wait until the following year to use it. Nonetheless, it’s such a great deal and decor doesn’t have an expiration date. It’ll last.

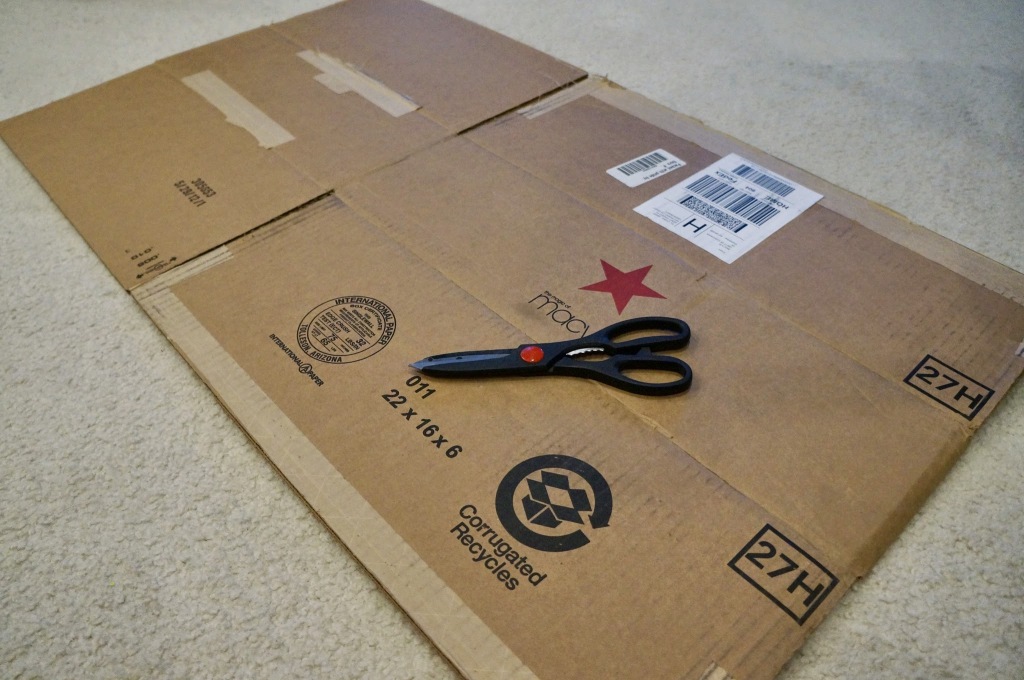
But my favorite thing to do? Get creative and come up with some of your own decor ideas. For my Halloween ideas, cardboard is my primary tool. MG and I buy a lot of things online so we usually save the boxes. Simply use any cardboard box laying around for a project like this. Most importantly, use your imagination!

DSC00840

Can you guess what I’m going to make from the outline below?

DSC00842

DSC00844

Another hint for you:

DSC00845

Final product – cutlery and a zombie barricade, all made from cardboard.  I want to add some blood to the knives, but I was recently home alone while MG was on a work trip. I didn’t want to freak myself out!

Final

Close up of the zombie barricade – simply draw some lines onto pieces of cardboard and tape them over a window. For the hands, I cut outlines on white poster board and then spray painted them black with the use of the best airless paint sprayer.

Zombie blockade

I also added some arms reaching through the banister of our stairs. They still creep me out a bit when I walk up the stairs. However, when I walk down, I feel like everyone is trying to give me high-fives!

Stairs - Zombie

Zombies

Paper and using your creativity, that’s all it took. What do you think? What are some other fun ideas you can come up with using cardboard and/or poster?

Happy Halloweek! Come back for a fun costume idea!
Jay

Happy One Year!

Birthday
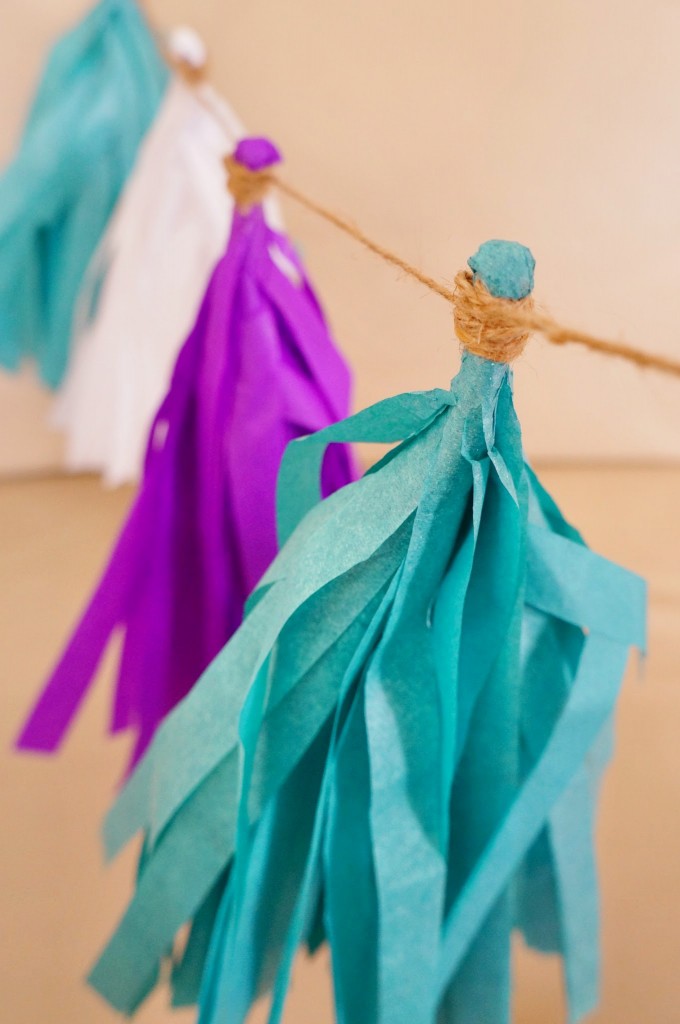
Tassel garland DIY here

It’s been one year since my very first post. I can’t believe I kept up with posting on this blog for a full year, posting 3 times a week, scheduling posts to go live at midnight. I first started this blog when I was still a housewife, beginning to find new hobbies. This was one of them, and this one actually stuck. Sometimes posting was a pain. I would remember that I needed to write a new post around 11:45pm with only 25 minutes to go live. Those were some of the nights I had to stay up late in order have posts for readers the following day. It was more about my own self-discipline and trying to keep myself on a tight schedule. I knew if I was too lenient, I would continue to let myself slip. But I stuck with it! I’m really proud.

Today deserves a celebration. Happy one year to my little blog!

In lieu of today, I’m featuring some of my proudest posts. I love to look back and see what kinds of projects I’ve completed, recipes I’ve created, and reminisce at trips that I took. I hope you enjoy this walk down memory lane!

My favorite DIY projects:

1. The $10 Dresser Revamp (By far my favorite project so far)

Complete

2. The Ultimate Wire Holder (so useful)

Displayed

3. The Reupholstered Bench (seriously, talk about drab to fab!)

DSC01785

Here are my favorite recipes. These are staples at home!

1. The Legendary Steak (people rave about MG’s famous steak. I kid you not!)

Baking

2. Yummy Fruit Tart Recipe (This recipe has been pinned over 500+ times!)

Glazed

3. Light & Creamy Pasta Recipe (I just made this dish the other day; it never gets old)

Light and Creamy Pasta

And then there’s the many, many different trips I took this past year. Each and every one of them were so memorable. If you’re going to any of these places, check out my posts for ideas of what to do and eat!

After our trip to Europe, the travel bug bit me! MG and I just booked a trip to Japan and Hong Kong in October. We can’t wait to travel abroad again!

Thank you to all of you who read my blog. The support and love you’ve given me continues to spur my creativity. Keep coming back for more!!!

With all my heart,
Jay

DIY: Removing Stickers

I have a story for you!

When I moved to the Bay Area from Texas, I still had my Texas registration sticker stuck on my windshield, probably for at least a year after I moved. I had my California registration already, but the Texas sticker was still there, very expired, and it was just forgotten about. I had asked MG to help me remove it, but the weekends would get so busy, he would forget. I would drive it for another week, then ask him again, and yet it wasn’t done. I had to ask him to help me because I just didn’t know how to remove the damn thing!

Along the way, I’ve learned some clever tricks. I’m here to share one with you! It’s really easy to remove any kind of sticker from glass. So easy that I’m embarrassed that I waited for so long to remove my Texas registration.

While I was doing this interior decorating project, this new trick I learned was really helpful. Basically, another doctor’s name was still on the office window. We needed to get that off.

All you need to remove stickers: Goo-gone, paper towel, and a credit card. Three things!

Goo-gone

Directions: Pour goo-gone onto your paper towel and wipe it on the sticker. Soak the sticker with goo-gone and let it sit for 30 seconds to a minute. Use a credit card to start scraping the sticker away, and it should easily peel off. It doesn’t damage your card, don’t worry! That’s all! No fuss.

Before

Nope! Dr. Pan don’t work here no more! Let’s take that out. Hello to Dr. John Rong!

Credit card

Peel

Clean

It’s so clean, no sticky residue! Now get that Windex to shine up the glass.

Done

Look how perfectly the stickers peel off!

Did you know how to do this prior to this blog post? Do you have other ways to remove sticky thing from glass? Do share! What else do you use goo-gone for?

Happy Friday,
Jay

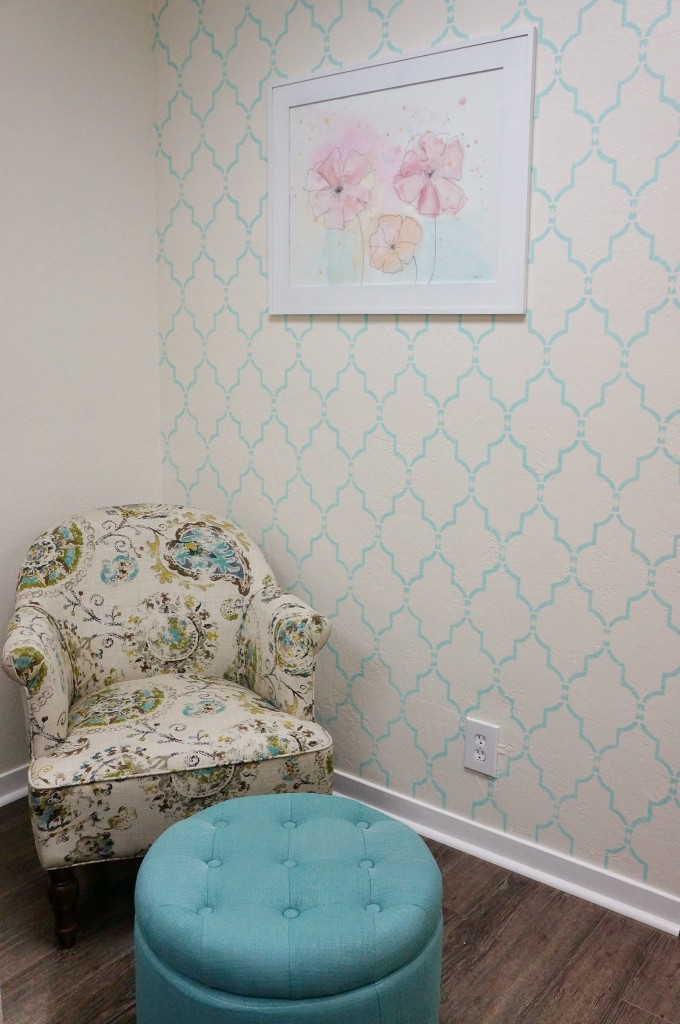
DIY: Wall Stencil

I’m so happy with the turnout of the dental office! I’m especially pleased with the stenciled wall to give it that extra somethin’ somethin’.

Dentist office

Just a fun fact, I actually stenciled my wall at home the exact same trellis pattern but in yellow. The wall took me half a week to complete at home because it’s a 10 ft x 20 ft. The office only took me 1 day to finish since it’s a smaller surface area.

For the dental office, I wanted a surprise element when patients walked through the front door. This stencil was perfect. Plus, I got to reuse it from my house so I saved money there!

If you’re interested in stenciling, here’s an easy DIY step-by-step. Honestly, it’s super easy, but be warned, it does take patience!

DIY: Wall Stenciling

Paint supplies

Supplies:

Directions:

  1. First off, prep your station. If you’re a messy one, lay out some tarp to protect your floors. Use painter’s tape to mask surfaces that will not be painted. Pour some paint into your tray.
  2. Now spray the back of your wall stencil with spray adhesive. This acts like the sticky part of a sticky note. It will help keep your stencil in place while painting. The stencil should be sticky to the touch but not wet.
  3. Okay, now really think about where you want your stencil to be on the wall. Perhaps you want to start in the middle of your wall. Maybe you want to the stencil centered above your doorway. Eyeball the perfect position and then stick your stencil onto the wall (this is where that adhesive spray comes in handy). If your stencil is a bit heavy (or like mine was used before), use painter’s tape to keep it from falling off the wall.
  4. Let’s get to painting! Dip your foam roller into the paint evenly. Roll it out on the tray as much as possible. Then roll the foam roller on a paper towel to get out all the excess paint. When I say less is more here, I mean it 100%. If the roller is too thick with paint, there will be seepage on your stencil. If paint does seep, here’s where that cup of water comes in handy. Dip a paper towel into the cup of water and simply clean the paint up. Since the paint is wet, it’s quite easy to wipe away the extra paint. Here is the weblink to find top quality paint that you require.
  5. Now that all the excess paint is out, roll your paint onto the stencil. It should be a light layer.
  6. Then take your stencil brush and fill in edges and gaps of the stencil where the roller couldn’t reach. Use circular motions.
  7. Once you’re done painting the first set, let it dry a little before moving on. My specific stencil overlays the next set of patterns. You simply have to line up the pattern. Depending on your stencil, you may need to do this too.
  8. Keep at those steps and remember roll out the excess paint!
  9. For the edge of the wall, the stencil company should have sent little pieces of the pattern. These are useful for those hard to reach nooks and crannies.
  10. When you’re done, stand in awe because you’ve completed a huge project!

It’s also important to note that the paint can warp the pattern as it becomes so thick and caked on. If the pattern starts to warp, it’s time to peel the paint off your stencil and clean it. Keep that in mind while painting.

Supplies
Supplies

Stencil^^^ Stick it onto the wall! There’s yellow from my previous project but the stencil still works fine

PaintRoll

Paper towel^^^ I can’t emphasize enough how important this step is! Roll… Roll… Roll…

RollingFinally onto the wall! 

Stencil brushGet the edges of the stencil…

Painting^^^ I know you see them!

Feet
Whoaaaa! So glad we got rid of that green carpet! 

Done
Project complete!

In my element

I’m honestly in my element when there’s paint on my hands and I have dirty feet!

What’s great is that this stencil can be used over and over again. When you’re done painting, the paint can be easily peeled off the stencil. Afterwards, I typically soak it in my tub for a bit to clean the rest of the paint off.

Have you ever used a wall stencil? How was your experience? Do you think this is something you can try? Have I inspired you?

With love,
Jay
—–
Balmy Seas paint by Behr

Wedding Invite Process

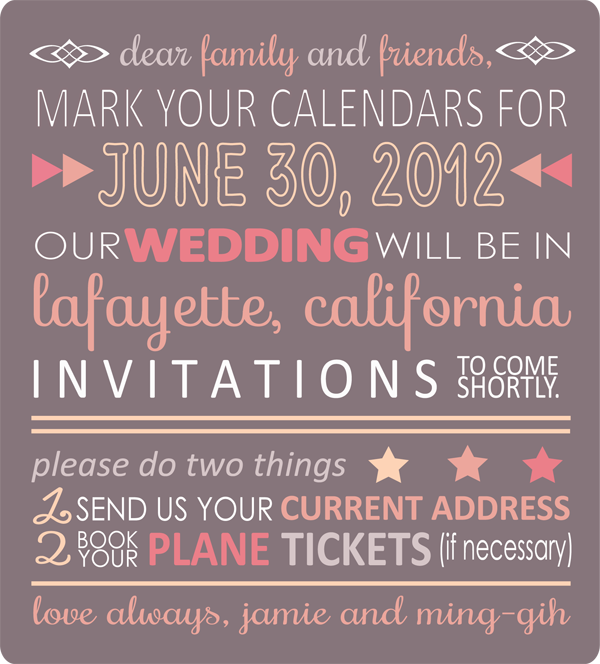
Welcome to the first of many posts, in my new wedding series! I aspire to give you key takeaways with every post so that you have some next steps if you’re planning a wedding.

Let’s start with the dreaded wedding invitation process… blegh. It’s a necessary evil step. It’s also the very first step of your wedding planning.

First thing’s first. Write out all the guests that you plan on inviting; family, friends, communities, colleagues. MG and I had a guest list of 250. His dad is one of 10 siblings, and his mom is one of 4. Both my parents have 6 siblings each. Yup, large families!

Once you’ve figured all that out, the 80/20 rule will apply here. An estimated 80% of your invited guests will attend, 20% will not. This will help you give you idea of how many guests will be present and will help you with planning for budget and venue. For us, that meant we would have 200 guest, which narrowed down many venues. Most venues have a max capacity.

Don’t overlook the importance of your save-the-dates and wedding invites! Remember that this is the first item for your guests to receive. Get them excited for the wedding!

We sent save-the-dates via email. Many of our family members are out of the country so we wanted to send them out to give them ample time to book airlines tickets. If possible, send your save-the-date 5-6 months prior to the wedding date.

I designed our save-the-dates with my color scheme (blush and grey tones).

SAVE THE DATE

Once that was sent, it was time to get the invites ready!

MG and I have a fun story. We met while I was doing a National Pageant in 2007. When we first started dating, we did long-distance for 3.5 years (who says that doesn’t work?!?). After college, I moved to San Francisco to start my career in advertising. Then we dated for another 1.5 years before he popped the question! We wanted to let people know about our history, so I put together a storytelling scroll as our invite (you can view our story in detail on our website).

Invite

For family members, I also put together a day-of schedule because we also had a traditional Chinese tea ceremony and family photos before the wedding. To get people excited for the wedding, I mailed the scrolls in tubes. We wanted something different than just a regular envelope. It wasn’t the most cost-effective way of sending invites, but this was a fun way to surprise our guests! If you didn’t notice, we also included a QR code for easy RSVPs. My husband is a techie, so it was the perfect way to show his personality.

Invite scroll
We used twine throughout our wedding too!

Send your invites 2-3 months prior to the wedding (traditionally invites are sent 1.5-2 months prior to the wedding). Don’t forget that it takes extra time for those, who live overseas, to receive your invites! Plan for this. Give yourself enough time to follow up to those who haven’t responded and also to put together the seating arrangements. Get that done and out of the way!

To further go along with the scroll, I designed our website in a scrolling manner. To take a look you can click (www.jamieandmg.com).

Fortunately for me, my husband is a web developer. My dream wedding website took fruition. If you also want to have a beautiful website of your own, it’s not to late to learn c programming.

In order to make a website run smoothly, preventing lags and crashes, IT services such as dedicated server hosting can be utilized.

Website

Believe it or not, MG also built an invitation process website while we were planning for our wedding. On this site, you can send mass emails to collect physical addresses, remind people to respond, and guests can RSVP and revise their RSVP (incase names are spelled incorrectly, change a meal plan, or add a guest’s name). This invitation site allows you to see a quick view of who’s attending, who’s not, and who hasn’t responded. Once you’ve received all your responses, you can even arrange your guests into tables with a widget within the website. There’s a product summary in the image below. In the end, this site was a lifesaver!

Are you interested in using it? We’re in Beta testing right now, so we can allow a few people to try it out. First come, first serve. We’ve had friends use it and have heard good things! Let me know if you want an account!

Invite site

Invite site

Ultimately, your save-the-date and invites should bring excitement and show your personality. Make sure it also gives your invitees a taste of what’s to come, some sneak peaks of what will be part of the big day! 

—–

Here are a few things that I’ve found helpful for those working on invitations.

  • Check out this iPad app, called Makr. It can help you generate some creative invites
  • Look at Laura Hooper Calligraphy. I’ve been obsessed with her work
  • Etsy has some awesome designs too. Affordable and personalized

Married people, do you have any additional advice? Did most of these tips apply to you too? Let us know!

Get to preppin,
Jay

—–
Fun fact: The engagement ring on our invite and website is my actual engagement ring

Rings

DIY Tassel Garland

It’s Friday! So this calls for another festive, party DIY!

Both these tassel garlands and the circle ones (previous circle garland DIY here) make for a very decorated party!

I know I’m currently not working right now so you might be thinking what’s Friday to you? It’s a time to finally have a moment to spend with MG. It’s a time where things slow down a bit because I’m not working on projects. The best thing? It’s a time where people come over to my place and all we do is watch TV, snack, and relax. Even though I watch TV during the weekday, it doesn’t have the same “weekend” feel.

It’ll be another eventful Saturday this weekend. I’m going to a boat party again! I’m also going dancing again; I think the club bug bit me. Tehehe

Anyway, whoohoo it’s Friday! Let’s party!

Done

What you’ll need:

  • Tissue paper in various colors
  • Scissors
  • Twine (or string or ribbon)

Directions:

1. Fold the tissue paper hamburger style in half, fold in half again, and in half again. Cut fringe while leaving 1-2 inches intact at the fold line. Don’t forget to cut fringe at the folded creases too!
2. Unfold paper and start rolling down the middle until completed and twist in half to create a loop.
3. Place the tassel over the twine, and wrap twine around to secure tassel. Continue until desired length.

DIY Tassel Garland

So easy right? And so beautiful!

Display

What do you think of these garlands? Is this something you can do?

Have a great weekend,
Jay

Circle Garland DIY

I truly believe that decoration can change the entire look and feel of an environment. For instance, Police Flags displayed in a room can convey a sense of respect, honor, and safety. After I painted the walls in my home, it became a more comfortable environment. Typically people stick with white, but I painted a dark navy that almost looks black during the day. I love it! To add some fun aspect, I stenciled the opposing wall with a yellow lattice pattern. I’ve also put up curtains which makes any room feel more grand. I’m starting to really love this home decor thing. I’ve been asked to help decorate a dentist office recently. I immediately accepted the offer and will be starting on designing this week. And of course, I’ll be taking you along the journey via my blog. We’ll see where this takes me! I’m so excited for the opportunity!

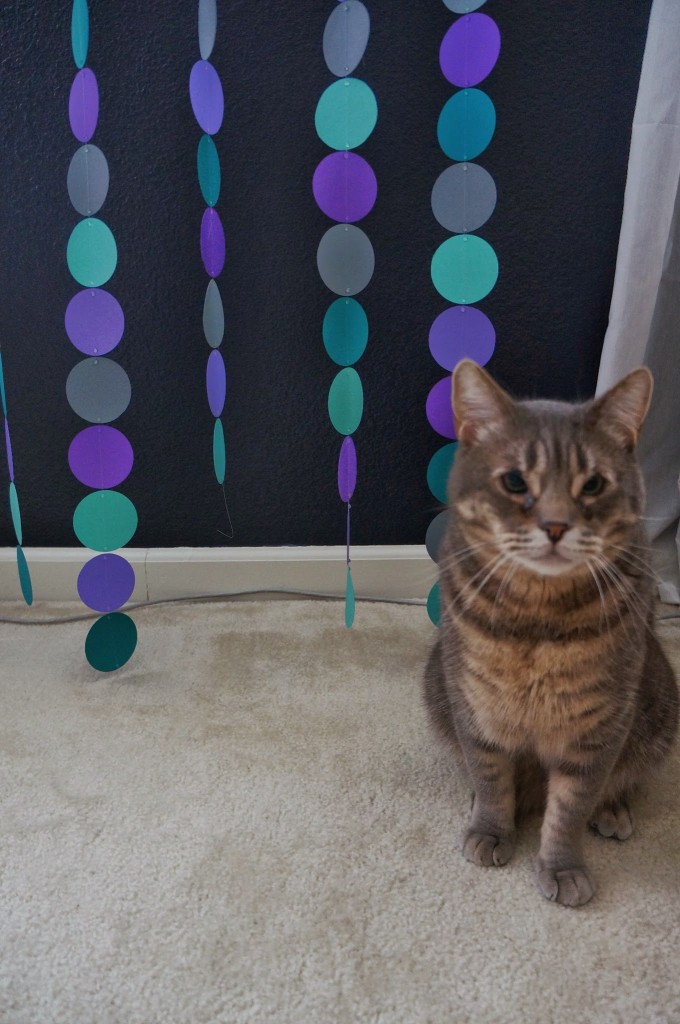
Perhaps you saw the decor at the bridal shower from my weekend post (previous post here)! I helped with that! Today’s post will be a DIY on how to make those circular garlands. Perfect for parties! It’s great to use as a backdrop for pictures as well!

These are so easy to make but it does take time. It took me about 3 hours a day for 5 days to make 15 garlands. Worth it when you get some great photos!

Chubalee

What you’ll need:

  • Paper to cut circles (I made about 225 circles for 15 strings of circles)
  • Circle cutter (similar one hereOR circle punch (affordable one here)
  • Cutting mat (I used a piece of plywood)
  • Fishing line
  • Hot glue gun with extra glue sticks

Directions: Cut out circles, line them up in a straight line, and hot glue the circles onto your fishing line. When cutting the circles, make sure you have something underneath so you don’t scratch up your surface (oh my poor dining table…).

Another option to put these together is sewing the circles into a straight line (perhaps you’ve seen this option on Etsy). I think the hot glue is easier but that’s up to you!

Aren’t these colors so pretty?

Colors

Here’s the photo tutorial:

DIY-tutorial

If you have a Silhouette, use it! It’s a cutting machine for avid scrapbookers or crafters. The best thing about this machine is that you can design your own shapes and fonts to be cut, whereas with the Cricut cutter you’re limited to their cartridges. It’s a pricey machine at $270. I would suggest only purchasing if you’ll use it often. Otherwise the Martha Stewart cutter at $12 is a great option. Still interested? You can purchase the Silhouette here.

I was able to cut 12 circles per every standard sheet of paper easily on the Silhouette. It saved me a buttload of time!

Silhouette

I really love these garlands, so festive!

Done

Have you ever purchased these garlands? Where did you get them and what did you use them for? Is this something you can make for your next party?

With love,
Jay

DIY Dresser Revamp

I’m super, duper, fricken ecstatic to share my newest project with you.

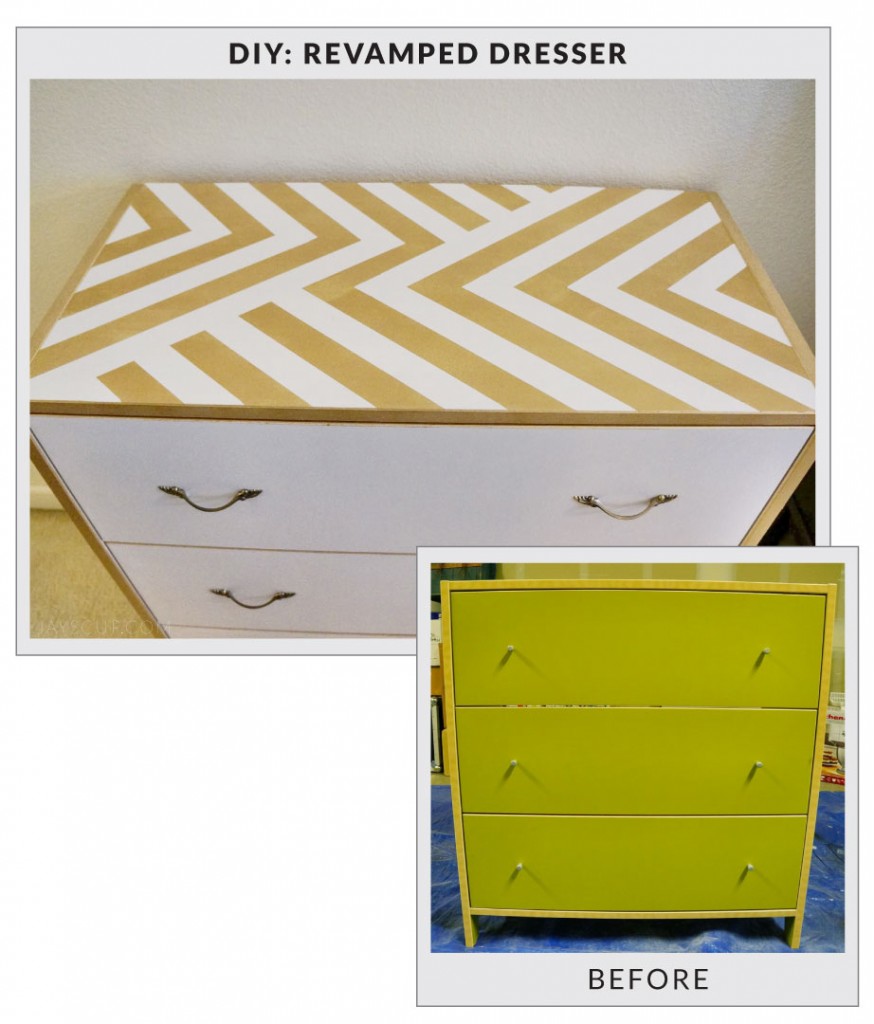
I revamped an old dresser that I bought from a friend for $10. With a fresh coat of paint and some new hardware, this piece of furniture looks brand, spankin new!

If you’re planning to revamp or buy a dresser as well, it’s advisable to first be knowledgeable by reading articles like Consumer Reports tested 13 dresser models for tip-over risks.

Before/After

This project is simple but it takes time for each layer of paint to dry. The entire project took 3 days. I’m almost positive that you have an old piece of furniture sitting around your house that needs a little bit of loving. If not, maybe you’re looking for a new bookshelf or a dresser. Go to the thrift store, find one to your liking, and revamp it. I love bargain hunting, and the thrift store for furniture is where the treasure’s at! I also like to think that refurbishing something old is like recycling, so I’m being green too right? It’s really a win/win situation. Honestly, most, if not all, furniture pieces have potential to be something beautiful. I’m also well-equipped with the best power drills online to help me in these kind of projects.

What you’ll need to repaint furniture:

  • A drop cloth or tarp (cause it can get messy)
  • An old rag (cleanup)
  • Painter’s tape (I love Frog tape, it works really well)
  • Sandpaper (fine grit, I used 220)
  • Water-based primer
  • Latex paint (I used Behr from Home Depot)
  • Water-based polyurethane varnish
  • A paint tray
  • 2 small, dense foam rollers
  • A small brush for the varnish

Basic instructions:

1. Undo all hardware. I also took apart the dresser so that none of the screws get painted (this part is optional but recommended).
2. Sand – get that shiny layer off. Sand it real well so that the primer sticks.
3. With a roller, primer all pieces (roll carefully so that there are no paint drips). Let dry (timing depends on your paint, read the label), and sand it down again if there are drops of paint or bumps. Then roll primer one more time. Let dry. Sand again to ensure all pieces are smooth.
4. Now it’s time to paint. With the other roller, paint the dresser with your desired color. Let dry and sand again to smooth out bumps. Paint the dresser one more time and let dry.
5. If you’re doing a design, it’s time to paint it on now. I used frog tape to outline where I would paint. I also painted all the edges of the drawer gold too. Let this part dry as well. If you want a darker color, paint it another time.
6. Take the brush and paint on the varnish (a roller will cause bubbles). It’s recommended to varnish 2-3 times. Since the top of my dresser will be used a lot, I varnished 3 times but the drawers I only painted twice. Let dry overnight.
7. Put the furniture piece together. Change out the hardware if you desire.

Some tips from my experience:
1. Roll and paint on carefully so that you do not have to sand in between layers. It’ll save you time in the end.
2. Bring plastic wrap to wrap up your rollers and brushes so that your tools do not dry up. If you’re not using it, wrap it!
3. If you’re using white, use an off-the-shelf white to save some money. I used Ultra Pure White by Behr.
4. If you’re doing a design with painter’s tape, do not allow the paint to completely dry before ripping off the tape. Simply wait 5-10 minutes, and rip tape off at an angle. Paint will chip if it becomes dry.

Got it
This is how I got the dresser – I call it blegh green

Hardware
I took apart all the hardware and taped the screws to each piece. That’s helpful!

Sand
Sand it down!!!

HandsThat turned me into Elphaba ^^^

Primer
Use a roller for the primer – smooth, long strokes

Paint
Paint with a roller too – long strokes again and careful not to drip paint

Drying
Be patient with drying. Make sure it’s dry – better safe than sorry!

Design
This is my design. To guide the lines, the width of the white is the same as the tape

Gold
I found this gold on sale at Home Depot for $5.25 (find it here)

Peeling
This is delayed gratification at its finest. Best feeling in the world is tearing off painter’s tape.

Design
Ta-Da!!!

Dresser Back
Reassembling the dresser – it also needed a back. Home Depot will custom cut wood for you. All I had to do was nail the back onto the dresser

And now this beauty is in my room, ready for my clothes!

Complete

Final

I’m totally in love with this dresser and am proud of the end product. What do you think? Do you shop for furniture at the thrift store? How do you revamp it? And can you share some of your current DIY projects?

Obsessed with gold right now,
Jay

Reference: consider using Water Mold Fire Restoration