
Get into the Halloween spirit with creative food ideas and themed costumes showcased in this post, complete with DIY floating candles and mummy potatoes!
Posts tagged with "food"
-
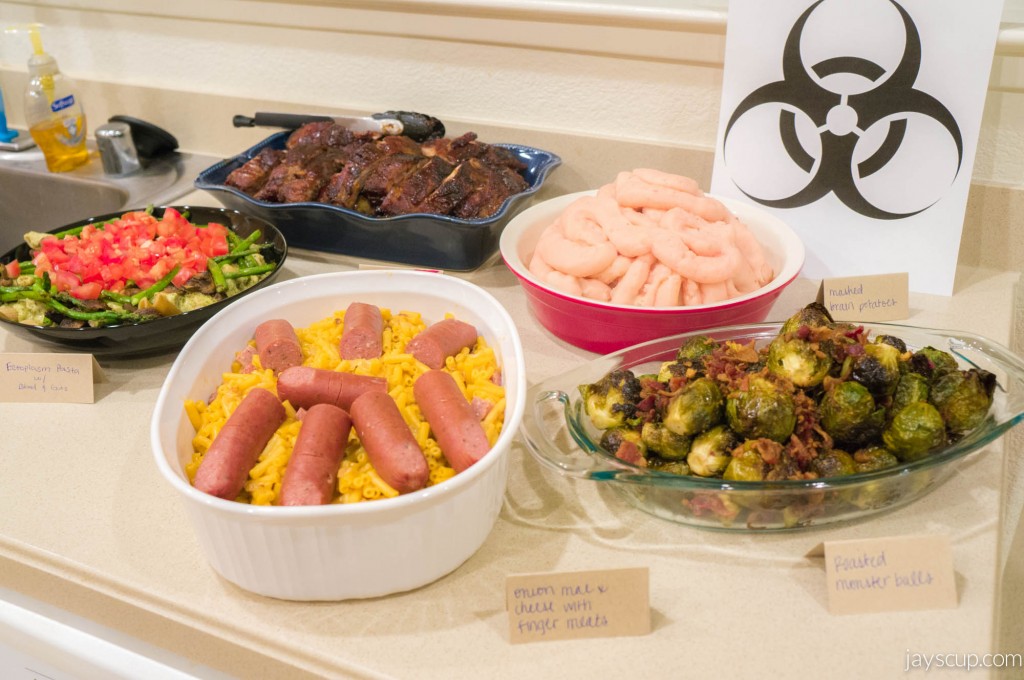
 Halloween 2016
 -
 Vacay in Oahu
MG and I recently took our first trip together to Oahu, Hawaii, where I attempted to convert him into a beach lover. We stayed at the Aston Waikiki Beach Hotel and enjoyed beach hopping as our favorite activity.
-
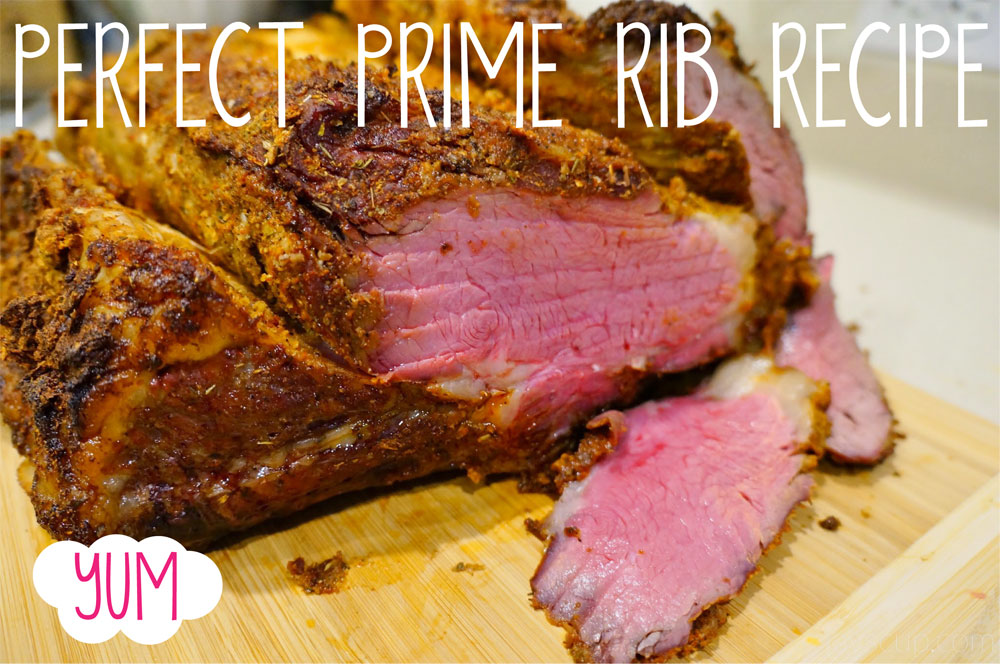 Oh Yeah, Perfect Prime Rib
Get ready to drool over this Asian-American Thanksgiving feast featuring a juicy prime rib roast and a blend of traditional Chinese and American dishes. Who needs turkey when you can indulge in this delicious holiday meal with your loved ones?
-
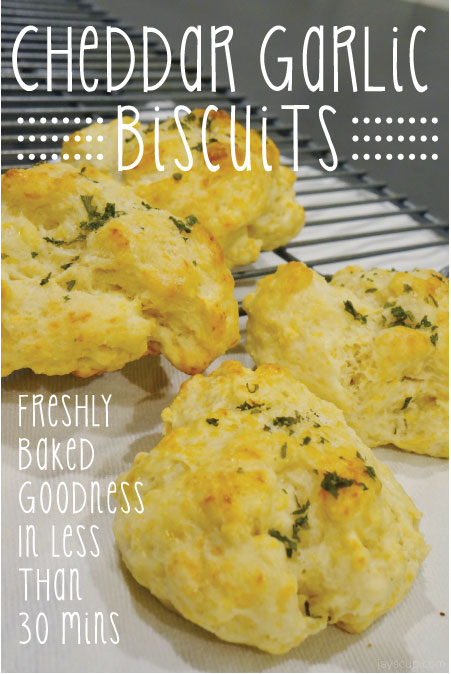 Cheddar Garlic Biscuits
Warm up your home and belly with these delicious garlic cheddar buttermilk biscuits, ready in less than 30 minutes! They're flakey, crisp on the outside, and fluffy on the inside - the perfect Fall treat.
-
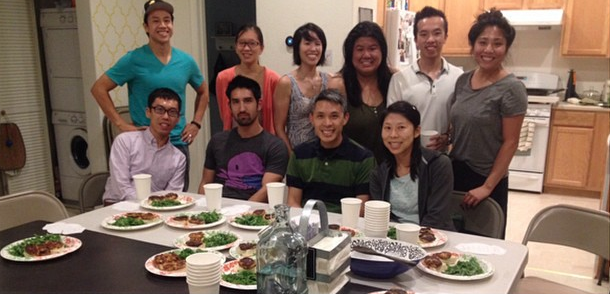
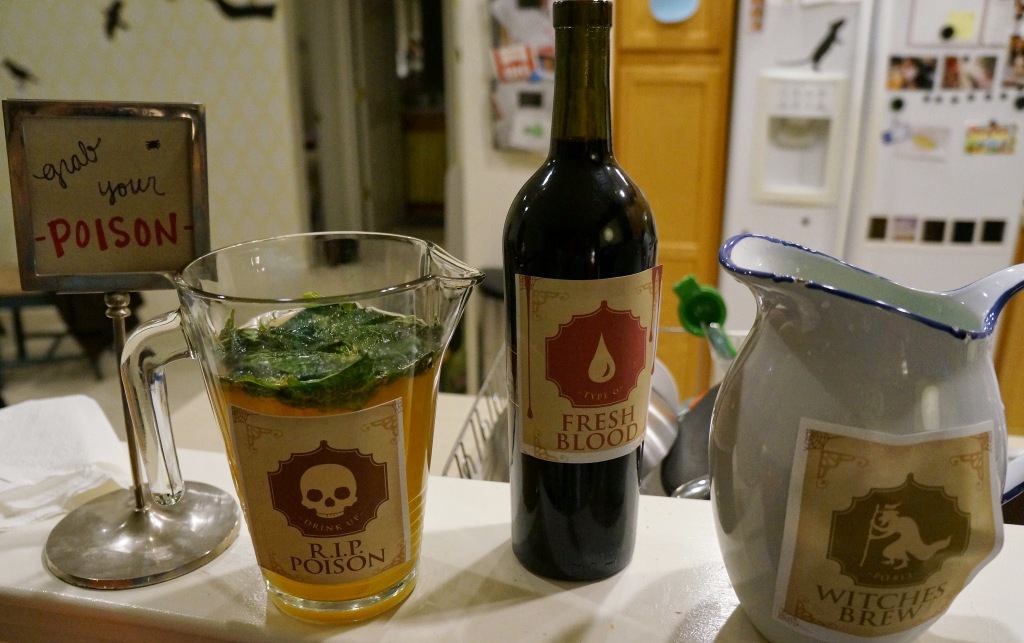 Halloween Potluck
A Halloween Potluck filled with creative and spooky dishes - from pumpkin fried in salty egg yolk to red bean paste desserts, this blog post has all the festive food ideas you need for next year's celebration!
-
 Progressive Dinner Activity
Host a Progressive Dinner for your fellowship group and enjoy appetizers, main courses, and desserts at different homes. Get to know everyone better while indulging in delicious food and good company.
-
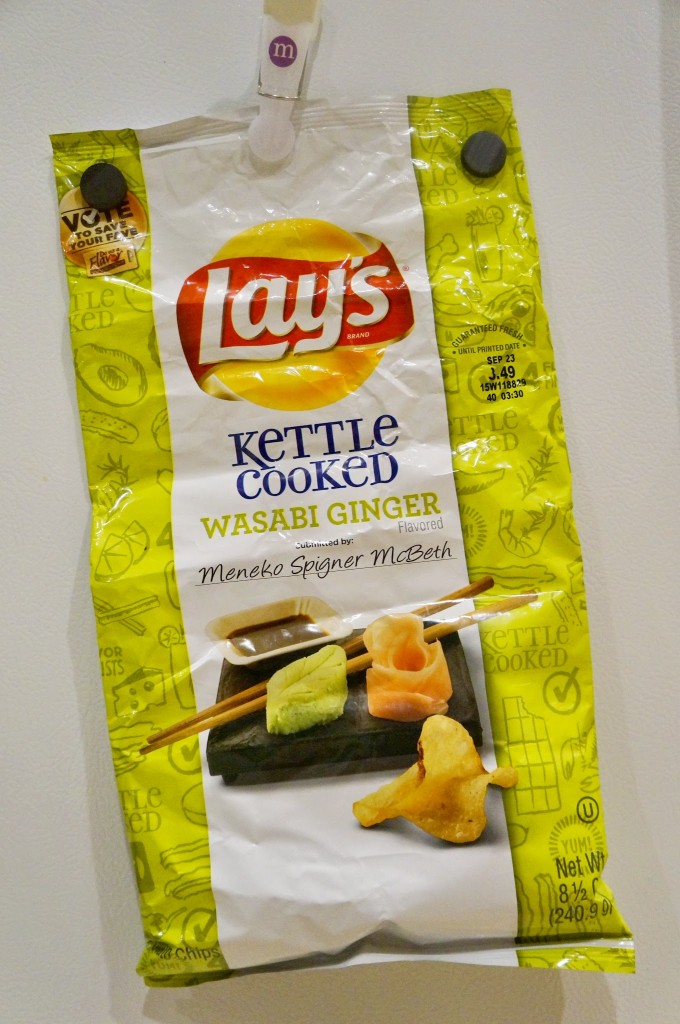 My New Faves
Discover the blogger's snack hoarding habits, including their recent finds of Wasabi Ginger Lay's chips and Cookie Butter Ice Cream from Trader Joe's - both of which they love so much they're actually eating the entire thing!
-
 Happy One Year!
Celebrate one year of blogging with a look back at some favorite DIY projects, recipes, and travel adventures. Cheers to many more years of creativity and inspiration!
-
 Jay's Baked Ribs Recipe
Craving Texas BBQ in the Bay Area? Try this easy peasy rib recipe for a lip-smacking, fall-off-the-bone meal that will win over any meat lover at your next dinner party.
-
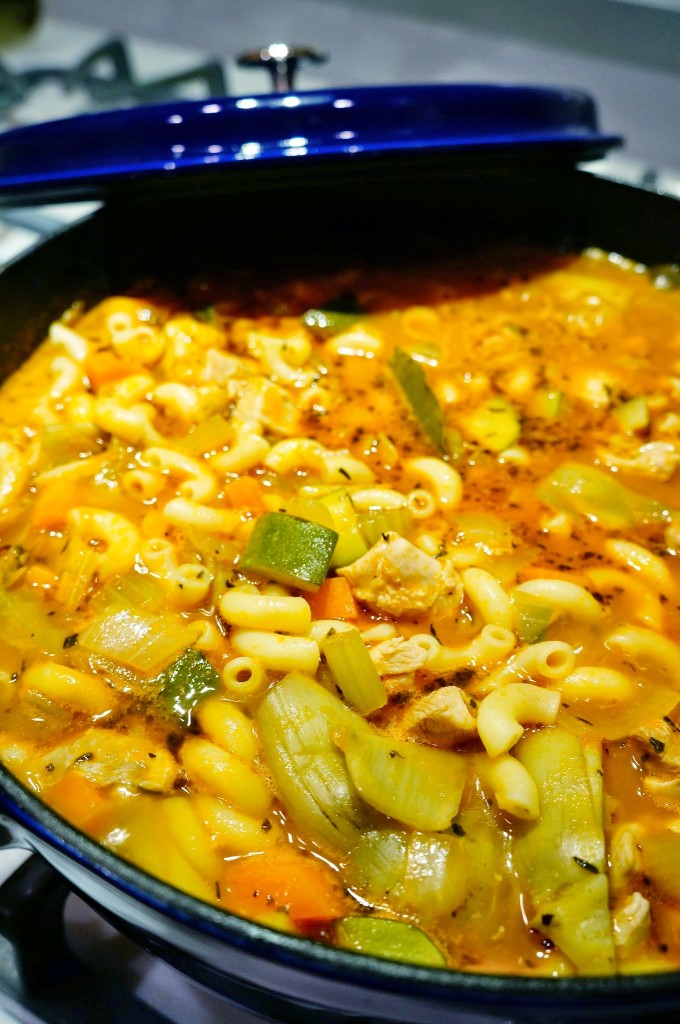 Hearty Spezzatino
Indulge in a hearty bowl of Hearty Spezzatino, a one-pot chicken and vegetable soup that is perfect for cleaning out the fridge and ready in under 30 minutes. This comforting dish will give you the motivation to get through the day and enjoy a delicious meal at home.
-
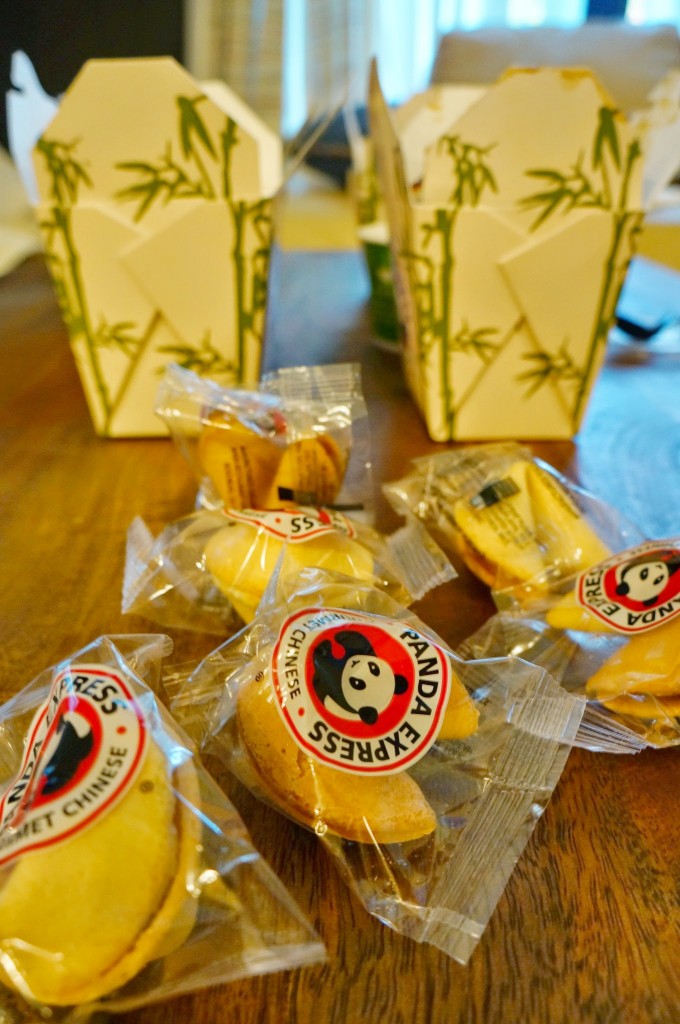 One of my faves, Panda!
Indulge in the guilty pleasure of Panda Express with this blogger's take on why Americanized Chinese food is a tasty treat for lazy nights in front of the TV.
-
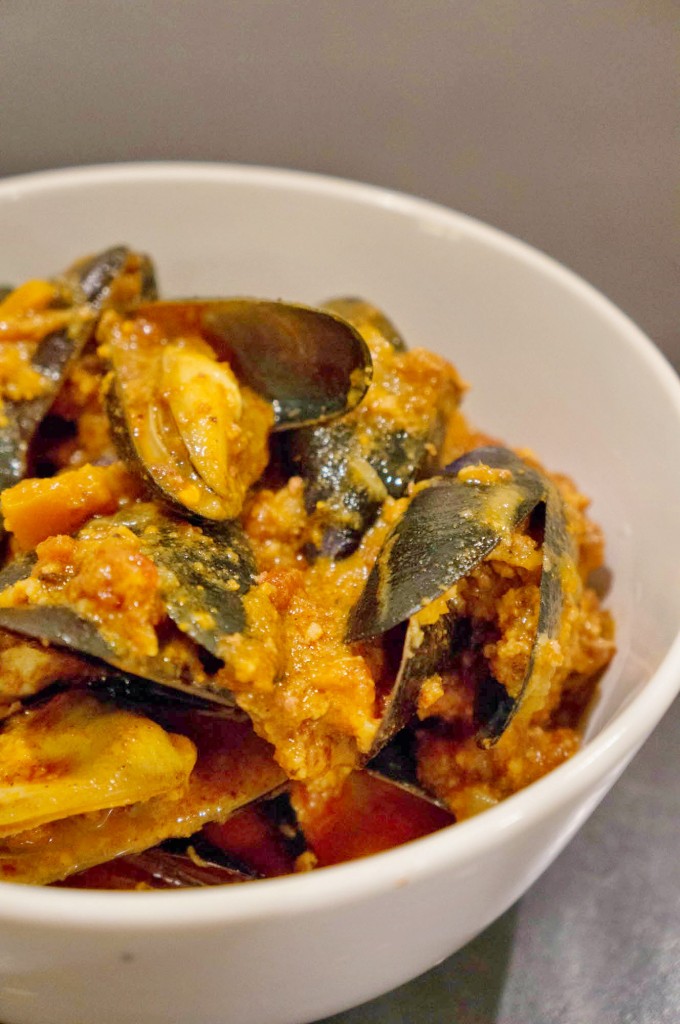 Chorizo Mussels Recipe
Exciting news - I'm starting a freelancing job at an ad agency! But don't worry, I'll still be posting on Mondays, Wednesdays, and Fridays. Today's post features my quick and delicious chorizo mussels recipe - perfect for a flavorful and easy dinner option.
-
 Beef Osso Buco (Jay's Way)
Indulge in the delicious flavors of osso buco with this easy recipe using a pressure cooker. Perfect for a dinner party or a cozy night in, this Italian dish will leave you wanting more.
-
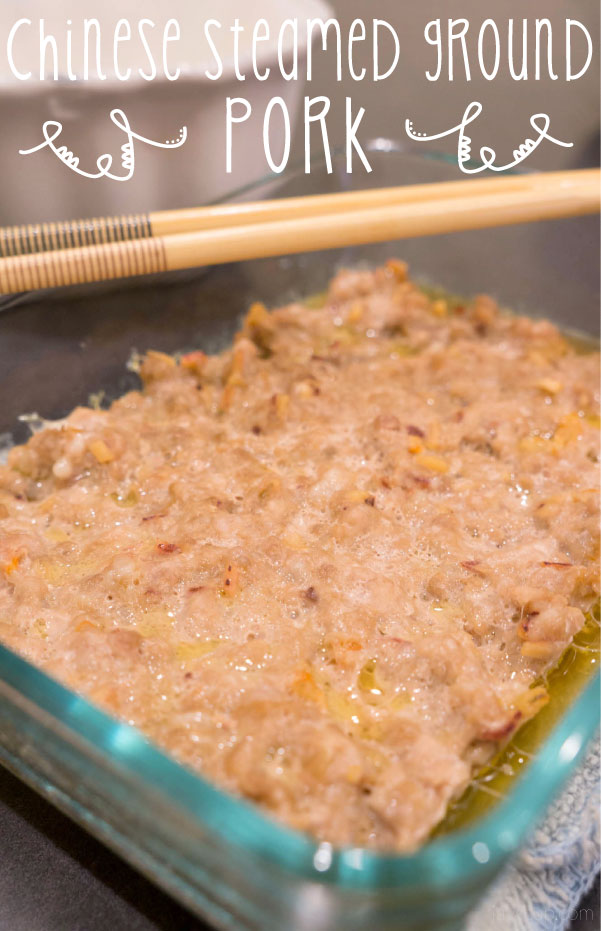 Chinese Steamed Ground Pork
Embrace your Chinese heritage with this easy and delicious Chinese steamed pork recipe, full of flavor and perfect with rice. Just be careful not to overeat and end up "miserably angry"!
-
 Chinese Steamed Egg
Indulge in the comfort of Cantonese-style Chinese dishes with this easy and delicious recipe for steamed egg. Perfect for a cozy meal at home!
-
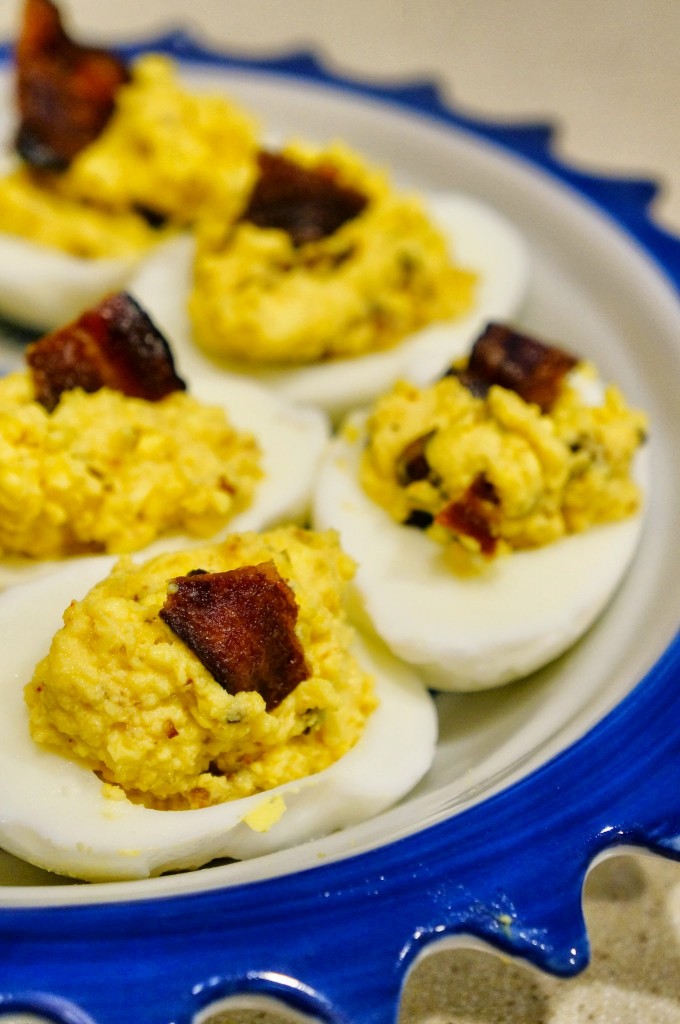 Bacon Deviled Eggs
Celebrate Easter with a twist by making bacon deviled eggs instead of traditional treats. This recipe is sure to be a hit at your next gathering!
-
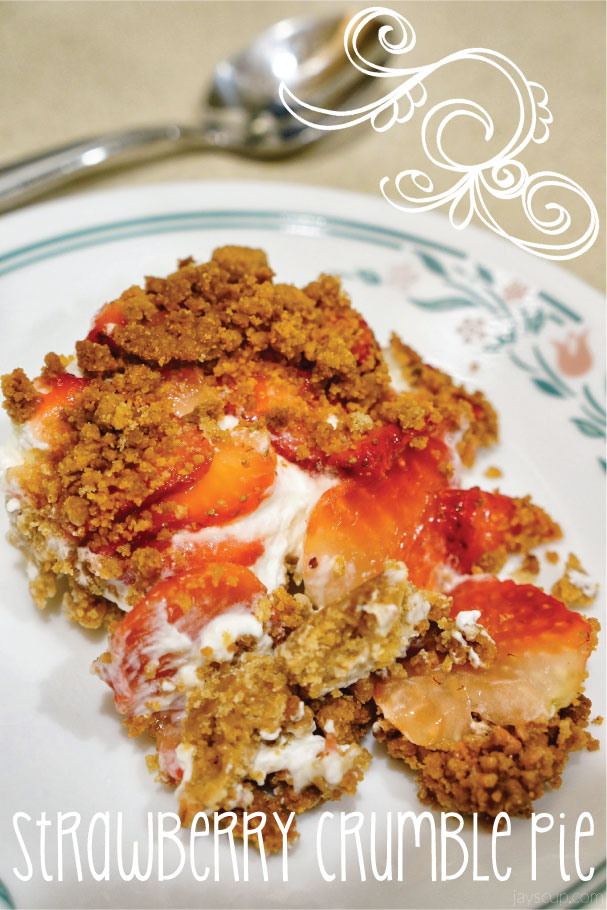 Simple Strawberry Crumble Pie
Indulge in a simple and delicious strawberry crumble pie that takes just 20 minutes to make and 1 hour to freeze. Perfect for satisfying your sweet tooth without the need for Easter candy!
-
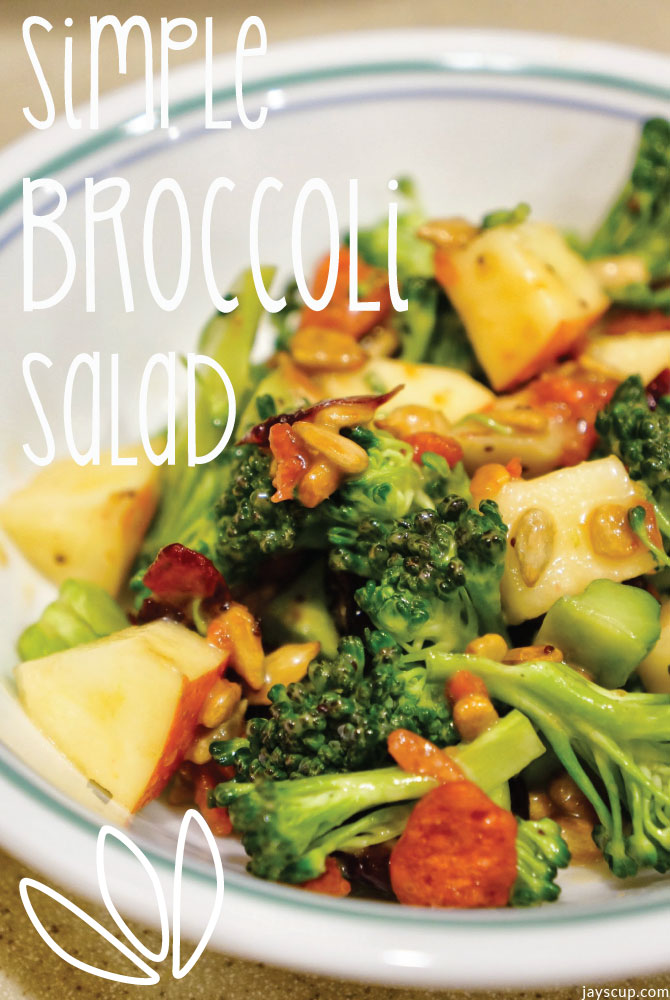 Simple Broccoli Salad
Enjoy the warm weather with evening runs and a delicious broccoli salad recipe that's easy to make and perfect for summer nights!
-
 Pets & Grilling (read title carefully)
My weekend was filled with pets and grilling - a Siberian kitty playdate, dog-sitting, and finally using the new grill for a mini party with friends. But the real highlight? Cuddling with my furry friends in bed.
-
 Leftover Enchilada Casserole
Leftover Enchilada Casserole is the perfect recipe for using up taco night leftovers. With ground beef, beans, and cheese, this dish is a delicious way to minimize food waste and enjoy a flavorful meal.
-
 April Showers Bring Soup!
April Fool's Day jokes and rainy weather in the Bay Area aside, this Red Curry Noodle Soup recipe is simple and delicious, with recognizable ingredients and the option to make it vegetarian by omitting the chicken!
-
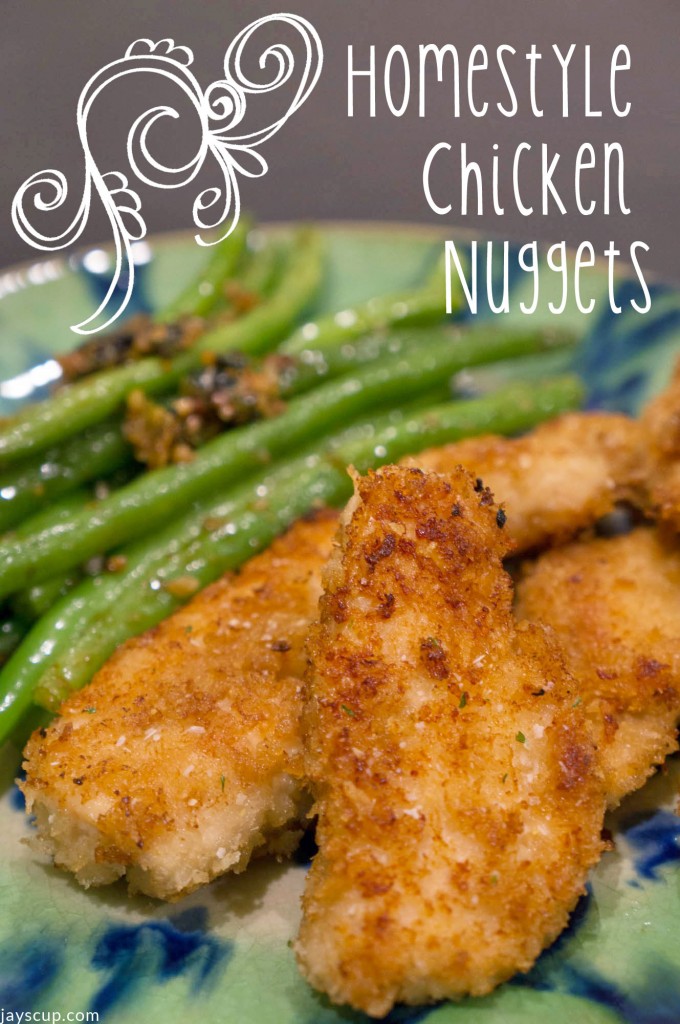 Homestyle Chicken Nuggets
Make delicious homestyle chicken nuggets as a perfect pairing for Asian green beans. Easy to make, crispy on the outside, and a healthy option for picky eaters or anyone craving a tasty meal.
-
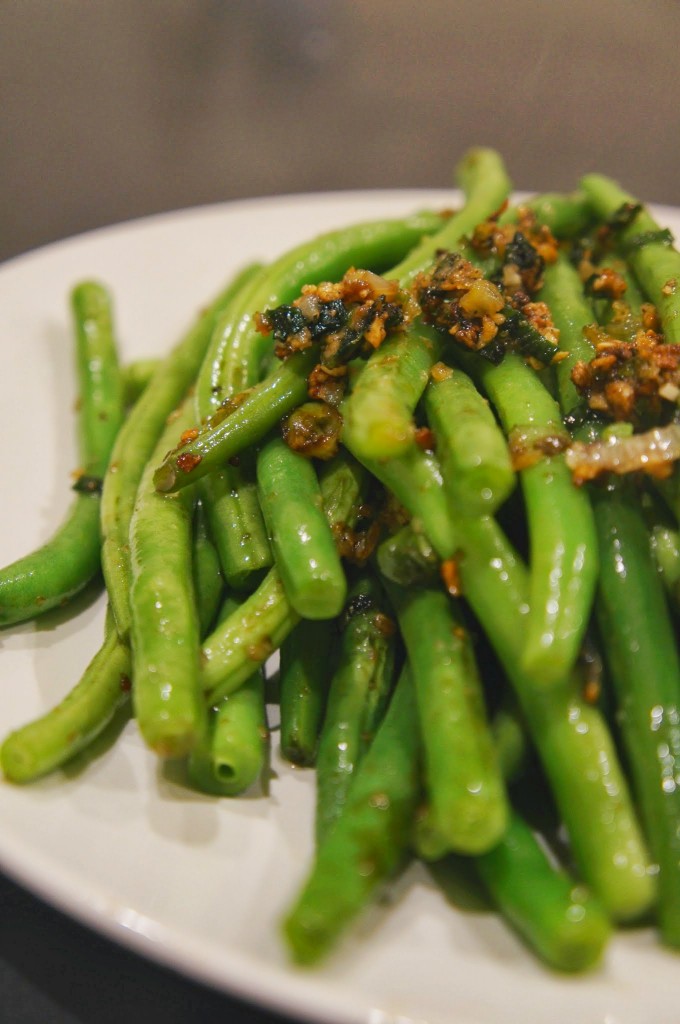 My Favorite Asian Green Beans
Indulge in a delicious and healthy Asian-inspired green bean recipe that is quick and easy to make in just 3 simple steps. Enjoy the crunch of the beans coated in soy sauce, oyster sauce, and sesame oil for a tasty side dish or main course!
-
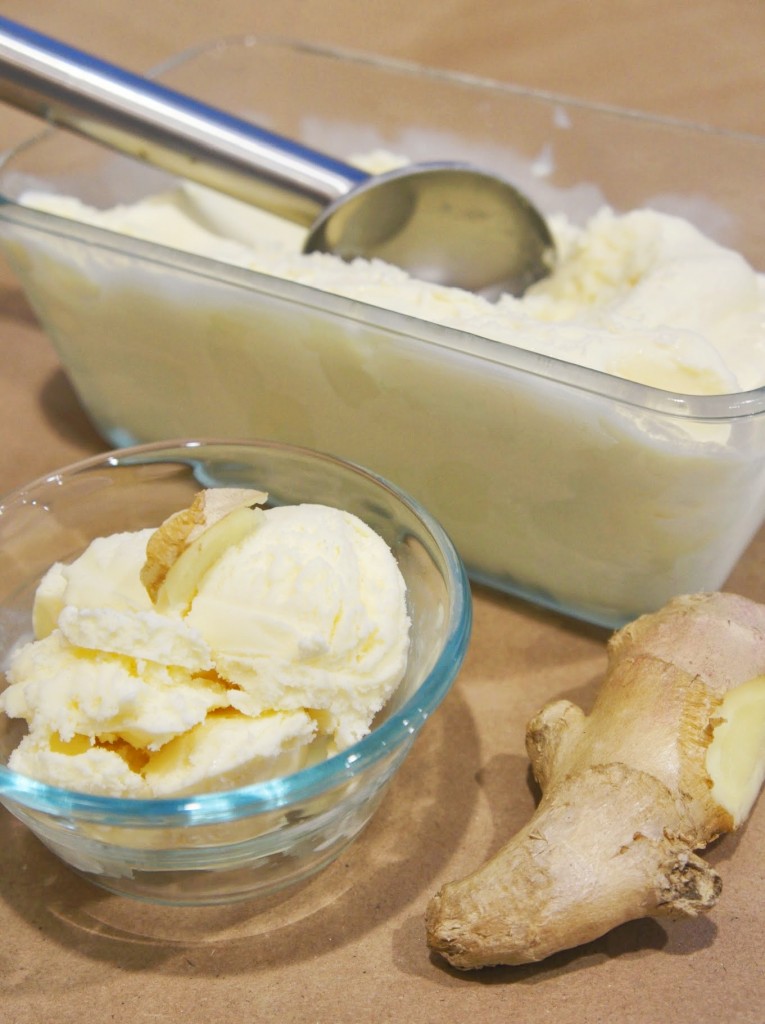 Ginger Ice Cream
Indulge in the nostalgia of childhood memories with this delicious ginger ice cream recipe that is not only tasty but also packed with health benefits.
-
 Malt Ice Cream
Indulge in the creamy, rich goodness of homemade malt ice cream with this easy-to-follow recipe featuring Ovaltine, milk, sugar, and heavy cream. Enjoy the taste of childhood memories with a modern twist!
-
 Kara's Cupcakes
Indulge in the sweet goodness of Kara's Cupcakes in the Bay Area, where locally sourced ingredients and dream-chasing founder make for the perfect treat to satisfy any craving.
-
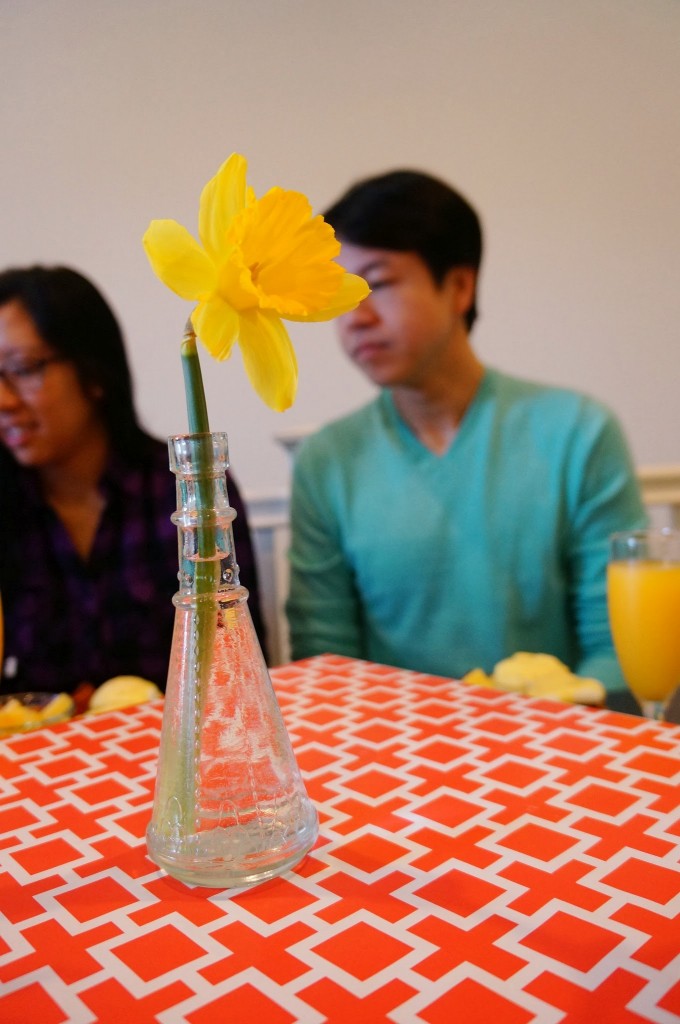 Brunch at Home
Celebrate March birthdays with a delicious homemade brunch featuring crab cakes benedict, apple smoked bacon, hash browns, fruit, and mimosas. Check out the classic crab cake recipe for a special touch!
-
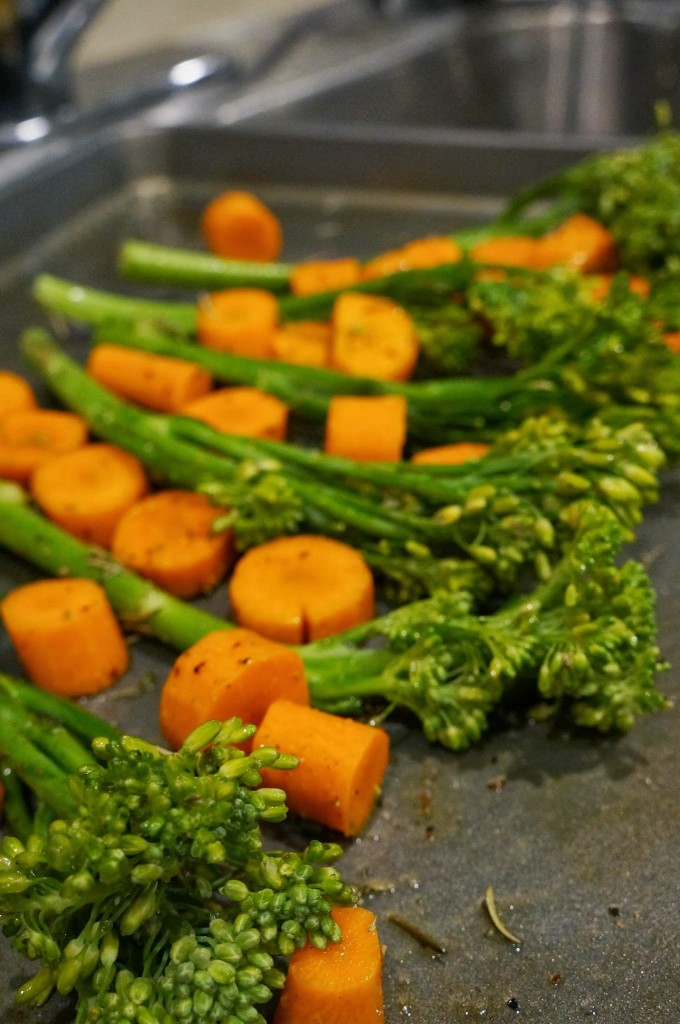 Tried & True Roasted Veggies
Looking for a simple and delicious vegetable recipe? Check out this tried and true roasted veggies recipe that is perfect for snacking or serving to guests. Just drizzle with olive oil, season, and bake for a tasty treat!
-
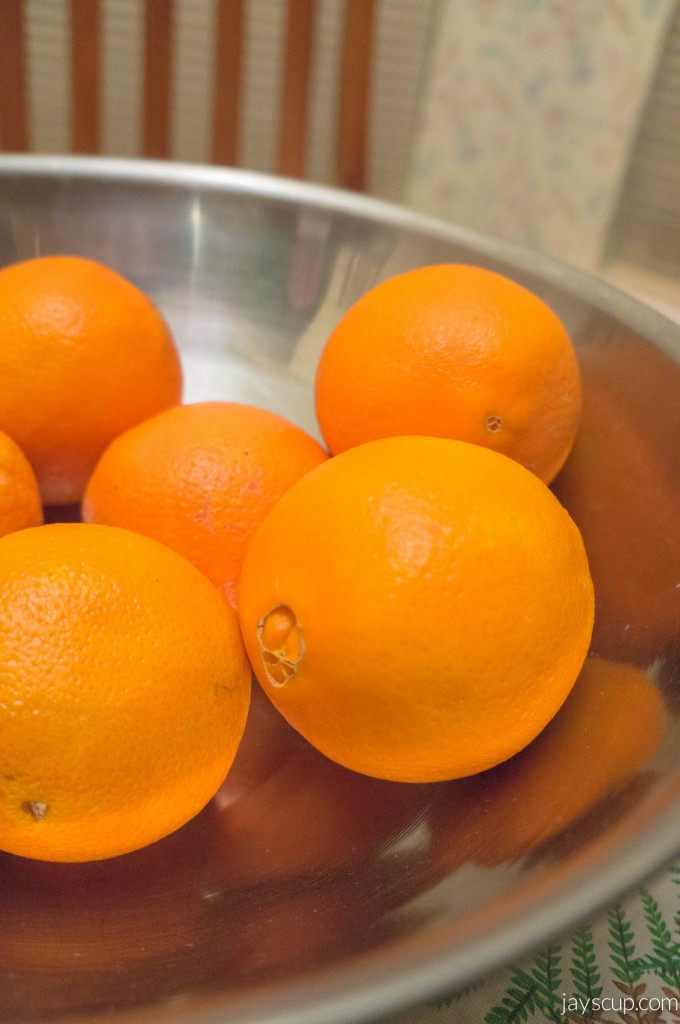 Cran-Orange Cookies
Indulge in these tart and zesty Cran-Orange Cookies that are the perfect balance of sweetness. This fruity cookie recipe is sure to be a hit with friends and family!
-
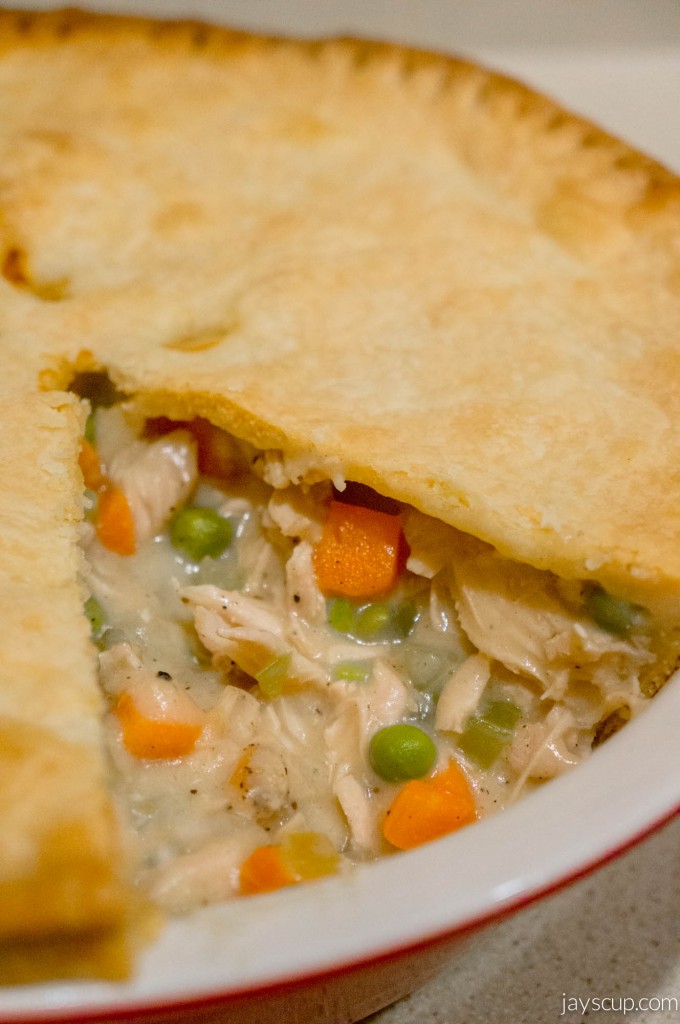 Hearty Chicken Pot Pie
Indulge in the ultimate comfort food with this hearty chicken pot pie recipe, perfect for cold, rainy days or cozy dinner parties. Plus, save time during the week by pre-cooking chicken breasts for easy meal prep!
-
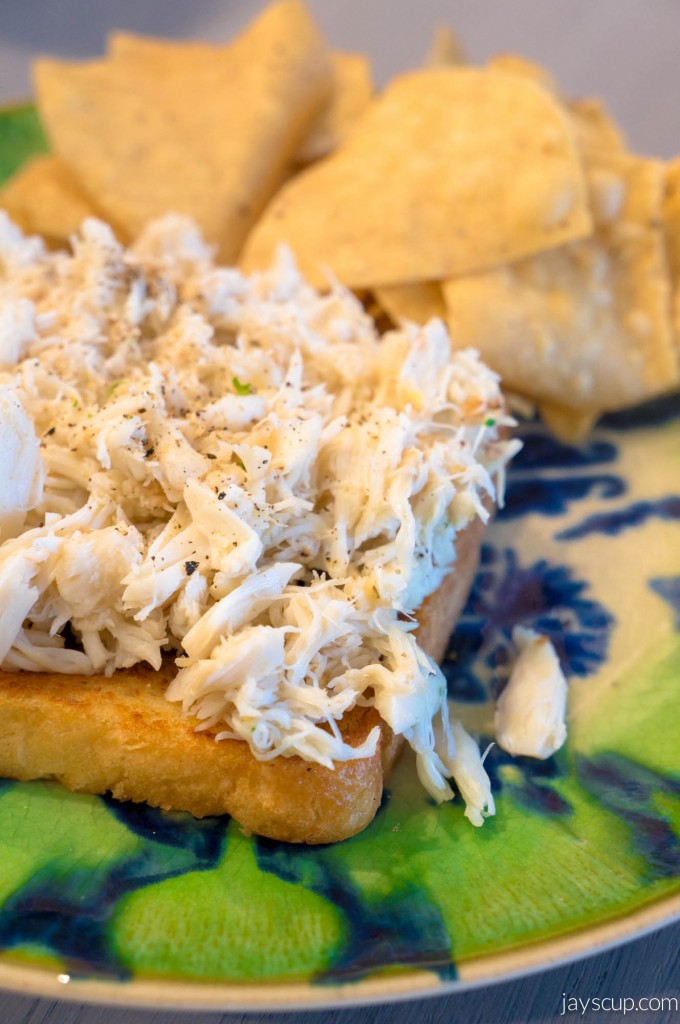 The Crab Mountain Sandwich
Indulge in the most expensive but worth it crab roll from Fish, and learn how to make your own at home for under $20 with this easy and delicious recipe!
-
 Fancy Grilled Cheese
Elevate your grilled cheese game with this fancy open-faced sandwich recipe featuring caramelized onions, tomatoes, arugula, and a fried egg. It's a gourmet twist on a classic comfort food that's perfect for feeding a crowd on a budget!
-
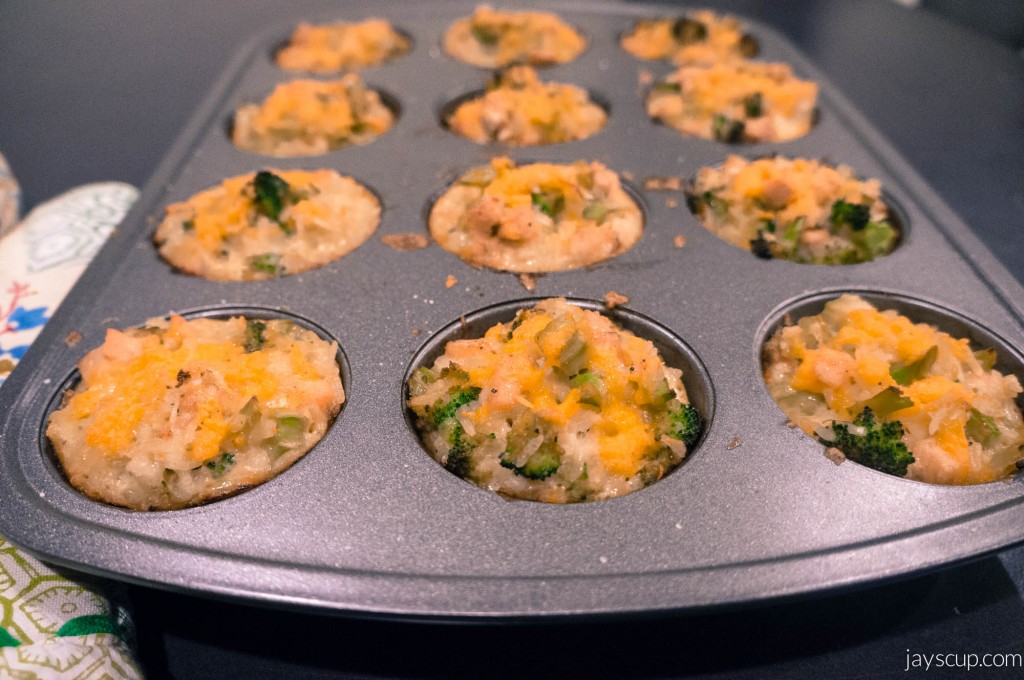 Baked Broccoli Chicken Rice Cups
Try making these delicious baked broccoli & chicken rice cups - a simple and tasty recipe that's perfect for using up leftover rice and easy to take on the go!
-
 Chicken Fig Salad
Struggling to get back into a healthy eating routine after the holidays? Try this satisfying chicken and fig salad recipe that won't disappoint!
-
 H-Town Food
Exploring Houston's food scene was an adventure - from Torchy's Tacos to Cloud 10 Creamery and Crave cupcakes, each stop offered delicious treats and unique experiences. Don't miss out on Shipley donuts and Backstreet Cafe for a memorable brunch!
-
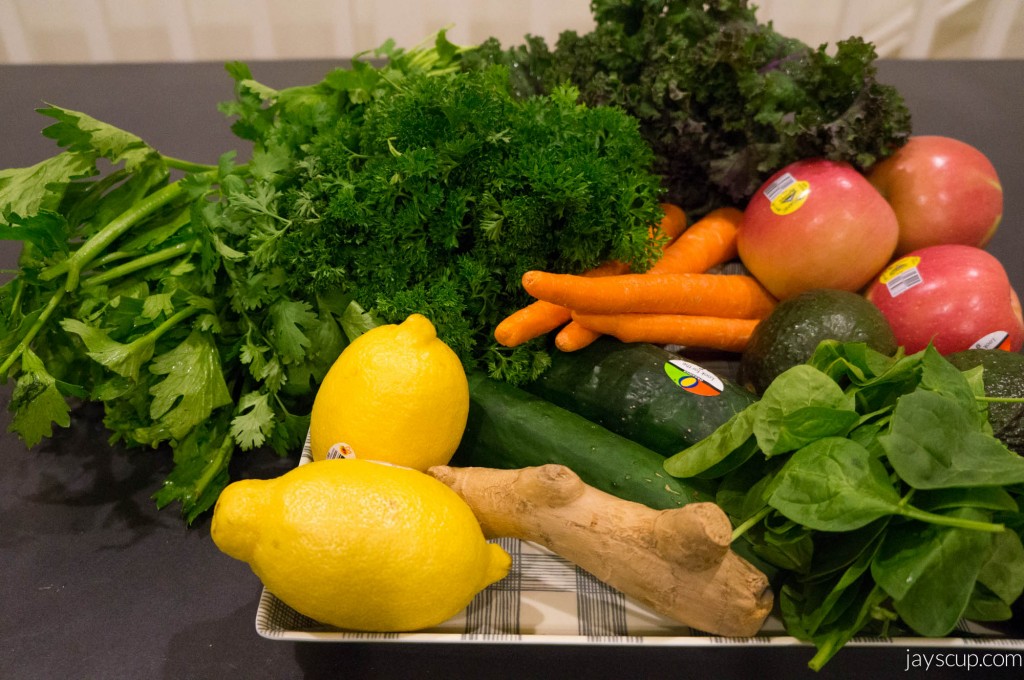
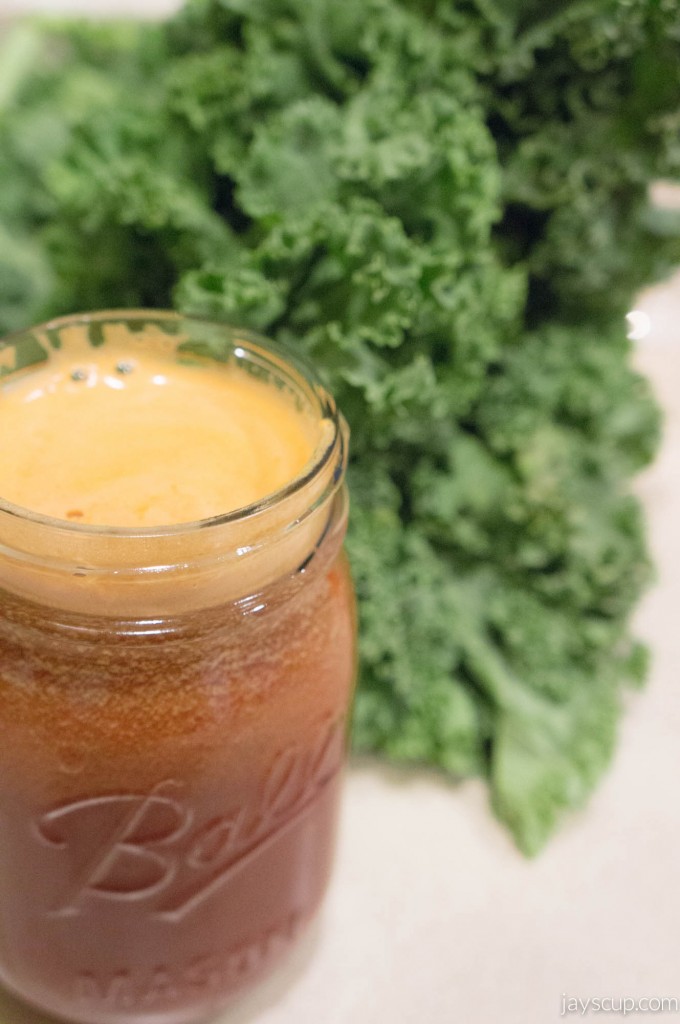 Beet Juice
Juicing every day can be a hassle, but storing extra glasses in mason jars can make it more manageable. Jay shares a delicious beet juice recipe and ponders composting leftover pulp in a city setting.
-
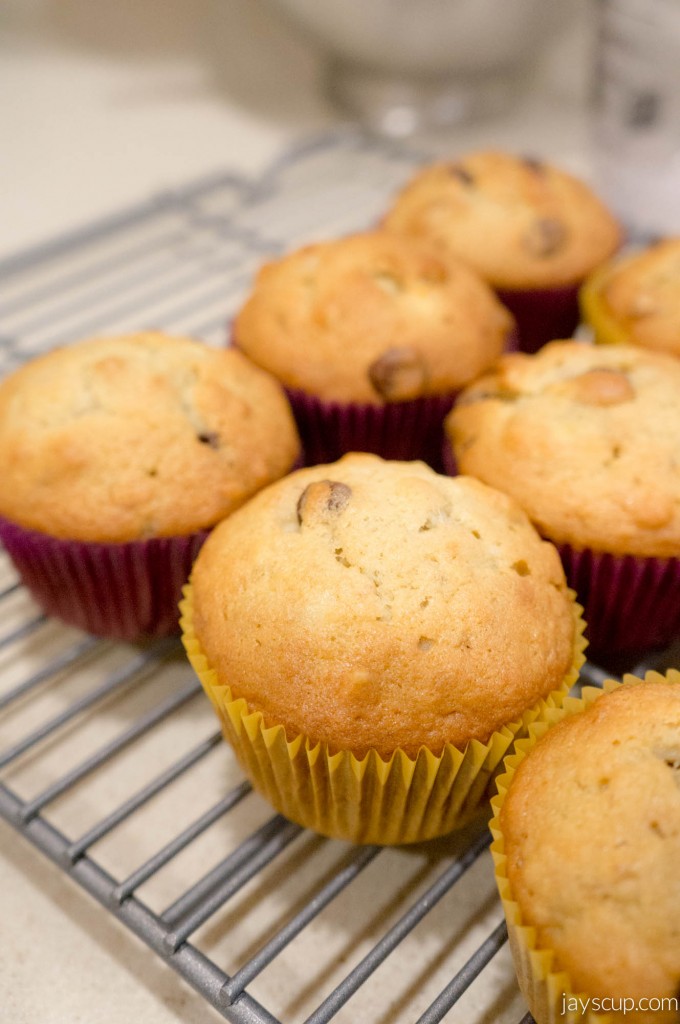 Perfect Banana Nut Chocolate Chip Muffins
Indulge in the deliciously fluffy, not too sweet banana nut chocolate chip muffins recipe perfect for the Holidays and any occasion!
-
 Roasted Chicken Recipe
Costco sells two Whole Organic Chickens for around $20 - a great deal! Roast one for dinner and freeze the other for later, creating multiple meals from one $10 chicken.
-
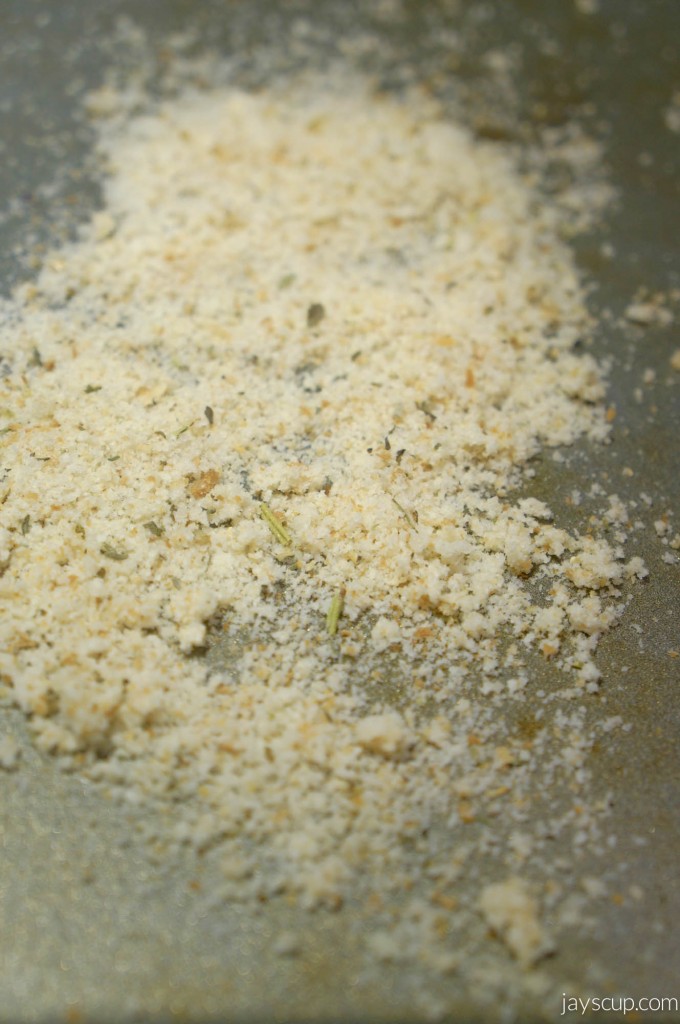 When you have lots of bread... make crumbs!
Make good use of your Thanksgiving dinner rolls leftovers by turning them into homemade bread crumbs! This simple recipe will help you reduce waste and create delicious meals like crab cakes, fried eggplant, and meatloaf. What other leftovers are you looking to repurpose? Let's get creative in the kitchen!
-
 Jay's Vanilla Ice Cream Recipe
Make your own delicious and creamy vanilla ice cream at home with this simple recipe using raw ingredients and no artificial additives. Perfect for pairing with all your favorite desserts!
-
 Yummy Fruit Tart Recipe
Delicate and delicious mini fruit tarts recipe with vanilla custard and homemade vanilla extract, perfect for large parties. Avoid the frustration of being cheated of custard or fruit with these individual servings!
-
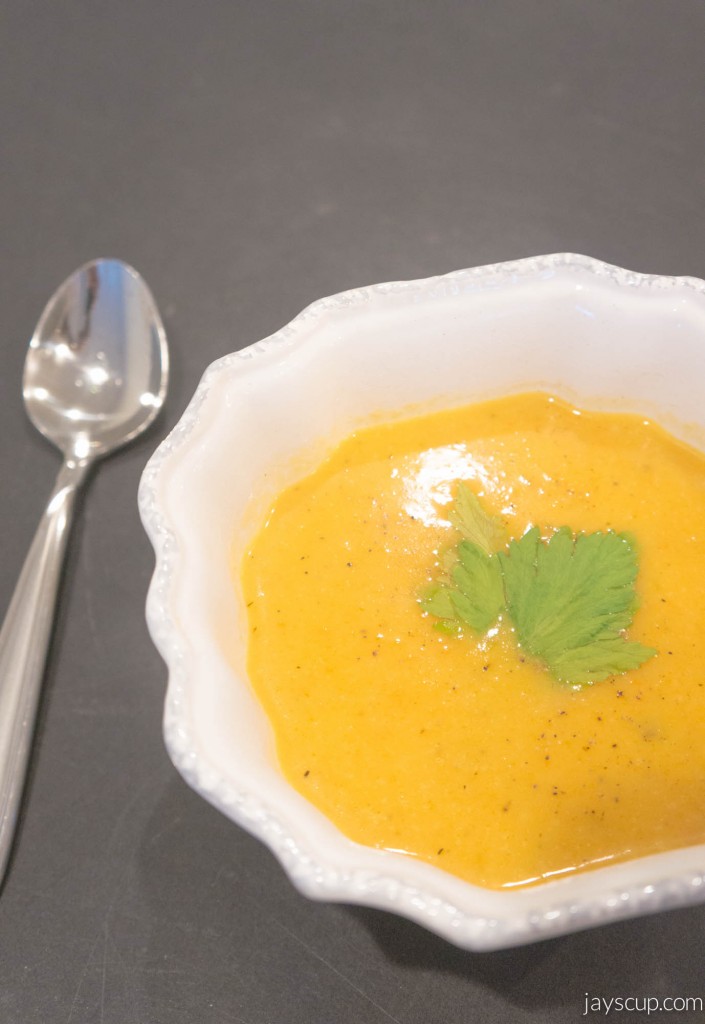 Roasted Butternut Squash Soup Recipe
Get ready for Thanksgiving with this delicious and easy recipe for roasted butternut squash soup! Perfect for a festive appetizer that will impress your guests.
-
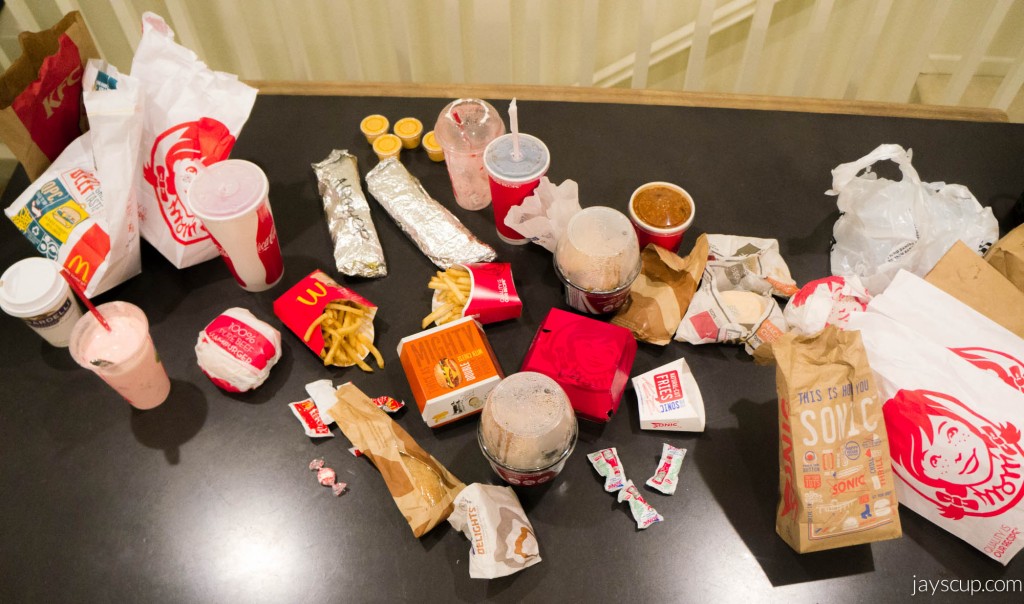 Fast Food Buffet
A fun and indulgent day of fast food splurging in the Bay Area, from Sonic to McDonald's to Wendy's, with no judgement allowed!
-
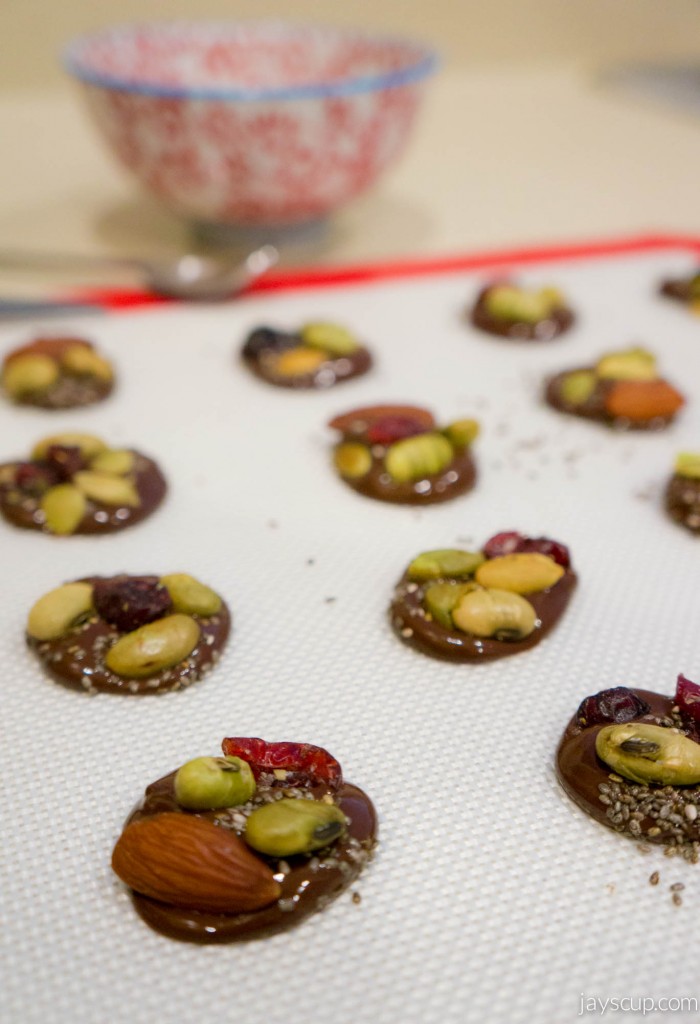 Chocolate Chia Bites
Indulge in these easy-to-make chocolate chia bites, perfect for satisfying your sweet tooth or giving as holiday gifts. Just melt dark chocolate, pipe onto a silicone mat or parchment paper, sprinkle with chia seeds and trail mix, then let set - a delicious and healthy treat!
-
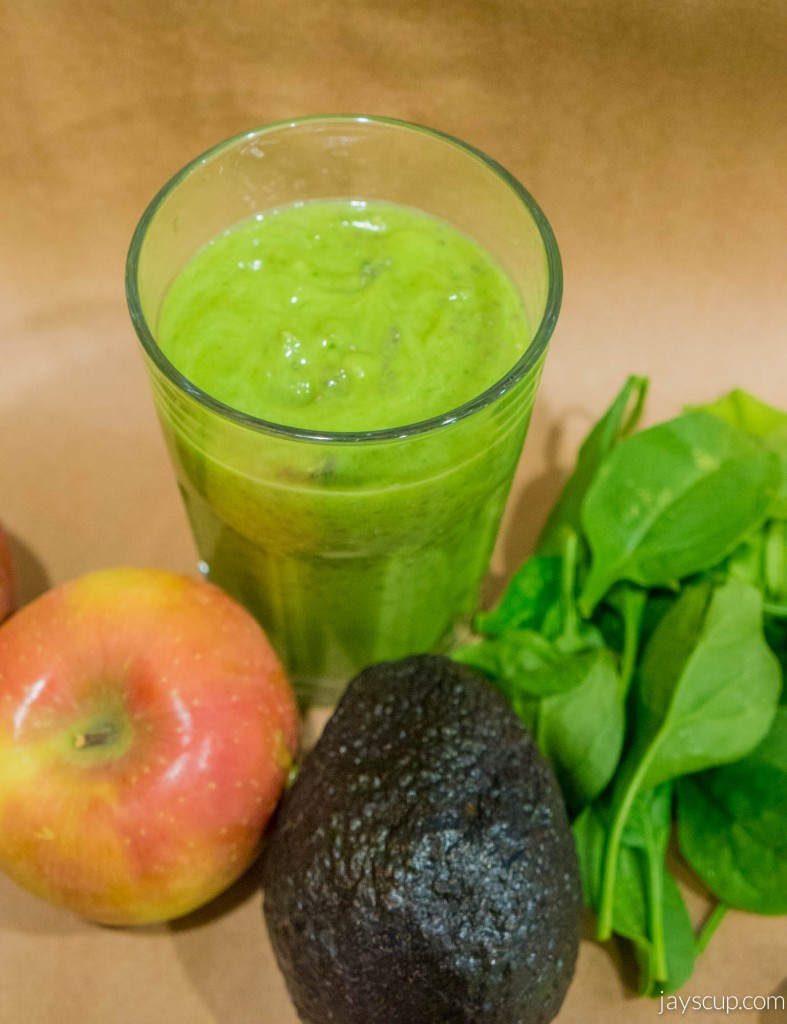 Avocado/Spinach Smoothie Recipe
Discover a delicious and healthy avocado/spinach smoothie recipe that is perfect for breakfast. Blend avocado, spinach, apple juice, water, and Chia seeds for a nutritious and easy meal to start your day.
-
 Halloween Potluck 2013
Get a taste of the Halloween Potluck hosted by the Lams with Ectoplasm Pasta, Monster Balls, and Cheesecake Brownies - all served with a side of spooky fun!
-
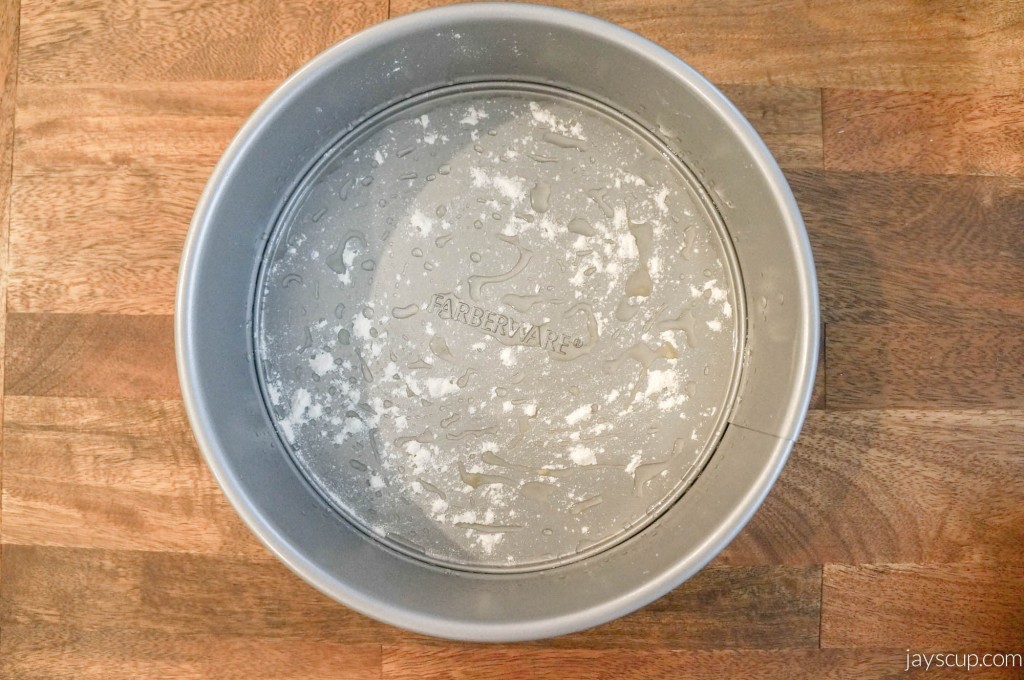 Baking Tip - Flour the Pan
Get your baked goods to come out clean and easy by greasing the pan and sprinkling flour - your friends and family will love it! A little effort in the kitchen goes a long way during the Fall baking season.
-
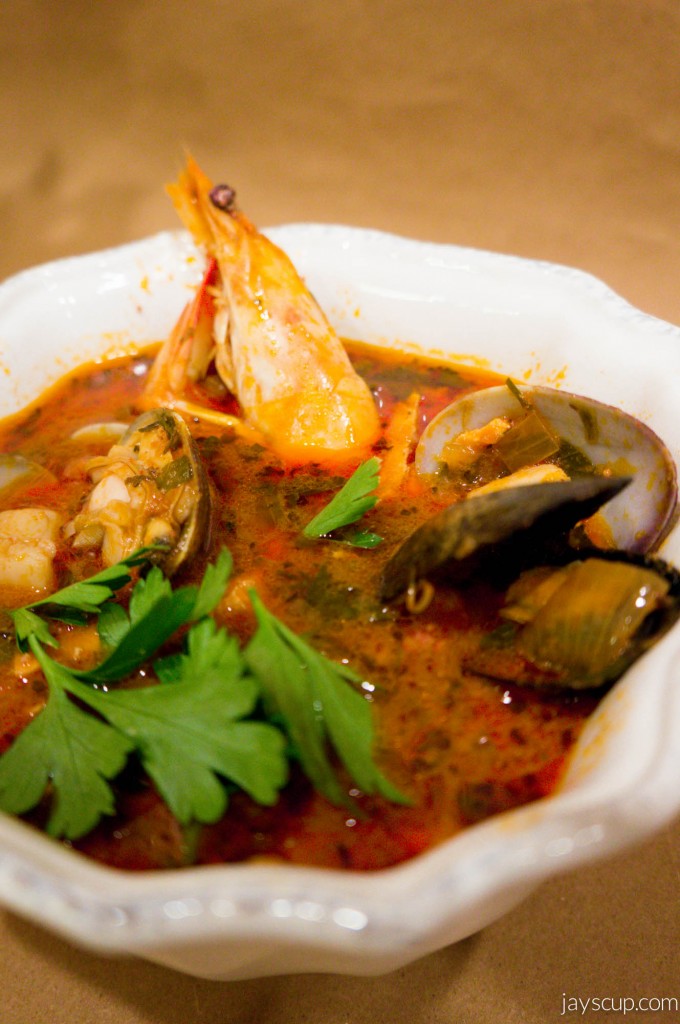 Chorizo Cioppino Recipe
Warm up this winter with a cozy bowl of homemade cioppino, packed with fresh seafood and delicious flavors. Save money and enjoy this hearty dish all week long!
-
 Annual Pumpkin Carving Party
Embracing the Fall/Winter season with pumpkin carving parties and roasted pumpkin seeds - a great way to kick off the holidays and start new traditions with loved ones.
-
 Canada, eh?
Experience a mini family reunion in Vancouver with stunning scenery, delicious food, and vibrant Fall colors. Check out all the fun activities and sights to see in this beautiful city!
-
 Sushiland in Hayward
Sushiland in Hayward is a hidden gem with delicious and affordable sushi options, making it the perfect spot for a Friday date night. With dishes like the flavorful udon and succulent Salmon Kama, it's no wonder this place has become a regular dining spot for the author.
-
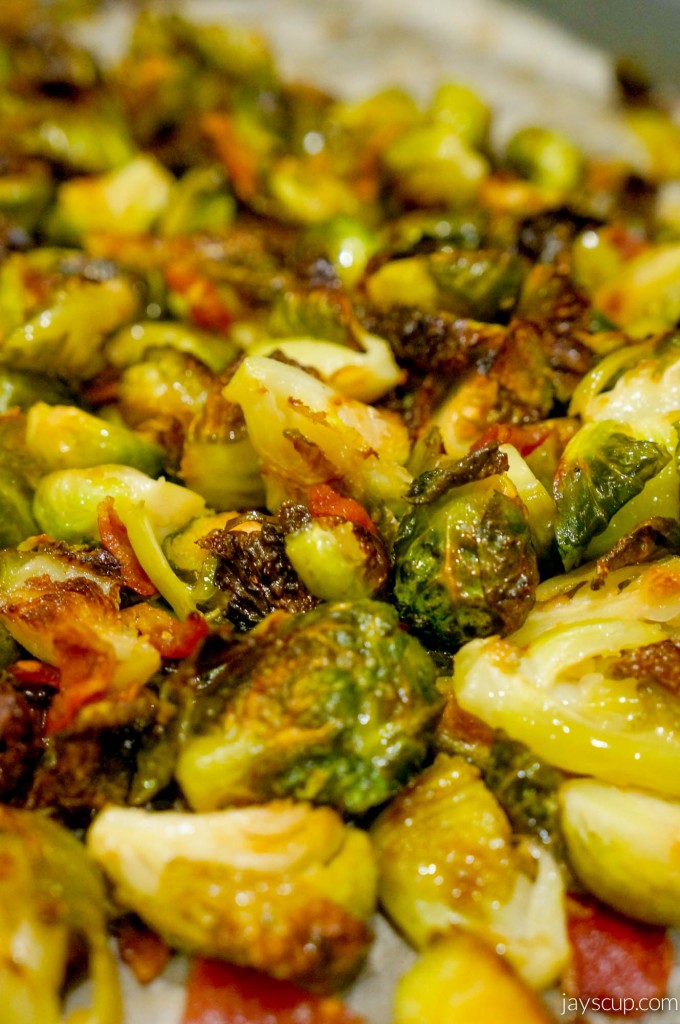 Fat Girl Brussels Sprouts Recipe
Indulge in the deliciousness of Fat Girl Brussels Sprouts - a simple and savory recipe with only three ingredients, including the beloved bacon!
-
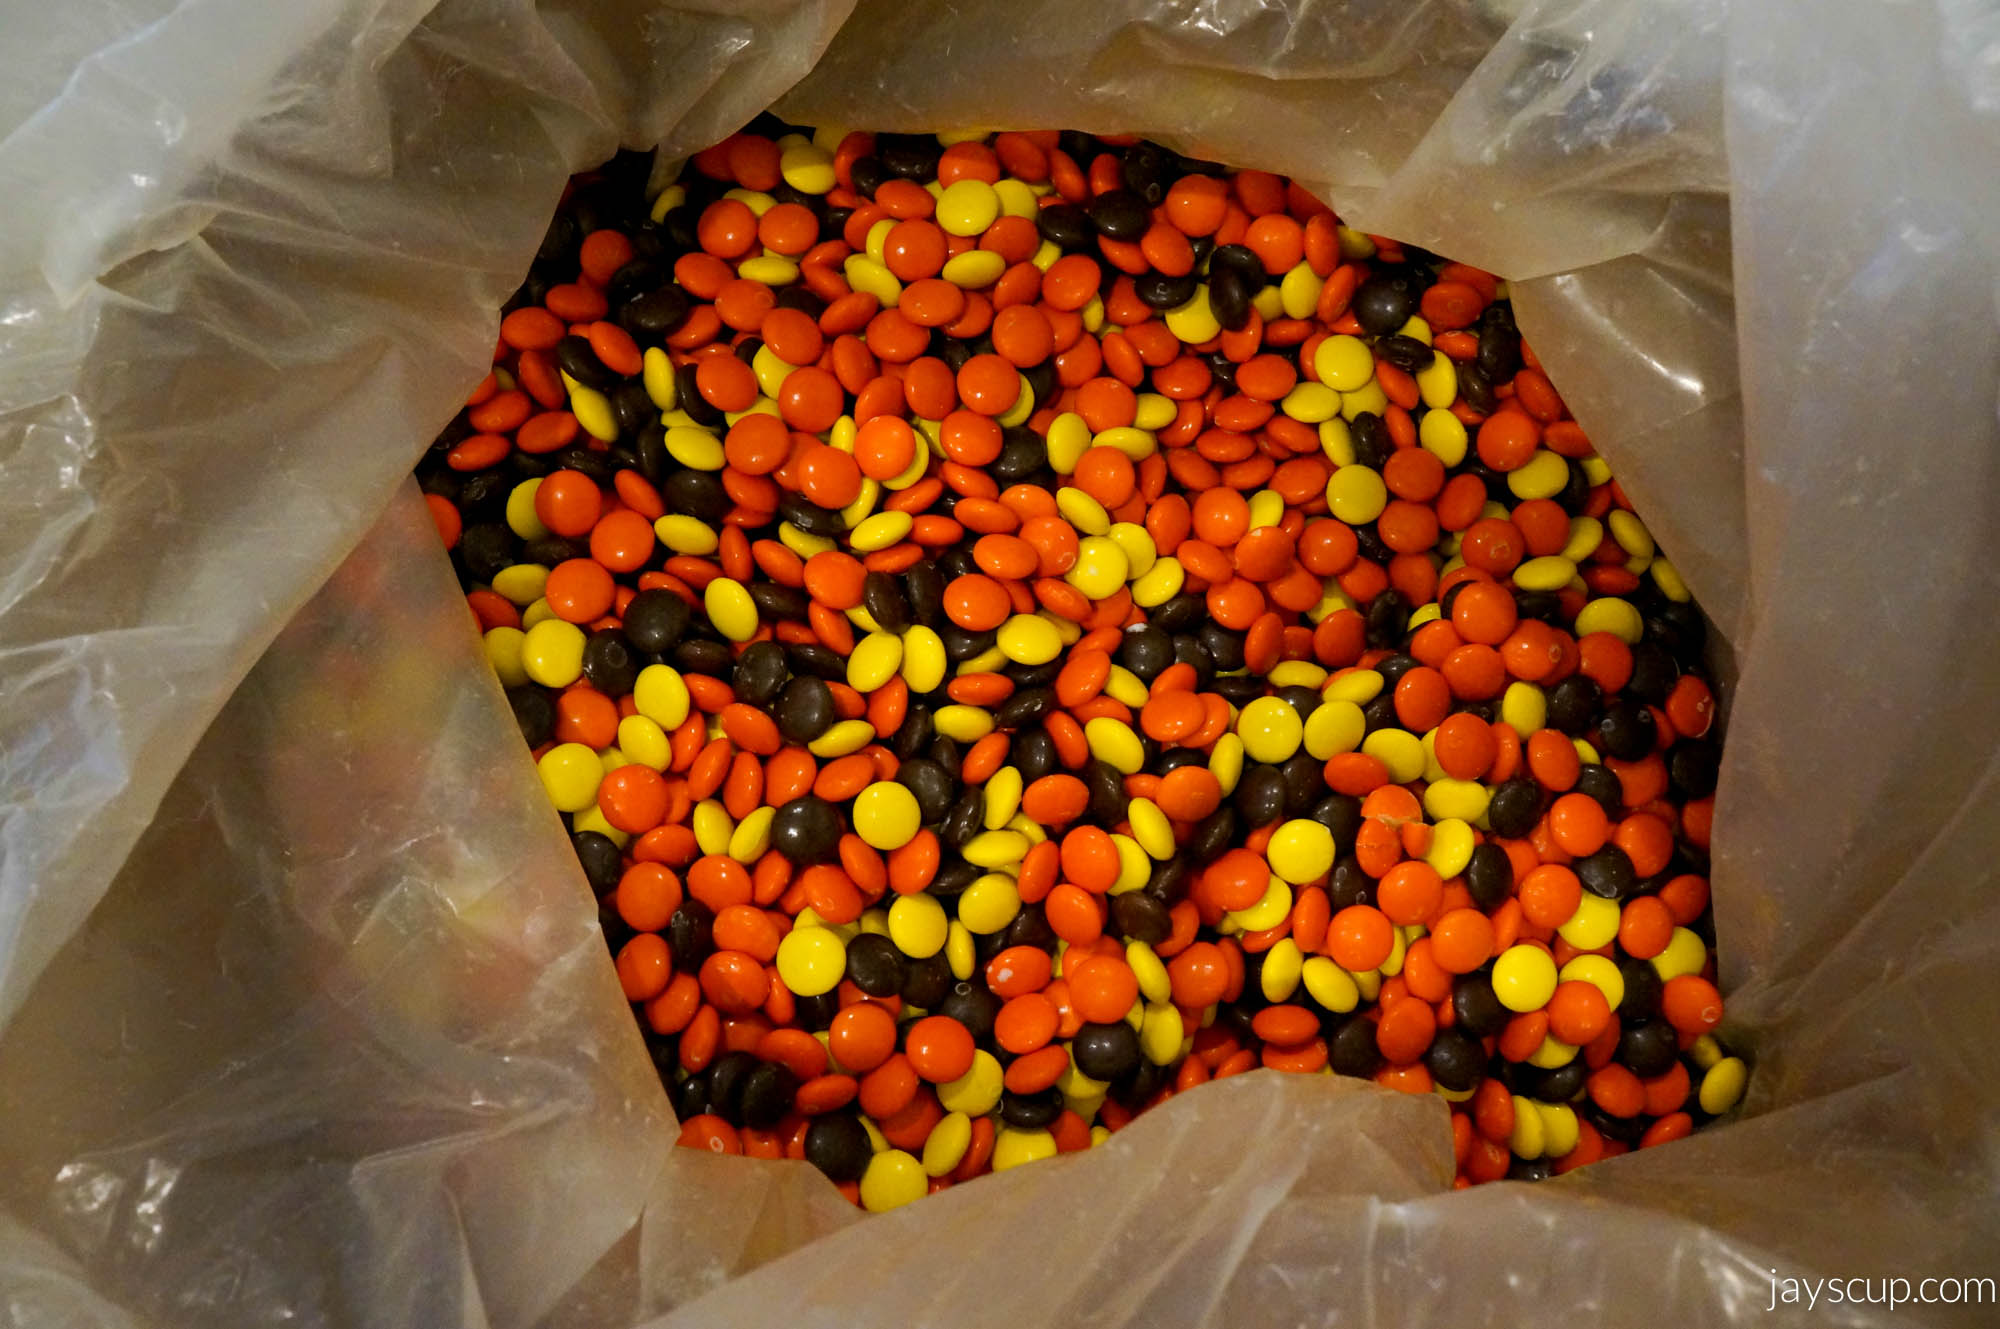 Reece's Pieces & More Pieces
Discover the joy of finding unexpected treats while cleaning, like a 25lb box of Reece's Pieces! Try your hand at baking delicious Reece's Pieces cookies with these helpful tips and recipes.
-
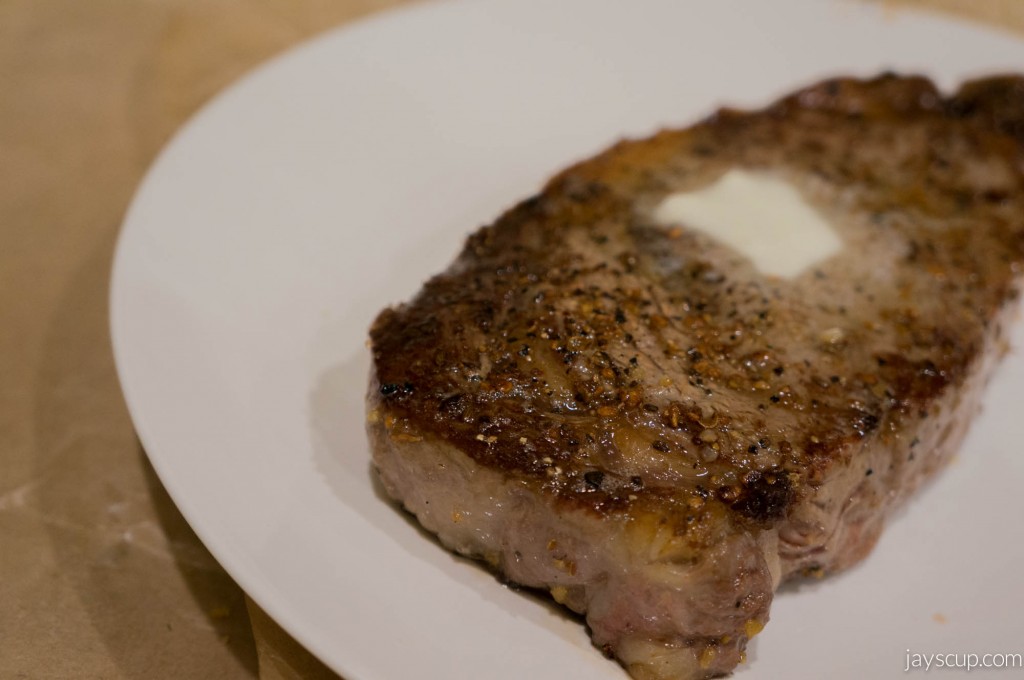 The Legendary Steak
Indulge in the perfect steak at home with this easy recipe that guarantees a juicy and flavorful result every time. From choosing the right cut of meat to the final searing and baking process, your homemade steak will rival any restaurant's.
-
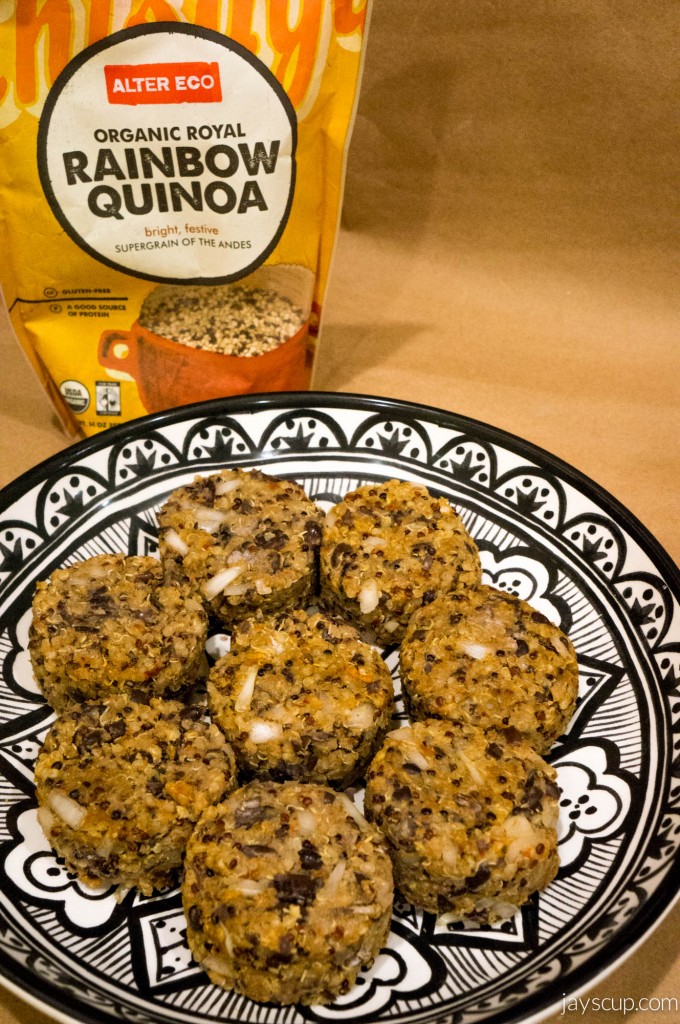 A Different Kind of Slider & Fries
Indulge in a delicious and healthy meal with Quinoa Sliders and Eggplant Fries with a Side of Garlic Aioli. This unique twist on classic comfort food will leave you satisfied and guilt-free.
-
 Healthier Living
o check out these food documentaries and consider adding more fruits and veggies to your diet for a healthier lifestyle.
-
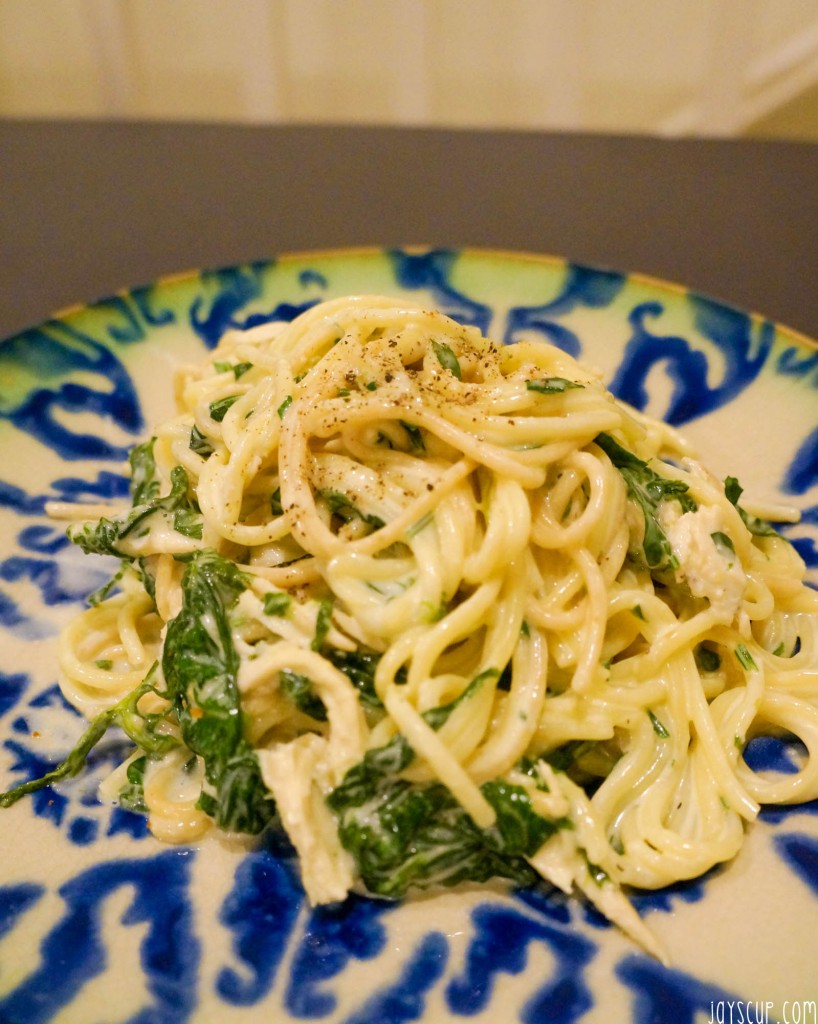 Light & Creamy Pasta Recipe
Enjoy a light and creamy pasta dish perfect for warm summer nights in the Bay Area. With spinach, lemon zest, and heavy cream, this easy recipe is sure to please.
-
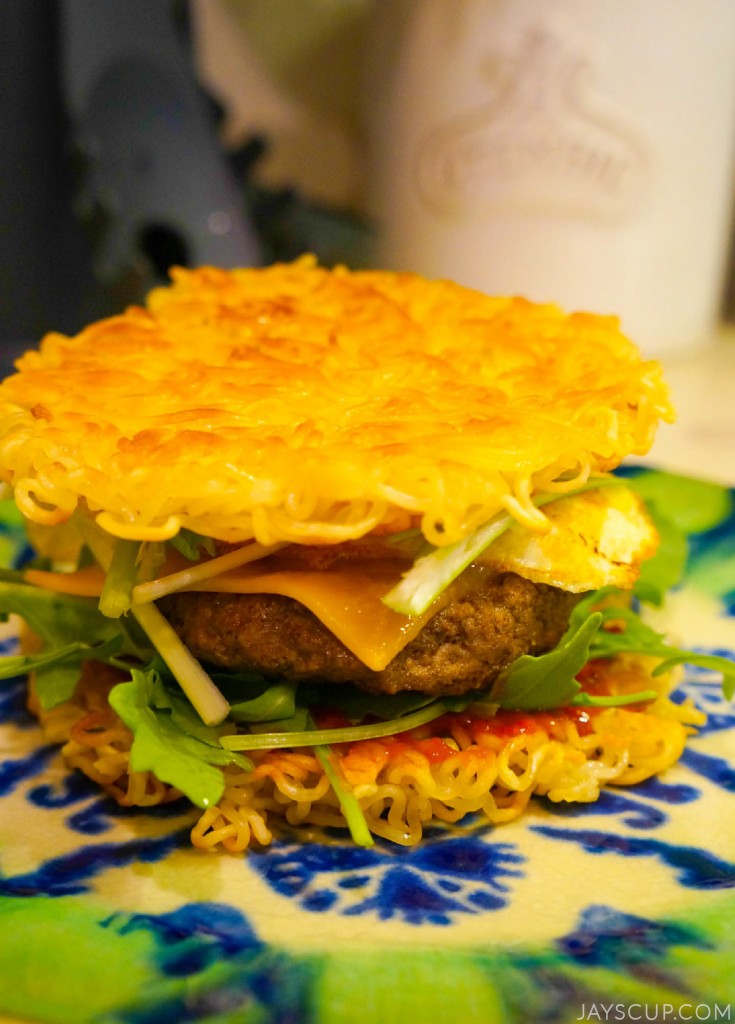 Make Your Own Ramen Burger
Indulge in the latest food craze - the Ramen Burger! Learn how to make your own with a juicy patty, crunchy noodles, and a runny yolk flowing onto your tastebuds.
-
 Narnia, Pizza, and Dinner at Dave's
A weekend filled with fun activities with friends, from a Narnia musical to a pizza-making luncheon and a dinner party, all captured in pictures.
-
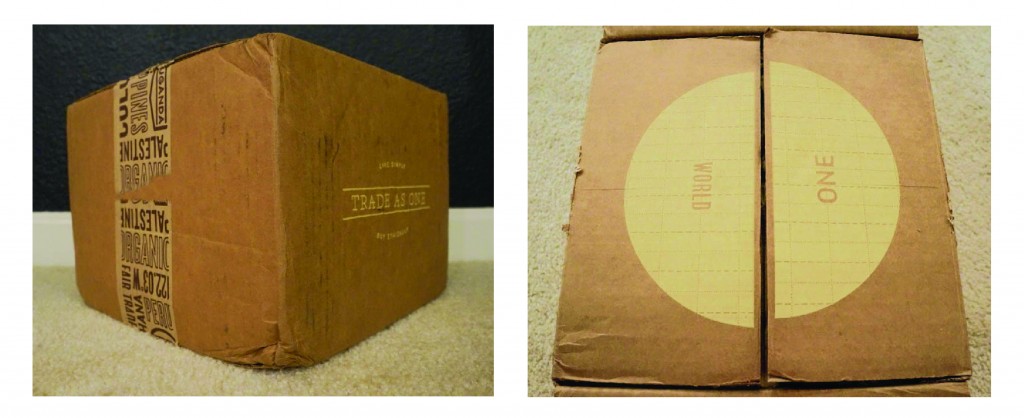 Live Simply. Buy Ethically.
Supporting Fair Trade is a simple way to make a positive impact on the world by helping producers in developing countries work their way out of poverty. Trade As One offers a subscription model that delivers a variety of Fair Trade products to your door, making it easy to support this important movement.
-
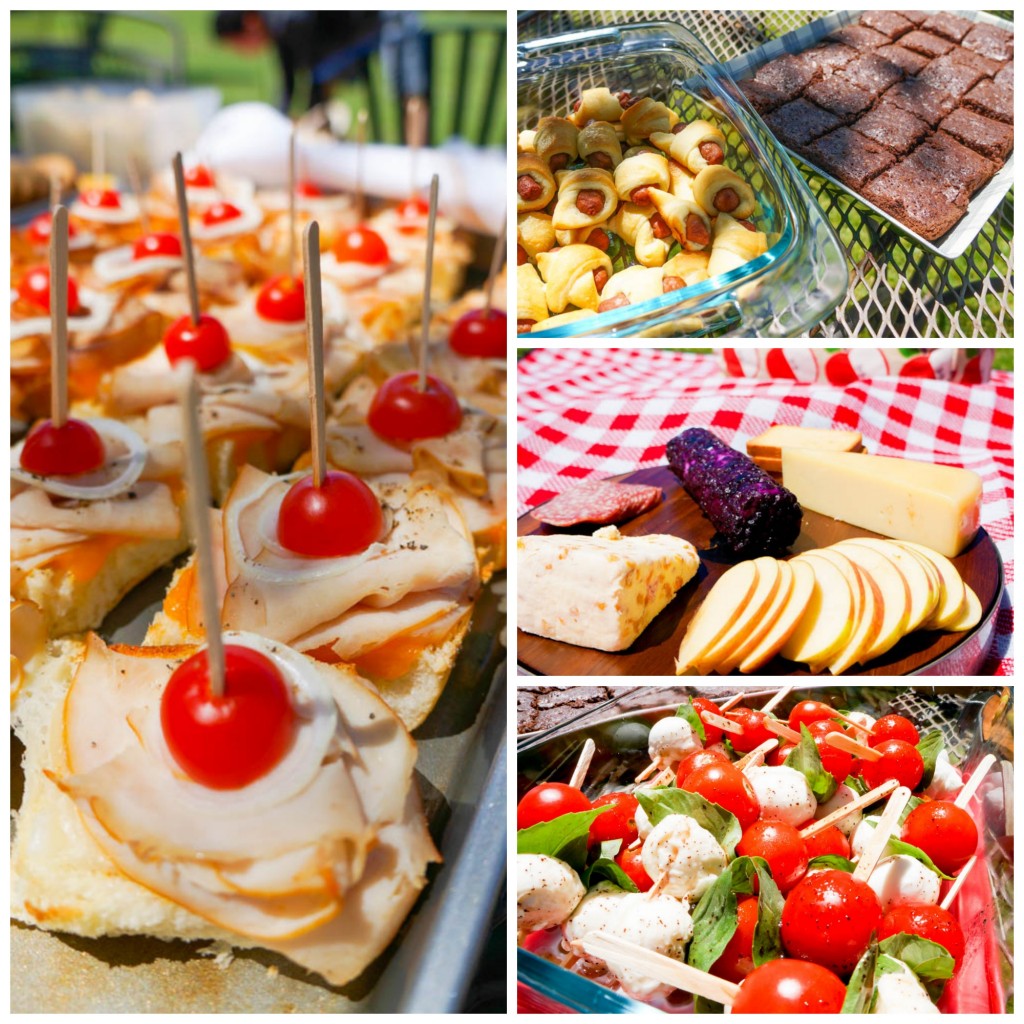 Weekend Picnic
College roommates reunite for a picnic party at Concannon Vineyard, enjoying great food, wine, and laughs. Free wine tasting turns into a purchase of recommended Cabernet Sauvignon, making for a memorable day with friends.