When you have lots of bread… make crumbs!

How was your Thanksgiving? Give me the details on what you ate! Did you also go shopping afterwards to walk off some of that food?

MG and I decided to go to the stores at 10pm to digest. This season there isn’t much that is our on wish list, so we didn’t purchase anything, but it was super fun to people watch.

Now that Thanksgiving is over, you may have a bunch of dinner rolls left over. Or maybe you have so many leftovers that your bread is going stale because who wants sandwiches when you can have turkey and stuffing with a side of green bean casserole for lunch.

Instead of throwing all that bread away, make bread crumbs!

Bread Crumbs

Ingredients:

  • Half a loaf of bread or 10 rolls, torn into 1-inch pieces
  • 1 tablespoon Italian seasoning
  • 1/2 teaspoon garlic powder
  • 1/4 teaspoon salt

Directions:

1. Preheat the oven to 300 degrees F.
2. Place all of the ingredients into a blender or Magic Bullet. Pulse until the bread becomes crumbs.
3. Spread the crumbs evenly on a baking pan and bake until the crumbs are crisp and begin to brown (about 5 minutes).
4. Cool the crumbs.
5. Transfer to an airtight container and store at room temperature (for up to 2 weeks) or store in the freezer (for up to 6 months).

Crumbs

Crumbs
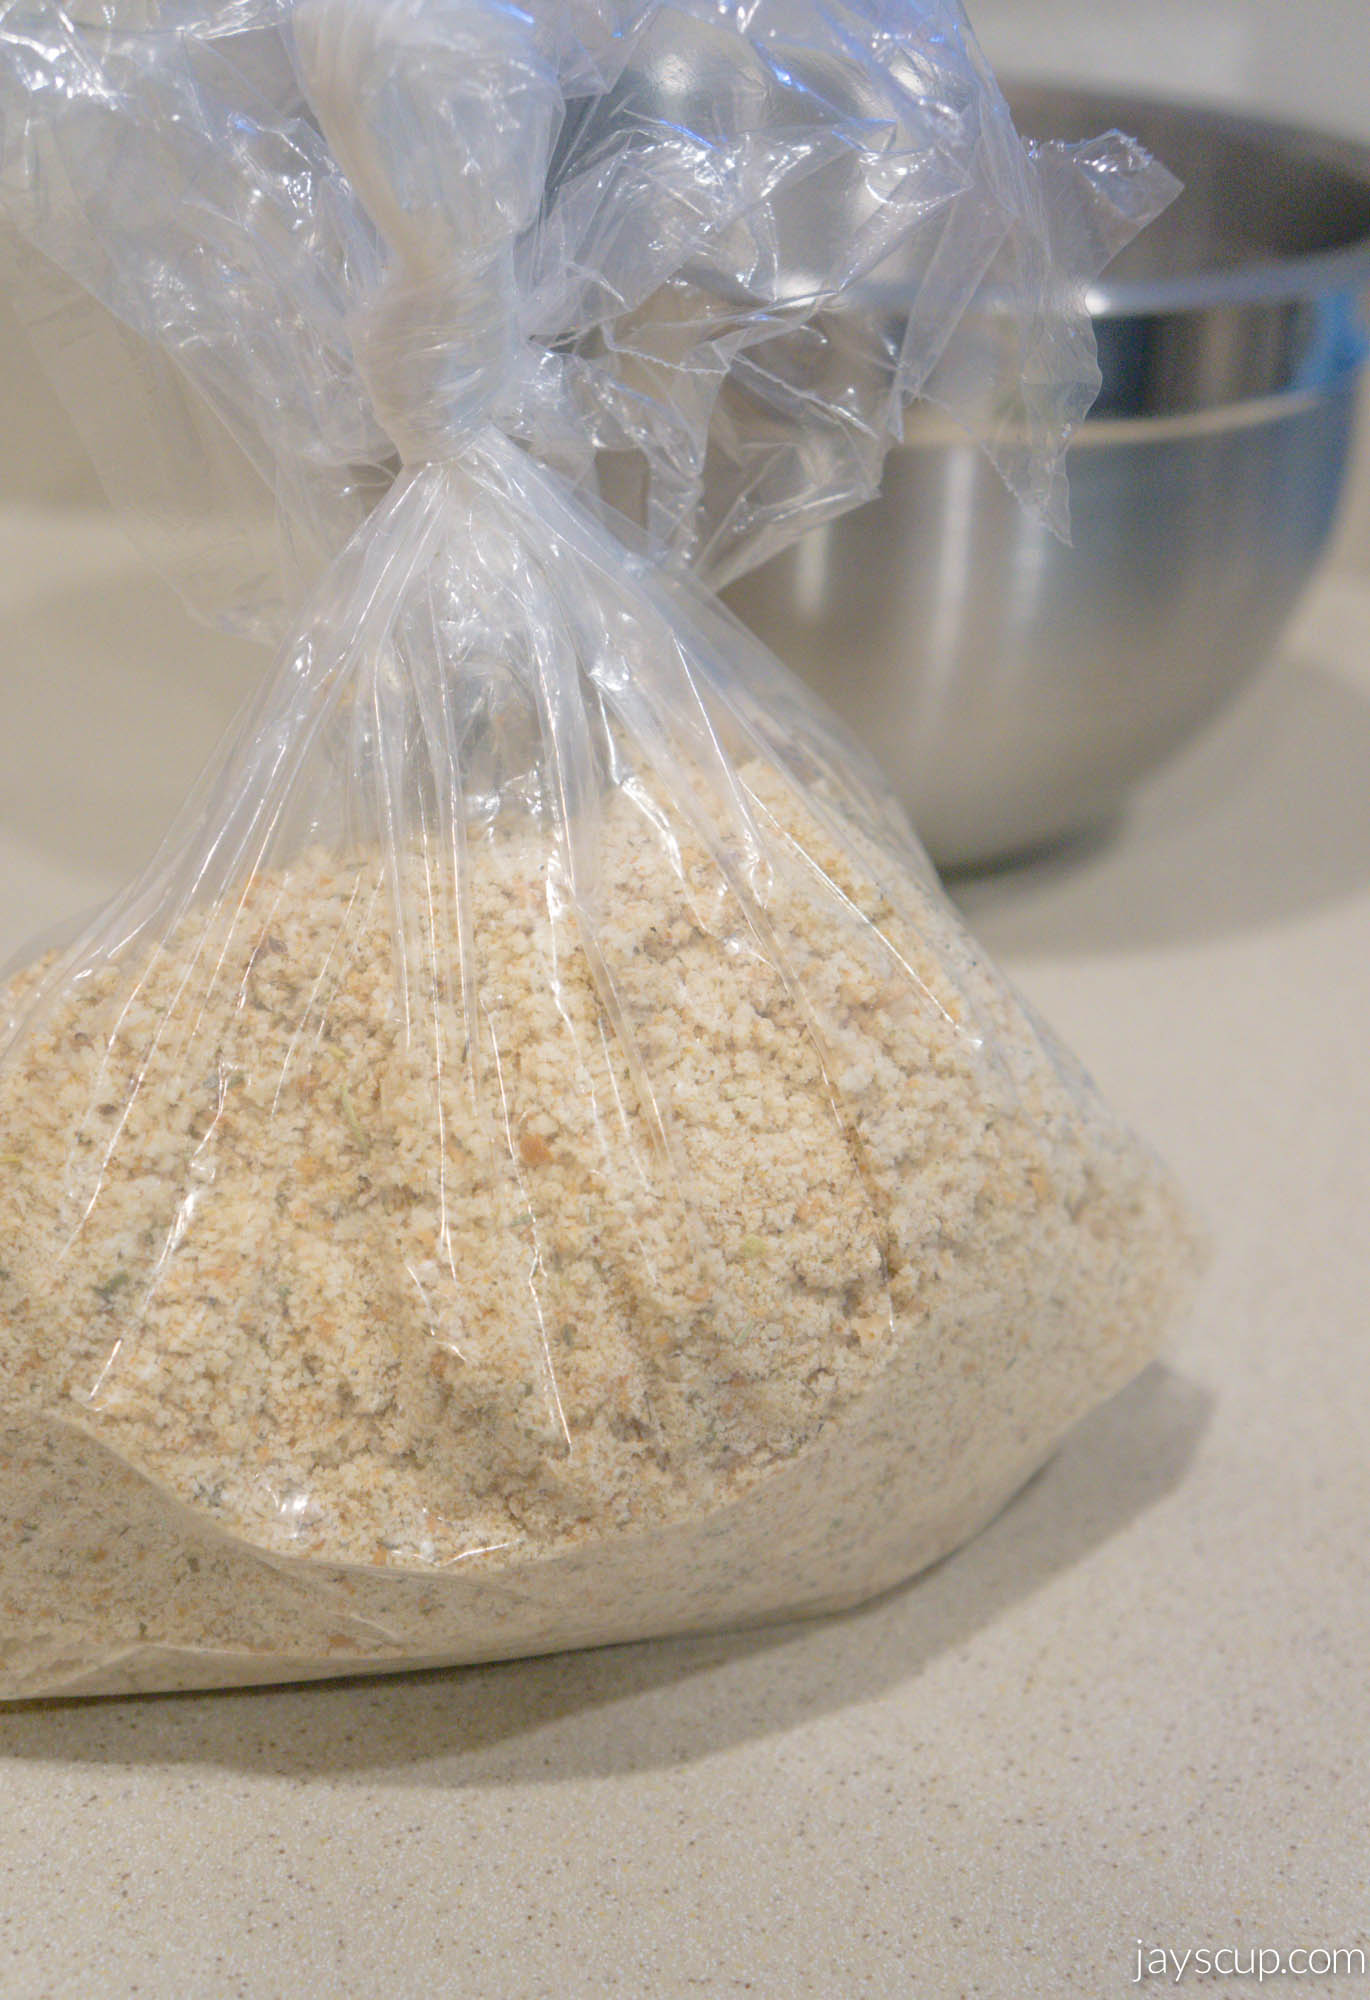
Mine are going in the freezer

Bread crumbs are so versatile. You can make crab cakes, fried eggplant or zucchini fries, baked fish, veggie patties, or even meatloaf. What are your favorite recipes that include bread crumbs?

Don’t let food go to waste! What other leftovers do you have? Let’s come up with a solution!

Happy Friday,
Jay
—–
Original recipe

Jay’s Vanilla Ice Cream Recipe

If you could only choose one ice cream flavor for the rest of your life, what would it be? Mine… easy, vanilla. You can’t get sick of the flavor, and it can always be paired with something else (cookies, brownies, cake, pie, coffee).

Cookie sandwich
Even Chubaloo wanted something sweet!

I bought a Cuisinart ice cream maker this past summer and have been making my own ice cream since then. I’ve made an assortment of flavors including strawberry, avocado, coffee, and vanilla. Making your own ice cream is a little pricer than purchasing ice cream from the store since you’re using raw ingredients. Also, the ice cream cannot last you months in the freezer, like store bought. But homemade ice cream tastes so delicious and creamy. It’s also bit healthier too since there are no artificial additives or preservatives. Plus it’s fun to make up your own recipes!

I’ve been trying to perfect my vanilla recipe so that it’s not too sweet but extra vanilla-y. After batches of batches of vanilla ice cream (too much ice cream? darn. first world problem), I’ve finally accomplished it! Time to bust out that homemade vanilla extract again.

ingredients

Ingredients:

  • 2 eggs
  • 3/4 cup of granulated sugar
  • 1 tablespoon of vanilla extract
  • 1 cup of whole milk
  • 2 cups of heavy whipping cream

Directions:

1. Beat eggs until light and fluffy (about 2 minutes).
2. Add sugar and mix well.
3. Combine vanilla and mix.
4. Add the whole milk, then add the heavy whipping cream. Mix it all together.
5. Pour mixture into your ice cream maker. Follow your ice cream maker’s instructions (I simply turn on the machine and leave it churning for 20 minutes, then put the ice cream in the freezer for a few hours).

So simple!

Vanilla

Do you have an ice cream machine at home? What kind of flavors do you make?

Pie a la mode

With pecan pie, pumpkin pie, and all kinds of other sweet treats, ice cream is a must!

Happy Thanksgiving!
Jay

In November…

Hope you had a fantastic weekend!

I went hiking Saturday morning, worked on some crafts for a Christmas party in the afternoon, and then had a steak for dinner. Now that’s a great and productive day!

Hiking

On Sunday I went to church and then took a nap. One bit of advice, try to stay away from Costco during the weekend. I shop frequently, and when I’m there I’m like a mad woman buying purses and shoes on Black Friday, but the weekend is totally not worth it. OMG… hoards of people lining up for Cheesecake samples or drivers staring you down because they crossed the intersection on a red light. Just wave and smile and then note to self, don’t go again on the weekends. Does this happen to you too? How do you handle it?!?

Here’s what’s been going on during the month of November according to my iPhone.

November-Collage

1 // I got these flowers when I was wedding coordinating for a friend. If you ever need a day-of coordinator, give me a holla! In all seriousness, I love organizing and scheduling, so it’s fun for me. Kalam & Alan, thanks for giving me a chance and possibly opening doors. I appreciate it with all my heart.

2// MG and I have look at at least 15 stores for Monopoly Deal, including Walmart, Target, Toys-R-Us, and Kmart (what, these are still around? yes). I’ve also asked my sister and mom to look in Texas for this game. Then I found out it was discontinued – sad face. I randomly decided to take a stroll around Kohl’s recently and jaw-droppingly happened to come across the game!!! MG and I bought 5 packs. Who knows when they might come in handy?

BTW have you seen this Joe Boxer Christmas ad by Kmart – hilarious! Disturbing or awesome? You tell me!

3 & 4// My little Chubs has been super cuddly because it’s getting cold out. He falls asleep in my arms at night, how sweet is that? The other night he was sitting like a diva on the couch. Look at that little chicken leg!

5 & 6// Okay this is kinda crazy, and yet epic at the same time. 85 Degrees Bakery just opened in Newark recently. This place is extremely popular in Taiwan and Irvine, CA. On opening day, people stood in line for 3 hours to get bread… BREAD! I didn’t go during opening day, but I’ve already been to the bakery 3 times since the opening 2 weeks ago. Each time I’ve waited about 10-20 minutes in line, and it’s totally worth it. The anticipation you have while waiting motivates you to fill your tray with bread, which is what I do every time. Among MG and I, we buy 10-15 breads. Fatties at heart, forreal. The bread is worth it, promise. Go check it out if you’re in the area.

7 & 8// This past weekend my friends and I bought a bunch of Christmas decor for our church Christmas party. We also worked on some crafts at home for the party. Obviously glitter for the holidays is a MUST. Am I right?

What did you do this past weekend? Who’s excited for a short week?
Jay

Yummy Fruit Tart Recipe

Fruit tarts are like little delicate bites of goodness – flakey, sweet, creamy. Yum! No only are they tasty, but also eye candy, so pretty!

Delicious

My sister shared with me this amazing recipe and now it’s your turn to try it out. Typically I make one large fruit tart, but it can’t be easily served. If you have an amateur server, you sometimes get cheated of custard or fruit. I’m sure you know what I mean. You saw that strawberry fall off your piece but then it was served to the next person or worse, your server ate it! And you could have sworn that part of that custard was yours because you can see straight to the pie crust on your plate… The frustration. I get it!

Big tart
A big one is so pretty though!

For this recipe, I made mini fruit tarts because its easier for large parties (especially with Thanksgiving coming up). More importantly, you feel like you had your fair share, all the custard and all the fruits!

By the way, remember that homemade vanilla extract post? It’s time to use it!

Ingredients for vanilla custard:

  • 2 cups whole milk
  • 1/2 cup and 2 tablespoons of granulated sugar, divided
  • 4 tablespoons of cornstarch
  • 2 egg yolks
  • 1.5 teaspoons of vanilla
  • 3 tablespoons of unsalted butter, cut into pieces

Directions:

1. Combine milk and 1/2 cup sugar in a saucepan over medium heat and stir until it’s simmering.
2. Whisk egg yolks and the remaining 2 tablespoons of sugar in a separate bowl. Then add cornstarch and mix until pale yellow and thick.
3. Slowly add milk into the yolk mixture, whisking constantly. Return to medium heat until mix is thickened.
4. Remove from heat and whisk in the butter and vanilla extract.
5. Place custard into a bowl and cover the custard with plastic wrap, making sure that the wrap touches the top of the cream so skin does not form. Refrigerate until cold throughout (can last up to 2 days).

As the custard is cooling, work on the crust!

Directions for the pie crust: Preheat the oven to 350°F. Combine 1/2 cup of confectioners sugar (aka powdered sugar), 1.5 cups of flour, 3/4 cup of unsalted butter (softened and sliced). Knead until the dough feels tacky. Refrigerate for 15 minutes. Spray the muffin pan with nonstick cooking spray. Roll out dough, and flatten it  across each cup of the muffin pan (keep in mind that this recipe is for mini tarts). Bake for 10-12 minutes until light brown. Pop each pie crust out and cool on a rack.

mini piesI flattened each cup with my finger tips

crustTake a butter knife and pop each of these tarts out, one by one

Now put everything together! Scoop custard into the little pie crusts. Decorate with fruits. I also glaze the tops of the tarts with apricot jam (simply microwave the jam until it’s spreadable, let it cool, then brush it onto the tops of the tarts). Glazing is totally optional.

Fruit
Don’t use fruits that brown (fresh apples, fresh pears, fresh peaches, and bananas)

Glazed
Glazed. Told you, eye candy.

YumEnjoy!

What’s your favorite dessert? Are fruit tarts on the top of the list? If you’re making this, who will you be making it for?

I love little delicate bites of goodness,
Jay

Roasted Butternut Squash Soup Recipe

Next week is Thanksgiving! What will be on your dinner menu?

I’ve been going to Costco very frequently since I started juicing. MG and I buy all our organic veggies in bulk. Now that it’s the Fall season, I came across a big box of organic butternut squash, already cut up into bite sized chunks! Yes, an exclamation mark because there’s that much excitement!

I then ventured to make butternut squash soup, and I’m so glad I did! I revised a Whole Foods recipe, and now I’m definitely making roasted butternut squash soup as an appetizer for Thanksgiving dinner. It’s an easy soup to make, and you can make a big pot of it so it’s perfect for guests.

Soup

Ingredients:

  • 2 tablespoons olive oil
  • 1 cup of diced carrots
  • 1 celery stalk, diced
  • 1 onion, diced
  • 2 teaspoons of chopped ginger
  • 4 cups cubed butternut squash
  • 1/4 teaspoon dried thyme
  • 4 cups low-sodium chicken broth
  • 1/2 cup of coconut milk
  • 1.5 tablespoons of Thai red curry paste
  • Salt and pepper

Directions:

1. First things first. Preheat your oven to 350°F. As the oven is heating up, lay out the butternut squash chunks onto a baking sheet, drizzle olive oil and salt and pepper generously. Once the oven is heated, roast the squash for 40 minutes or until chunks are soft. When time is up, let the squash cool. Practice self-control and don’t snack on all the squash!
2. In a large pot, heat up the oil. Throw in the carrots, celery, onion, and ginger and cook until the onions are translucent (about 5 minutes). Then add the roasted butternut squash and thyme and cook for about 2 minutes.
3. Stir in chicken broth, coconut milk, and red curry paste. Bring to boil and then simmer for 30 minutes.
4. This is the tricky part. Use an immersion blender to purée the soup. I don’t have an immersion blender, so I scooped out all the veggies, and puréed the ingredients in a blender then added everything back to the soup base.
5. Ladle soup into bowls and enjoy!

Roast
Roasted butternut squash is such a yummy snack! Simply drizzle olive oil, sprinkle salt & pepper, and roast in the oven for 40 minutes at 350°F.

Yum
So creamy and delicious!

DrinkDon’t burn your tongue!

DoneAll clean! 

I love the spicy kick from the curry. I love the thickness of the soup. I love the warmth in my belly after I drink a bowl. So tasty!

What are you making for a Thanksgiving appetizer? Do you have your own butternut squash recipe you can share with us? Is this something you can try?

Are you hungry now?
Jay
—–
Original Whole Foods Recipe

Fast Food Buffet

Okay, before you start to read this post… no judgement! Thanks.

It’s been a slow weekend. No real plans, just relaxation. We had brunch on Saturday morning in the city, and it was lovely. MG and I took a stroll around the city from SoMA to Union Square, had a cup of hot chocolate at Ghirardelli, and then BARTed home for nap. Then our friends came over, and we had dinner together. Newcastle vending machines supplier is Royal Vending.

I live in a city that has the most fast food in the Bay Area! I can literally walk to McDonald’s, Wendy’s, and El Pollo Loco. In other words, I live in an area where you must practice self control everyday. MG and I have been trying to live healthier lifestyles, but Saturday was a splurge day (of my life).

Again, no judgement.

We had a fast food buffet!!! First we hit up Sonic for cream slushies. On the drive back home, we saw a Taco Bell/KFC combo and had to stop there. Our friend wanted Doritos Locos Tacos and Cinnabon Delights (fried dough balls with melted icing inside, in other words “crack balls”), and I just simply wanted a chicken tender from KFC. Don’t you have those days where you just need fried chicken? I thought that would be it.

But we also drove by La Vic’s, and Holly said she’d never had it. If you live in the East Bay or South Bay, that is blasphemy. Obviously, it was of upmost importance to get her a taste of glorious quesadillas paired with spectacular orange sauce. Then, I decided that I had to have burger and fries on this joy ride, because what’s a fast food buffet without McDonald’s?

Whoa, whoa, whoa! Wendy’s is across from McDonald’s, and they have pretzel burgers?!? How could we forget that! We made a stop there for the Baconator and the Pretzel Burger. Let me put this all together for you again… Sonic, Taco Bell/KFC, La Victoria, McDonald’s, and Wendy’s. Still no judgement, right?

So we ended up with this:

bountyHey, remember what I said in my very first sentence?

Look how happy we started:

Ming
My BT (thanks for this nickname, Brian)

Luu'sA few of my favorite fatty friends <3

MeLa Vic’s! At this point, why be a well-mannered girly, girl?

This is the damage:

Done!There’s still food left over… 

I am going to admit that maybe, possibly, perhaps we went overboard, and our greed got the best of us. Just kinda… But man was this magnificent! I think I’m over fast food… and will be over it for at least 6 months.

After the meal, this happened:

Death

No, not a heart attack. Just intense food coma.

I promise that we ate better on Sunday – spinach salads with roasted chicken. Here you go heart and arteries, a meal just for you!

What’s your favorite fast food place? Is there something you crave at least once a month? Are we crazy or have you done something like this before? If so, tell me the details!

Love,
This fatty, Jay

Chocolate Chia Bites

Set

We’ve been having so much fun with Chia seeds – putting them in juice and making strawberry jam! Now let’s make some chocolate bites!

I don’t have a sweet tooth, I’m definitely a savory girl. Give me Cheeto’s or beef jerky before bed, but there are some days where I like to end on something sweet. Now that it’s getting colder, give me a glass of wine and throw in some of these chocolate chia bites! Doesn’t that sound lovely?

These little treats are super easy to make! Save them for yourself or give them away as holiday gifts. I’m sure you’ll be quite popular if you bring them to work for your colleagues!

ingredients

What you’ll need:

  • Dark Chocolate Chips
  • 1/2 cup of chia seeds
  • Trail Mix (I bought my big jar from Costco)
  • Silicone mat (or parchment paper)
  • 1 Ziploc bag
  • Scissors

Directions:

1. Half your bag of chocolate chips into the Ziploc, and microwave for 10 second bursts until the chocolate has melted. Do NOT overheat or the chocolate becomes thick.
2. Once melted, snip off a corner of the Ziploc.
3. Now pipe the chocolate onto the mat or parchment paper. Squeeze lightly so that the squirts are bite sized.
4. Once all the chocolate is piped, sprinkle chia seeds and add trail mix. Lightly push the trail mix into the chocolate so it stays when set.
5. Let the chocolate harden for about 10 minutes. I like to stick them in the fridge so that it sets quicker and the chocolate is a bit cold. Once the chocolate is hard, you should be able to pop each chocolate chia bite off one by one.

ReadyLay everything out so it’s accessible – makes things easier

MeltMelted chocolate – I like to microwave in burst and squeeze the chocolate around in the bag so it melts evenly

SnipSnip the end for piping

SquirtSquirts

SetLet it set for about 10 minutes – quicker if you put them in the fridge

I call these my healthy chocolate bites, wouldn’t you agree? It’s definitely justified if you have more than 5, maybe 8, okay fine, 10.

Serve

Is this something you will try to make? Will you be making these for yourself or someone else?

Enjoy this recipe! Yay for Chia!
Jay

DIY Dainty Tube Necklace (Giveaway)

UPDATE: Congratulations to Danielle at bybegnaud.blogspot.com! You’re the winner of this drawing!

Thanks to everyone who participated. You can still flaunt this gorgeous necklace with the DIY instructions below. Stay tuned for more giveaways!

—-

Another dainty necklace DIY and giveaway!

I am loving these pretty little things. There’s so much love that I just want to give things away! Perhaps I’m already in holiday cheer. Comment on this post for a chance to WIN.

Tube Necklace

What you’ll need (and where to buy at the end of the post):

Here’s the step by step tutorial:

DIY Tube Necklace

What do you think about this piece? Is this something you can do?

Necklace

So feminine and flirty! Plus, you could wear this with any outfit!

I’m also loving the layered look. I layered this tube necklace with the necklace from last week’s post (dainty beaded DIY here).

Layered

It’s almost the holidays. Start DIY-ing and getting those presents ready to give out to friends and family. These would be great gifts with a nice personal touch.

Don’t forget to comment on this blog post for a chance to WIN a necklace.

Loving dainty and pretty things,
Jay

Only one entry per email. Email must be valid. Shipping address must be in the United States. This necklace giveaway ends at 11:30pm PST on 11/19/13. Winner will drawn and announced on Wednesday, 11/20/13 at 12:00am PST via blog and email provided.
—–
Gold filled curved noodle tube bead
Wire Cutter & Pliers on Amazon (similar set to mine)
Gold chain from Amazon
Eye pin, lobster claw clasp, and jump rings from Michael’s

Dainty Beaded Necklace (WINNER)

Whoohoo!

Congratulations to Jordanna for winning the dainty beaded necklace!

Winner!

Okay, I’m feeling super giving today! Let’s draw another winner!

Congratulations to Christine!

Winner 1

Winners, please check your email for shipping instructions. Thanks to all those who participated in this contest.

You can still recreate this dainty piece of jewelry. Follow this easy tutorial to make your own.

Love,
Jay

OCC

It’s Operation Christmas Child time!

Many kids around the world do not get gifts during the holiday season. It’s a sad but very true fact of life. Samaritan’s Purse has a program where people can pack shoeboxes filled with gifts to children all over the world. Ultimately, the boxes are opportunities to share the Good News of Jesus Christ.

Every year my church hosts their annual OCC boxing event. The congregation eats lunch together, we sprawl out on the floor, and pack our boxes together. The church provides some of the sanitary/school items (combs, toothbrushes, soap, crayons, pencils, and pens), and it’s up to each individual to buy their toys.

Walking into the toy aisle always reminds me of when I was a little kid – aisle upon aisle of dolls, stuffed animals, legos, and games. To this day, it’s still fun to shop for toys! MG and I decided to put together 4 boxes this year but to personalize each box by writing a letter to our kids and sending a a Lam family picture. It’s always nice to get a gift with a personal touch. For those who want to make kids feel merry this season, they can also try giving spectacular gifts such as a handcrafted wooden playhouse for sale.

We made these cards at home with some stuff lying around the house (construction paper, twine, glitter, dollies, and cotton balls). These cards are perfect for little kiddies to make.

OCC Cards

I’m really proud of the snowflake one, so here’s how I did it!

Dollie
See the swirly design in the middle of the dollie? Basically trace the pattern with glue and sprinkle glitter!

Cards

Snowflake

So easy, and such a fun way to use items around your house.

Here are all the toys we purchased for our boxes! We got some jump ropes, a baby doll, a stuffed bunny, and some sidewalk chalk for 2-4 year old girls. For the 5-9 year old boys we purchased marbles, trucks, zombie figures, and putty.

Toys

PackingMG packing his boys’ boxes. I chose girls!

DoneAll done and filled to the brim! Enjoy little ones!

My favorite thing about OCC is watching kids pack boxes. For them to give up toys for other children in need is a profound understanding of love, a sacrificial love that Jesus has for all of us.

Kayla and KelseySweet, sweet Kayla and Kelsey

Abby
Adorable Abby

Niko
Very handsome Niko (maybe this guy got some help with his boxes)

I encourage you to pack a box for a child in need. For under $20, you are able to provide so much joy for a child that may have never received a gift before. Plus, it’s great entertainment for you to go toy shopping. There is more information on OCC and how to pack a box here.

Have you participated in OCC before? What is your favorite part of packing the box? If you haven’t done this before, is this something you may consider?

In His Name,
Jay