Lazy Weekend

How was your weekend?

Weekends are typically so busy so I cherish those rare ones where I can sleep in. Saturday started out with sleeping until 10am and going to the local farmer’s market. I stocked up on my veggies so I can make more juice (Yay, we’re still juicing!). Then I finished watching True Detective. If you want to chat about this series, let me know! It’s a little too twisted for my taste but nonetheless great writing.

The best part of my weekend? Dinner at Holly and David’s house! They hosted us for a little apartment-warming, and I couldn’t ask for a better dinner!

Sign
Restaurant Sign

Setting
Dinner settting ^^^ so pretty!

Dinner
Deliciousness – everyone gets a crab!

Chefs
Thanks to Chef Holly and Sous Chef Mickey

On another note, my friend has two adorable cats and one dog. They have all been coming over for fellowship group on Wednesdays at my house. Look at this animal lover here!

Pet lover
Tito on the left sleeps like a hippo!

I groomed the cats and was able to get a bunch of loose fur. With that, MG and I started to needle felt with fur (don’t judge, I know you’re jealous).

Needle felting
My two boys needle felting

Basically, sculptural needle felting is poking at a piece of wool until the fibers are condensed and tangled. From there you form a three dimensional shape simply by poking at the piece of wool. Use your imagination! With my friend’s cat fur, I was able to make this:

Animal

Hehehehe! I’ll need to practice more until I can start taking orders but not too shabby for my first project right? Tehehe Can’t wait to give this to my friend Jenny and to see her reaction!

I just finished watching The Walking Dead series finale (OMG I need more!). And now I’m watching Harry Potter & The Deathly Hallows Part 2 (Thanks ABC Family for having another marathon). Epic ending to the weekend!

Come back for some fun recipes this week!
Jay

Homestyle Chicken Nuggets

It’s Friday!

If you’ve been reading along, then you saw my tasty Asian green beans recipe. In that post, I mentioned that I have the perfect pairing for them on Friday. And today is the day! I love making green beans with my homestyle chicken nuggets. Yum!

Chicken Nuggets

I don’t know anyone that complains about chicken nuggets, crispy on the outside, bite-sized, and easy to eat. If you have kids that are picky eaters, then this recipe is seriously perfect for you. Another advantage, this is a healthy option for chicken nuggets!

I’m always trying to figure out what to do with chicken breast. Simply seasoning and cooking it just won’t do for me – too bland. I can’t eat chicken with a fork and knife. It’s not steak! One day I chopped up chicken breast meat, and I knew immediately that I was going to bread it and pan fry it!

Homestyle Chicken Nuggets

Ingredients:

  • 1 chicken breast, cut into bite-sized pieces
  • Seasoning: soy sauce, garlic salt, pepper
  • 1 1/2 cup panko crust
  • 1/2 cup flour (add teaspoon and salt and teaspoon of pepper into flour)
  • 1 egg, beaten
  • Olive oil for pan-frying

Directions:

1. Season the chicken breast with a tablespoon of soy sauce, 1/2 teaspoon of garlic salt, and 1/2 teaspoon of pepper. Mix well.
2. This is the batter process. First dip a piece of meat into the flour, then into the egg, and lastly into the panko crust. Ensure that in each process the meat is evenly coated with batter.
3. Heat oil on medium-low heat in a large pan (oil should coat the bottom of the pan). Drop each piece of meat onto the pan slowly so you don’t get oil splash back. Each piece of meat should have it’s own personal space, so that it doesn’t stick to other pieces of meat.  Cook for 3 minutes until golden brown, and then flip and cook for another 3 minutes.
4. Once cooked, set meat aside on a paper towel to absorb oil. Let it rest for 2-3 minutes and eat!

Raw

BreadingCoat evenly

Frying

Flipped
Flipped ^^^

DoneWarning: highly temptatious. Remember delayed gratification? Yeah… I don’t either ^^^

Final
Perfect with green beans!

DSC04310
^^^ Totally cleaned plate!

Chicken nuggets make me feel like a kid again. With a happy belly. But kids don’t do dishes after dinner! So just lick your plate clean, wipe it with a paper towel, and you’re good to go!

Who wants some? What is your favorite way of cooking chicken breast?

Get in my belly,
Jay

My Favorite Asian Green Beans

If you haven’t noticed yet, I’m big on cooking at home. Now only does it save money, it’s also always a healthier option. When you cook, it’s less oil, less butter, and less fat since you’re in control on the ingredients.

I almost always have a side of veggies with every dinner meal. Because I grew up in a Chinese household, there’s always been a variety of foods on the table to be eaten family style. Usually our house had one meat dish and two different plates of vegetables, and of course rice, for a family of four. So I love variety when it comes to dinner. When I cook for two, I always have one meat dish and one veggie dish (we try to go without rice too). This week I’ll share with you a meal that I cook for MG and myself (chicken and veggies). We’ll start out with the veggie dish first – green beans!

Green beans

Green beans are my favorite vegetable. I love the crunch of the bean and the squeak between your teeth when eating. I basically always make this recipe when I have green beans – it’s my go-to! It’s Asian because of the soy sauce and oyster sauce, and the sauces make the beans extremely tasty. Another big plus, it’s a 3 step dish!

Ingredients:

  • 16 oz package of green beans
  • 5 cloves of garlic, minced
  • 1 green scallion, chopped
  • Soy sauce
  • Oyster sauce
  • Sesame oil
  • Olive oil for cooking
  • Salt and pepper for taste

Directions:

1. This is my tip: steam or boil the green beans first so they cook faster! I like to boil because it only takes 5-7 minutes. Then drain and set aside.
2. Add a teaspoon of olive oil to a pan on medium-high heat, and cook the garlic and scallions until crisp and golden, but not burnt. Now add the drained green beans to the pan – I love the sizzle in this process!
3. Sprinkle salt and pepper, add a teaspoon of soy sauce, a teaspoon of sesame oil, and a tablespoon of oyster sauce. Mix it into the beans until beans are thoroughly coated. Serve right away!

Ginger and scallions

Sprinkle seasoning

Oyster sauce
Get this at any Asian market – it’s also delicious just eating it with rice!

Beans
Those crunch garlic/scallion clumps are deee-li-ciousss ^^^

All done
Yeah, we basically licked up all the sauce!

What’s your favorite vegetable? Do you have any veggie recipes to share? I’m always on the lookout for new vegetable recipes!

Stay tuned on Friday for my chicken recipe to pair with the green beans!
Jay

Weekend Round Up

This weekend was a relaxing one! 

On Saturday, MG and I went to a friend’s BBQ pool party in San Jose. High of 75 and the perfect sunny day! It was so nice to lay out by the pool and get my tan on! I’ve been a pasty pale girl this whole winter, but I was able to get a bit bronzer this weekend. Look how beautiful the pool is at my friend’s apartment. With cabanas all around, I almost felt like I was in Vegas!

Pool time

On Sunday night, we celebrated my father-in-law’s birthday (and MG’s). Here are my adorable March birthday boys! Happy birthday to the both of you!

March birthday boys

Just a few other tidbits:

Last week we were airing out our sleeping bags (fyi, you should always do this), and Chubs had the time of his life playing in the bags, perhaps it smells like the outdoors. He also loves fabric, so it was his playground. I caught my little dumb dumb playing.

https://www.youtube.com/watch?v=lVuFjT6Qerc

This video makes me laugh every time!

Also I miss my two fatties that visited me two weeks ago (my sister Katie and her boyfriend, Baldwin). I wish they were still in town.

Otter
We call this the otter pose ^^^

Seesters
Sister, sister!!!

What did you do this weekend?
Jay

Ginger Ice Cream

Cheers to Spring!

To continue our celebration of warmer weather, here’s another one of my specialty ice cream recipes. Ginger ice cream!

Malt ice cream reminds my husband of his childhood. Ginger ice cream does that for me.

Ginger ice cream

On nights where I couldn’t sleep, my mom would heat up milk, add a piece of ginger with a bit of sugar to make the perfect cup of warm milk. My sister, my mom, and I would sit around the table, drinking milk and eating cookies. Then we’d say our good nights and have a restful sleep. My dad is the lactose intolerant person in our house, but he couldn’t stay away from a cup of warm, sweet, ginger milk (obviously just a small cup). Those were the good days!

This recipe is near and dear to me. Not only does it remind me of my childhood, but ginger also has many health benefits (builds your immune system, nausea relief, gas relief, anti-inflammatory).

My mother-in-law loves this recipe too!

Ginger Ice Cream

Ingredients:

  • 2 eggs
  • 1/2 cup of sugar
  • 1 cup of milk
  • 3 inch piece of ginger (cut into 1/2 inch pieces).
  • 2 cups of heavy whipping cream (divided)

Directions:

1. In a large bowl, whisk 2 eggs until light & fluffy (about 2 minutes). Then add sugar and 1 cup of heavy whipping cream, and combine.
2. On medium-low heat, heat up the milk until simmering. Add ginger and simmer for 5 minutes. For those that LOVE ginger, feel free to grate some of that root into the milk mixture. Set milk aside and stir in 1 cup of heavy whipping cream. Strain out the ginger.
3. Whisking continuously, pour the warm milk into the egg mixture slowly. Do NOT cook the eggs, so whisk, whisk, whisk!
4. Set the bowl in the fridge for an hour or until thoroughly chilled (can last up to two days).
5. Pour the mixture into an ice cream maker and follow manufacturer’s directions. Transfer into a covered container and put into the freezer (can keep up to 1 week in the freezer).

Ingredients
Ingredients ^^^

Scoop
The perfect scoop!

Yum

What’s a flavor that reminds you of your childhood? What’s the story behind that flavor?

Happy Friday! Enjoy the weekend!
Jay

Malt Ice Cream

It’s so beautiful outside in the Bay Area! Blue, cloudless skies. Slight breeze. Sun sets late at 8pm now.

The first day of Spring is this week, on March 20. To celebrate the warmer weather, it’s ice cream week! I’ll be featuring my specialty ice cream recipes. Today it’s malt ice cream!

Ice cream

If you’re like me, you’re wondering, “What does malt even taste like?” Think Whoppers. Think Maltesers. If you’re like my husband, you immediately think of those childhood days when your mom mixes malt into your milk. And you know it’s one of your favorite things.

While in San Francisco last month, MG and I wanted some ice cream. There are copious ice cream parlors to choose from in the city, but we decided on Mr. and Mrs. Miscellaneous located in the Dogpatch. Good choice because this place is adorable! Think super hipster environment, with tatted up servers, a few baked goods, and  ice cream with a super creamy, rich texture. When we walked into the parlor, malt was on the flavor menu, and it was immediately decided by MG that we would get this flavor. Great decision!

After that ice cream date, MG added malt to the list of “ice cream flavors we must make.” And this was now at the top of the list. After many batches of malt ice cream, I’ve perfected the recipe and am ready to share it with you!

Scoop

Malt Ice Cream

Ingredients:

  • 3 egg yolks
  • 1/3 cup of sugar
  • 8 ounces of milk
  • 8 ounces of heavy cream
  • 7 tablespoons of Ovaltine
  • 1 pinch of salt

Directions:

1. Heat milk in a pot on low until simmering, then add Ovaltine. Mix well until all Ovaltine is combined. Turn off heat, add a pinch of salt, and stir. Set milk aside.
2. Whisk the egg yolks until light and fluffy. Then add sugar. Whisk until thoroughly mixed. Pour in heavy cream.
3. This is the tricky part because you do not want the eggs to cook. Pour in the warm milk slowly into the egg mixture, while whisking continuously.
4. Refrigerate the ice cream mixture for 1 hour until thoroughly chilled (can keep up to 2 days in the fridge).
5. Pour the mixture into an ice cream maker and follow manufacturer’s directions. Transfer into a covered container and put into the freezer (can keep up to 1 week in the freezer).

Ovaltine

Done

Spoon

Cuisinart
I love this machine and highly recommend it! Buy it on Amazon here

Do you like malt? What are some other malt recipes you’ve come across? Do you have an ice cream flavor that you want to add on my “must make” list?

Stay tuned on Friday for another ice cream recipe!
Jay

MG turns 36!

This past Sunday was MG’s 36th birthday!

He came back from Los Angeles after a weeklong work trip on Friday. After a one night rest at home, we set out to go camping on Saturday morning. My sister Katie and her boyfriend, Baldwin, are in town. They’ve been camping in Texas once before and didn’t love it, but it’s nothing like NorCal California camping! Amirite NorCal people?

We drove to a new campsite called Bootjack Campgrounds at Mount Tamalpais State Park in Marin County. This campsite was established in 1920s and closed 1969 because of overuse. But it’s been reopened as of this year! It’s a first come, first serve site, and it was available for us! Thankfully most of the sites were actually empty. We decided to set up shop right next to a running creek so we could hear the stream when sleeping. With some lunch in our stomach, we went hiking on Old Mine Trail, which was a 1 mile hike to a scenic spot called The Bench. It overlooks the Bay and Stinson Beach, and in the far distance, my beloved city of San Francisco.

Tent

After the view, we hiked back, finished setting up our sleeping bags, and took a well-needed nap. I have the most comfortable naps when I camp – maybe it’s the fresh air. But they are awesome!

Mg Hiking

Hiking

Selfie

Scene

Scenic

After waking, it was time to build the fire, which I think is still the best part of camping. The firewood made me a hungry girl so I started dinner around 5:30 (I’m such a g-ma!). Camping always means eating well. Don’t ever tell me that food isn’t part of camping. As MG says, “food makes every situation better.” And camping is no different. Garlic fries, mushrooms, grilled corn, and steak for dinner. Can’t ask for a better meal! And obviously smores is on the dessert menu. Wouldn’t have it any other way!

Flowers
Katie picked some flowers for our dinner table!

Lams

Cooking

Steak
Uh huh! ^^^

Chef Ming
Thanks Chef Ming ^^^

Dinner

Eating

Magical Fountain
After meals, we washed our cookware in the “magical fountain”

Smores
My infamous inside out smores!

We stayed up poking at the fire until 11pm. And there was this huge slug hanging out with us by the fire. We named her Daisy. Say hi!

Daisy

MG and I woke up in the morning and watched the sunrise then made breakfast. Another epic meal – corned beef hash, toasted english muffin, sunny side up eggs, bacon, and tangerine juice. Yum! And this breakfast concluded the camping trip.

Sunrise
Beautiful view to wake up to!

Breakfast

Corned Beef

Bacon

It was another successful trip (though I forgot my wine opener, darn)! And I’m pretty sure Katie and Baldwin enjoy camping too now!

I love camping! Few reasons:

1. I love waking up to fresh air. It makes every sleep a well-rested sleep. Even if I wake up a few times in the night, I still wake up feeling refreshed.
2. I love peeing in the woods. I feel like a free woman! TMI? Never on this blog!
3. Campfires. No details needed.

Happy birthday

Happy birthday my love. I hope you enjoyed your birthday celebration (even though I love to camp and you don’t, and that’s my favorite cake and not yours).

Cake
Seriously, best cake – Berry Chantilly from Whole Foods ^^^

What do you do to celebrate your birthday? Do you have some recommended camping spots? Please share!

What did you do this weekend?
Jay

Kara’s Cupcakes

What’s your favorite place for cupcakes?

Mine is, without a doubt, Kara’s Cupcakes in the Bay Area. It started when someone in the advertising business decided to quit her job and follow her dreams to open a bakery. Maybe I love this place because her life is something I can relate to (I was in the ad industry and I quit my job to find a new path). Or it’s her locally sourced, organic products. Whatever it is, it’s damn good!

I’ve been craving sweets lately, and so I had to get my hands on some cupcakes. And Kara’s was the only place that would satisfy.

Store

Cupcake

My favorite flavor is the vanilla one. I just can’t get sick of it. The glob of vanilla icing in the cupcake is the perfect touch!

Flavors

Banana caramel and passion fruit never disappoint me!

My box

Yup, I bought four!

Boys, write this down, and take notes:

Cupcakes can make any girl smile. What’s with these little cakes topped with a boatload of icing? It can seriously make a girl’s day. If you ever need forgiveness, bring a peace offering of cupcakes. Promise it will make all wrongs right.

What’s your favorite cupcake bakery? Where is it located and why is it your favorite?

Friday demands cupcakes,
Jay

DIY Dresser Revamp

I’m super, duper, fricken ecstatic to share my newest project with you.

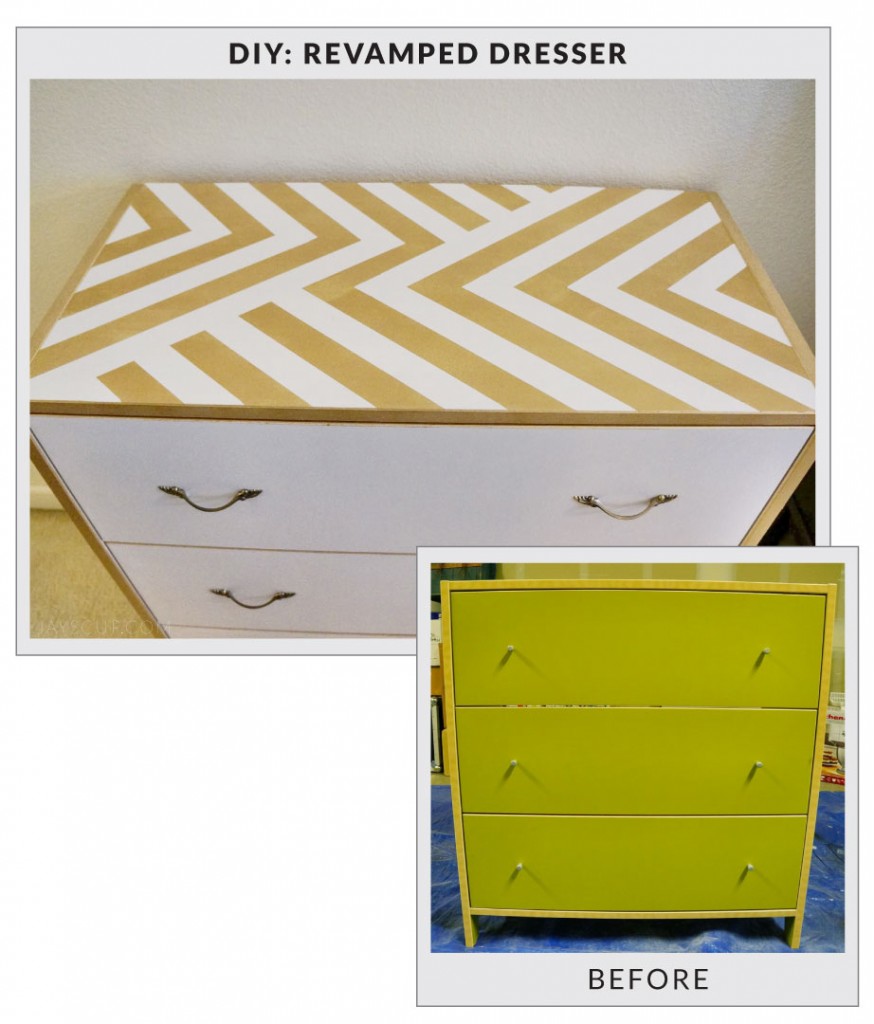
I revamped an old dresser that I bought from a friend for $10. With a fresh coat of paint and some new hardware, this piece of furniture looks brand, spankin new!

If you’re planning to revamp or buy a dresser as well, it’s advisable to first be knowledgeable by reading articles like Consumer Reports tested 13 dresser models for tip-over risks.

Before/After

This project is simple but it takes time for each layer of paint to dry. The entire project took 3 days. I’m almost positive that you have an old piece of furniture sitting around your house that needs a little bit of loving. If not, maybe you’re looking for a new bookshelf or a dresser. Go to the thrift store, find one to your liking, and revamp it. I love bargain hunting, and the thrift store for furniture is where the treasure’s at! I also like to think that refurbishing something old is like recycling, so I’m being green too right? It’s really a win/win situation. Honestly, most, if not all, furniture pieces have potential to be something beautiful. I’m also well-equipped with the best power drills online to help me in these kind of projects.

What you’ll need to repaint furniture:

  • A drop cloth or tarp (cause it can get messy)
  • An old rag (cleanup)
  • Painter’s tape (I love Frog tape, it works really well)
  • Sandpaper (fine grit, I used 220)
  • Water-based primer
  • Latex paint (I used Behr from Home Depot)
  • Water-based polyurethane varnish
  • A paint tray
  • 2 small, dense foam rollers
  • A small brush for the varnish

Basic instructions:

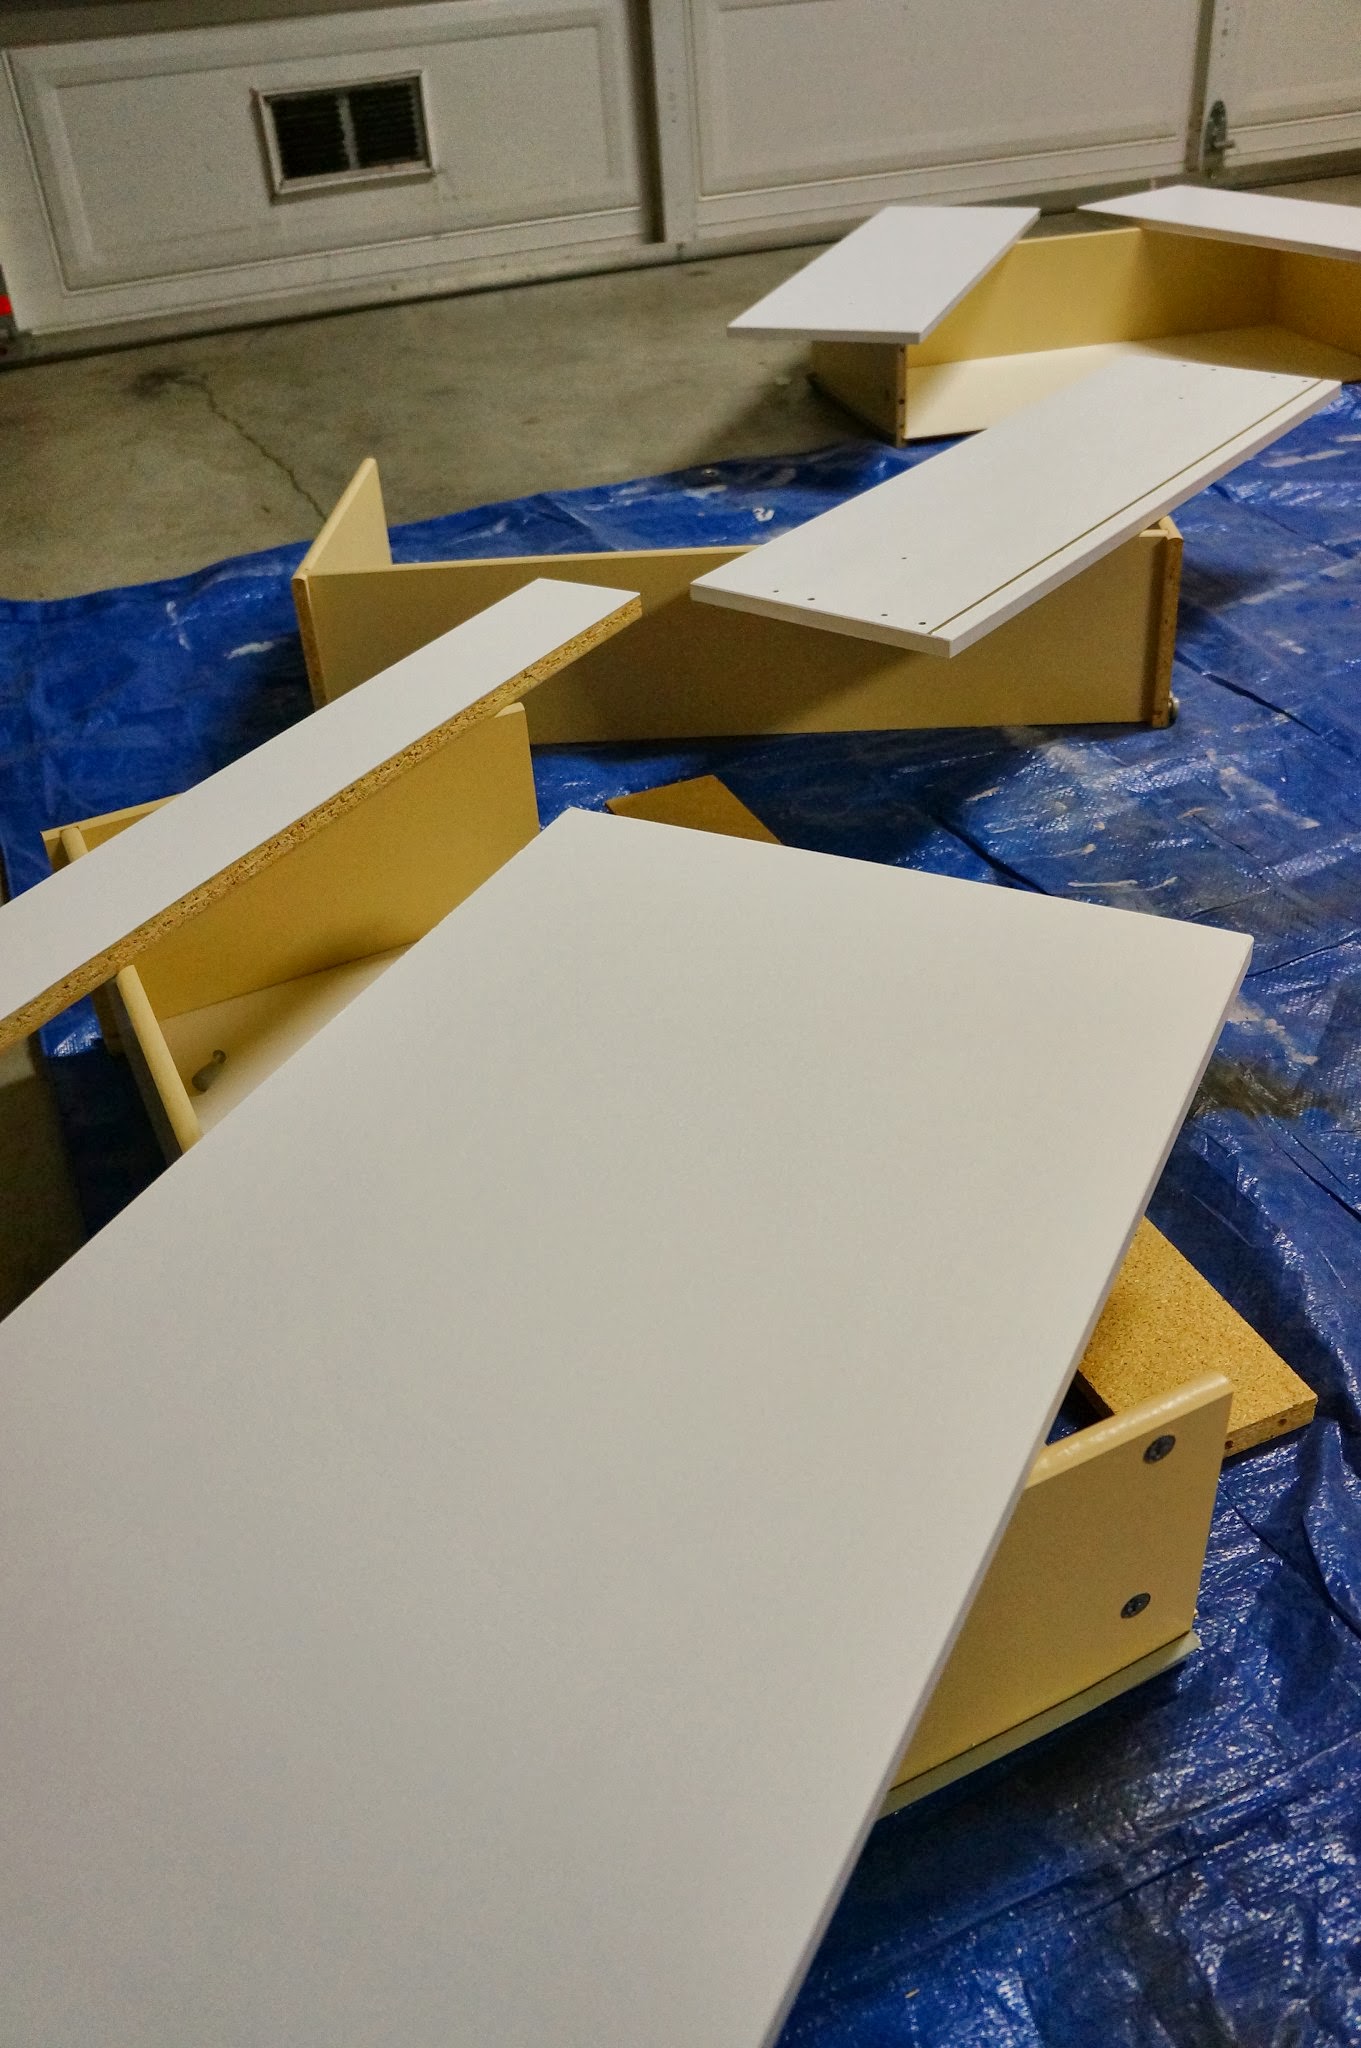
1. Undo all hardware. I also took apart the dresser so that none of the screws get painted (this part is optional but recommended).
2. Sand – get that shiny layer off. Sand it real well so that the primer sticks.
3. With a roller, primer all pieces (roll carefully so that there are no paint drips). Let dry (timing depends on your paint, read the label), and sand it down again if there are drops of paint or bumps. Then roll primer one more time. Let dry. Sand again to ensure all pieces are smooth.
4. Now it’s time to paint. With the other roller, paint the dresser with your desired color. Let dry and sand again to smooth out bumps. Paint the dresser one more time and let dry.
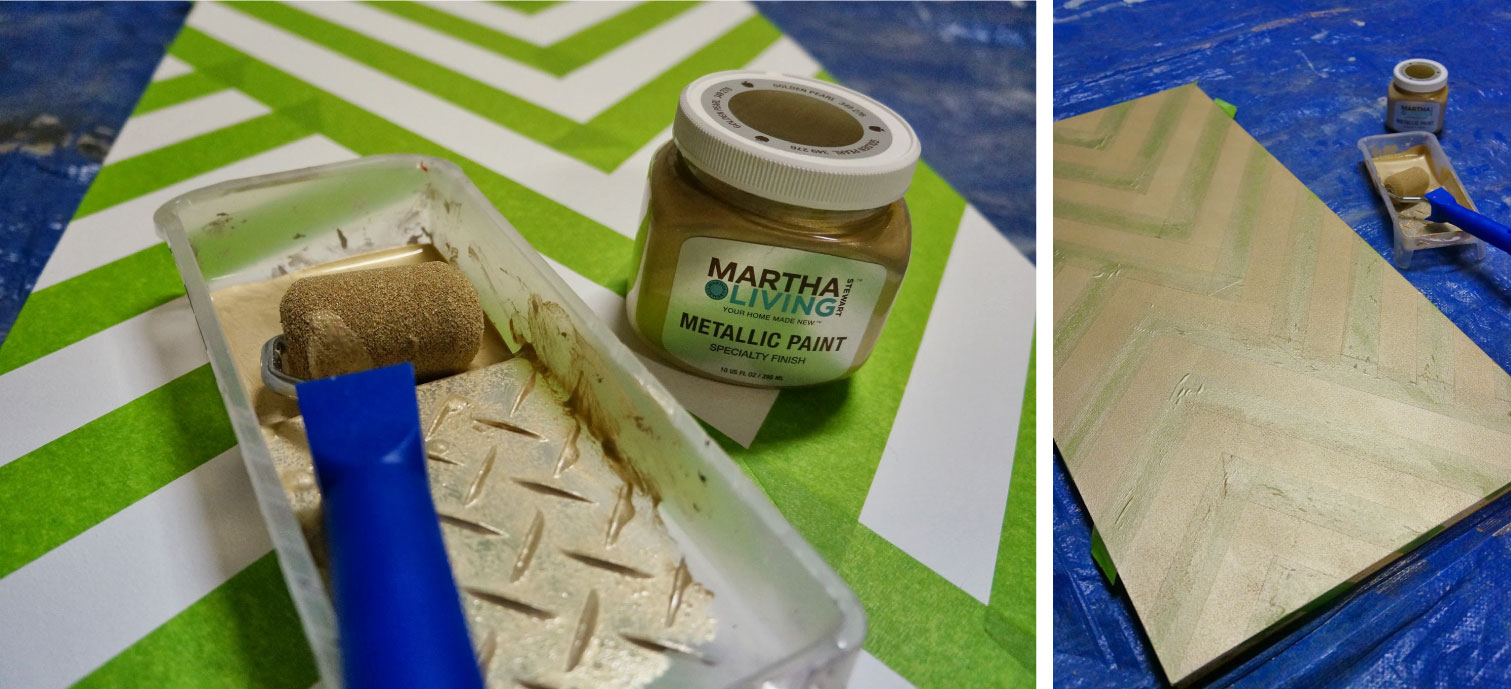
5. If you’re doing a design, it’s time to paint it on now. I used frog tape to outline where I would paint. I also painted all the edges of the drawer gold too. Let this part dry as well. If you want a darker color, paint it another time.
6. Take the brush and paint on the varnish (a roller will cause bubbles). It’s recommended to varnish 2-3 times. Since the top of my dresser will be used a lot, I varnished 3 times but the drawers I only painted twice. Let dry overnight.
7. Put the furniture piece together. Change out the hardware if you desire.

Some tips from my experience:
1. Roll and paint on carefully so that you do not have to sand in between layers. It’ll save you time in the end.
2. Bring plastic wrap to wrap up your rollers and brushes so that your tools do not dry up. If you’re not using it, wrap it!
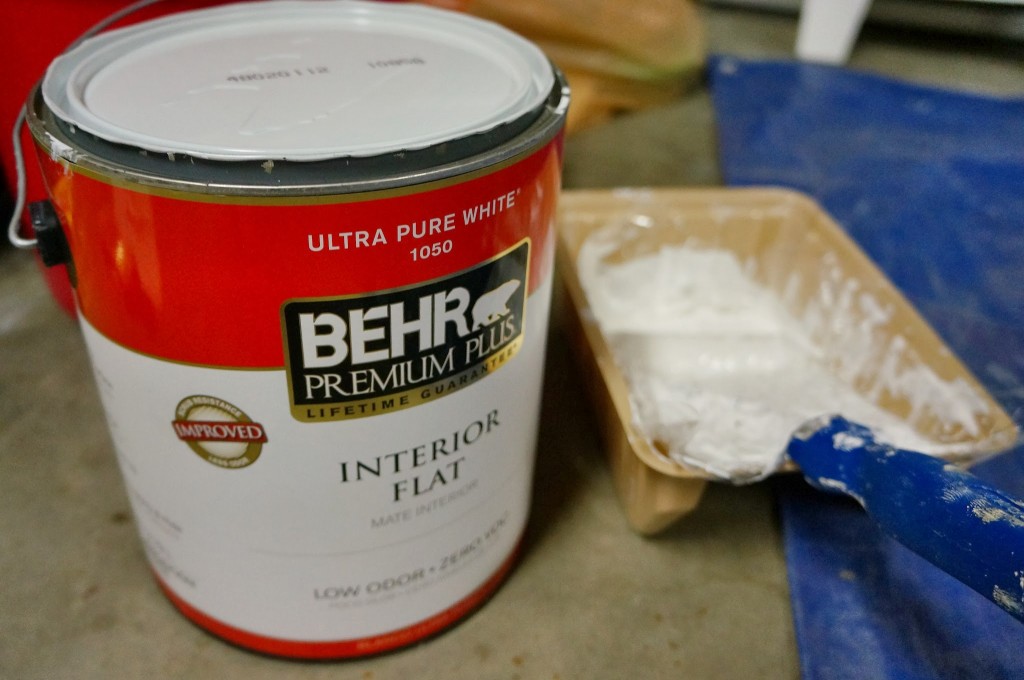
3. If you’re using white, use an off-the-shelf white to save some money. I used Ultra Pure White by Behr.
4. If you’re doing a design with painter’s tape, do not allow the paint to completely dry before ripping off the tape. Simply wait 5-10 minutes, and rip tape off at an angle. Paint will chip if it becomes dry.

Got it
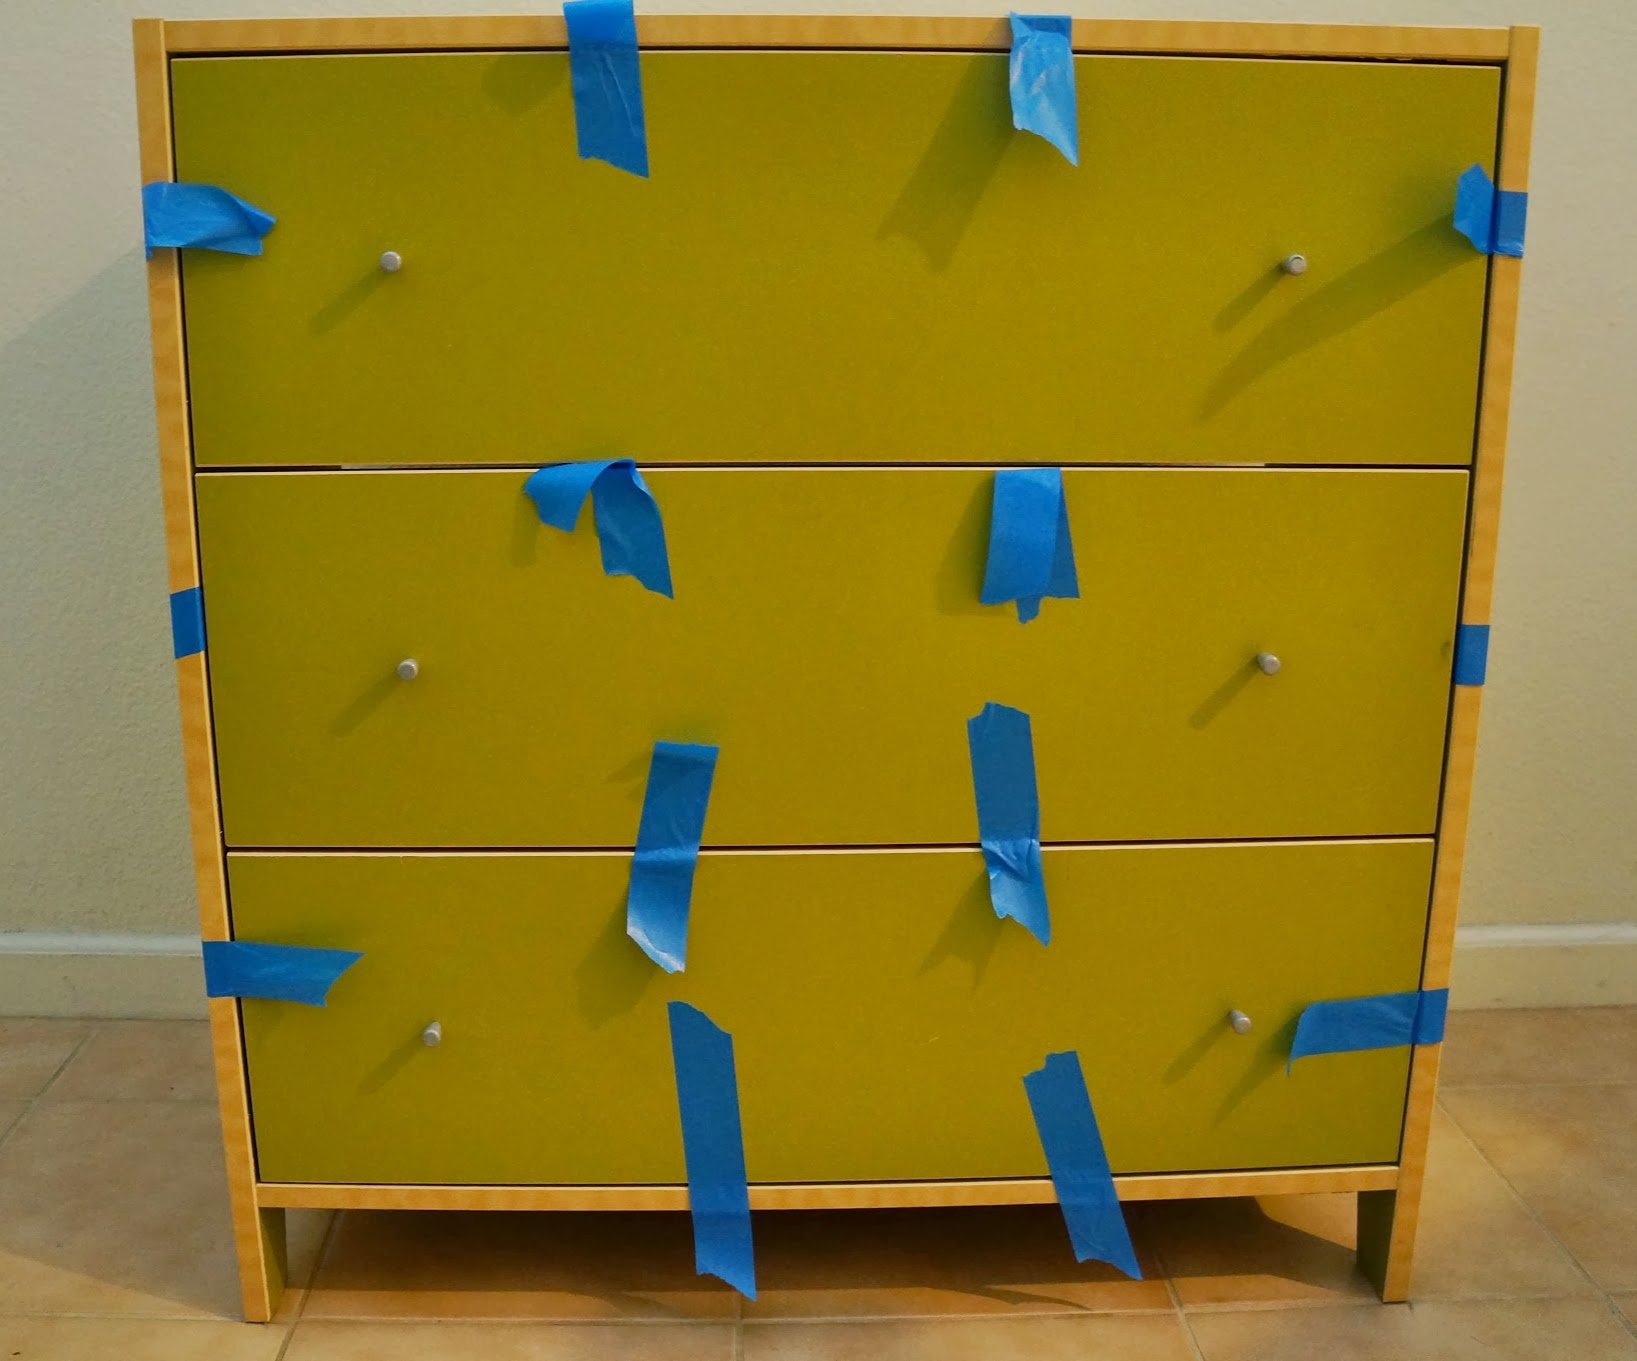
This is how I got the dresser – I call it blegh green

Hardware
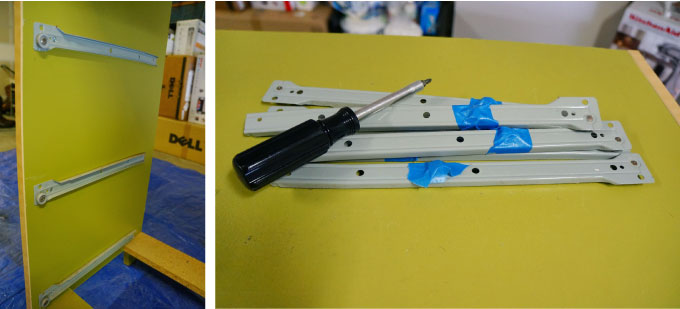
I took apart all the hardware and taped the screws to each piece. That’s helpful!
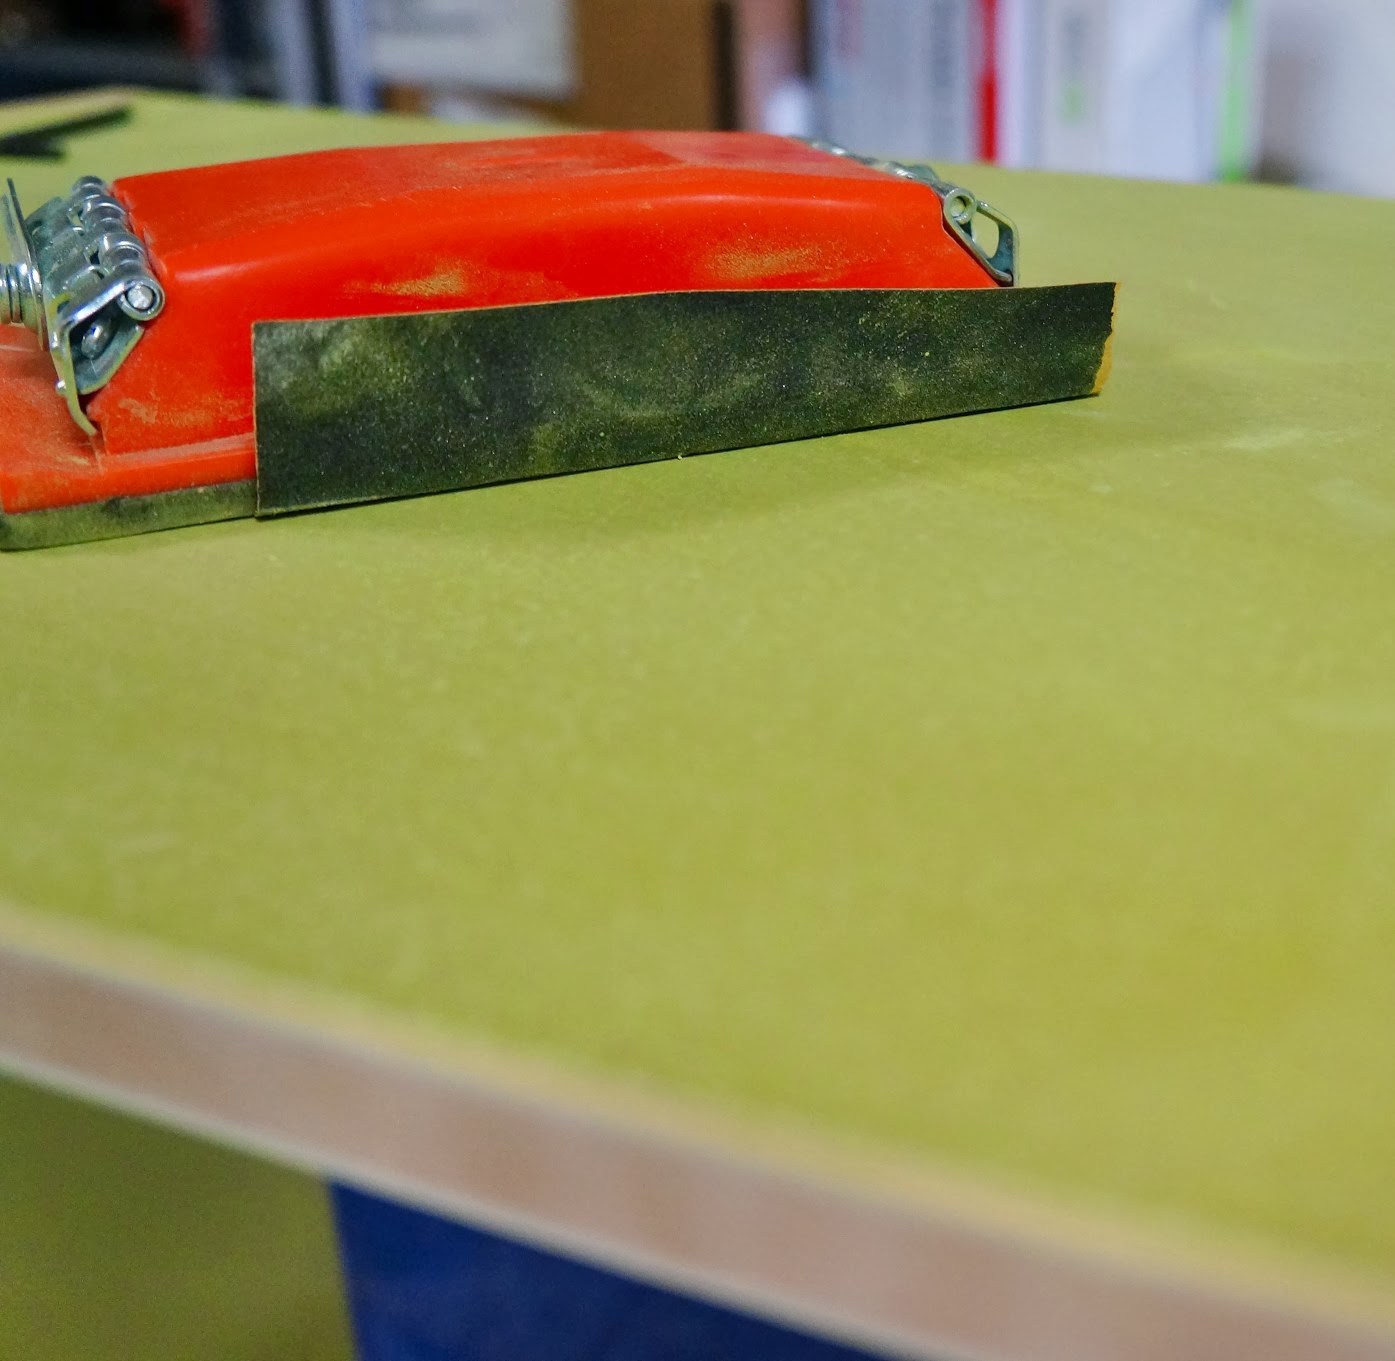
Sand
Sand it down!!!

Hands
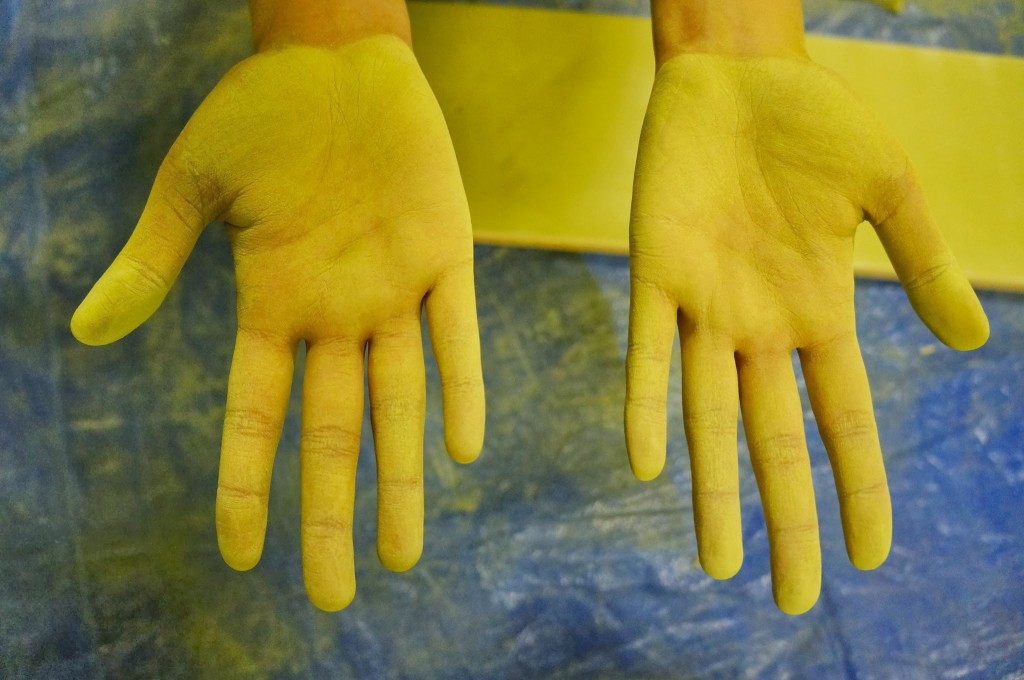
That turned me into Elphaba ^^^

Primer
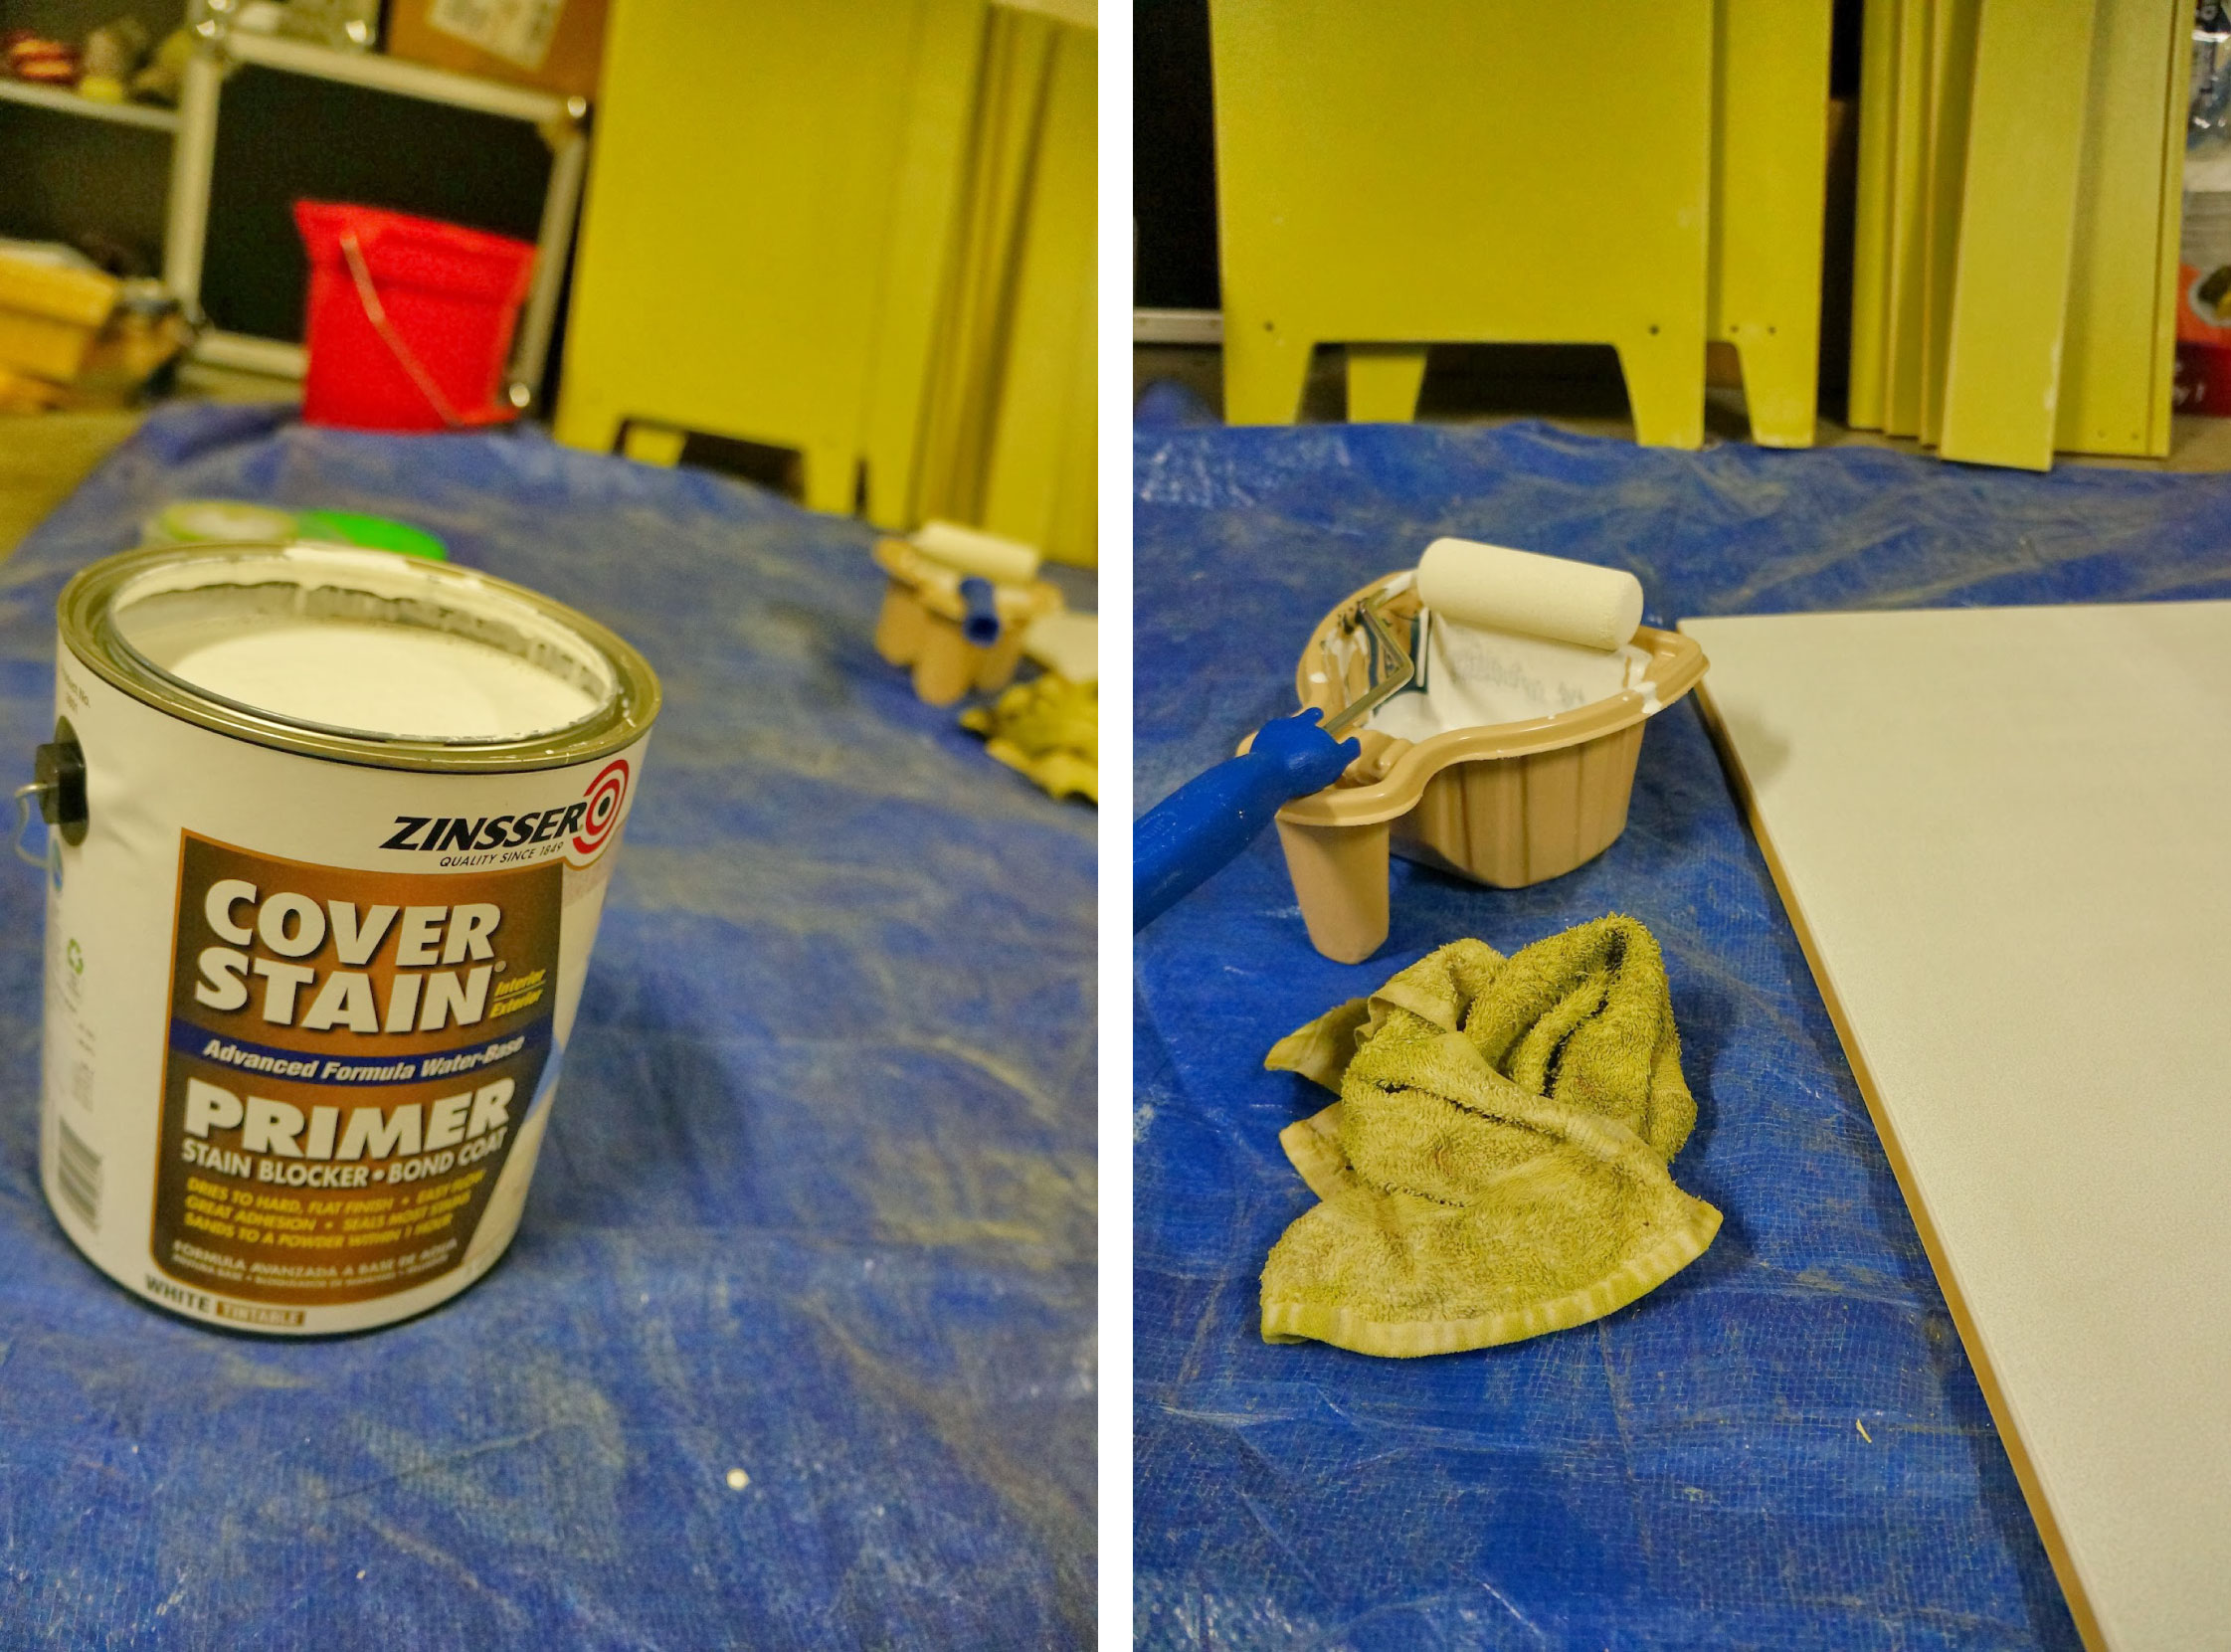
Use a roller for the primer – smooth, long strokes

Paint
Paint with a roller too – long strokes again and careful not to drip paint

Drying
Be patient with drying. Make sure it’s dry – better safe than sorry!

Design
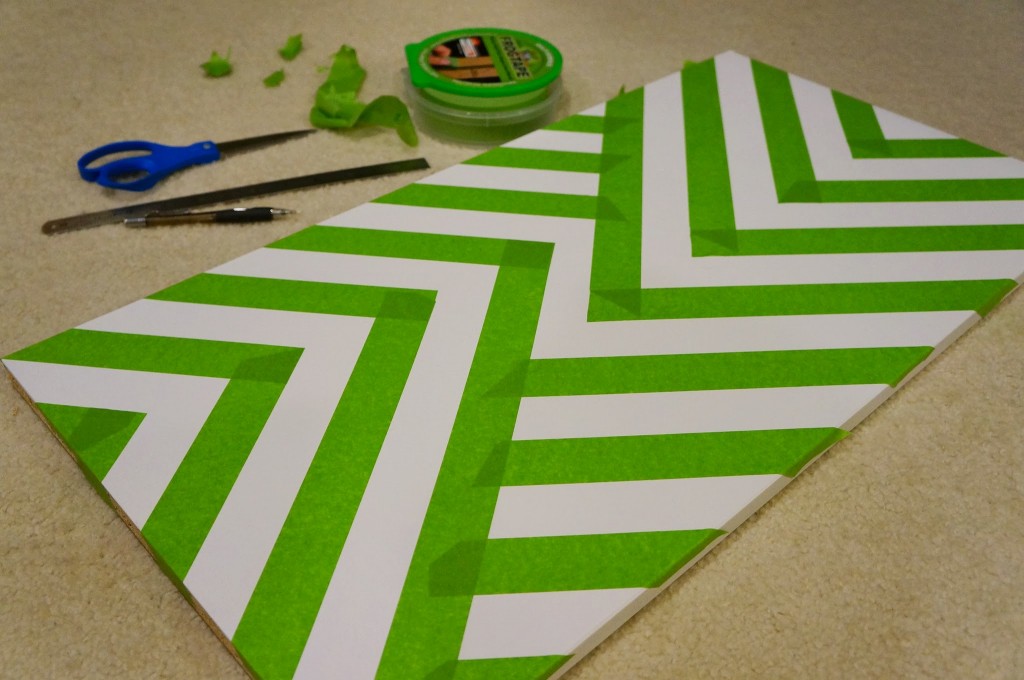
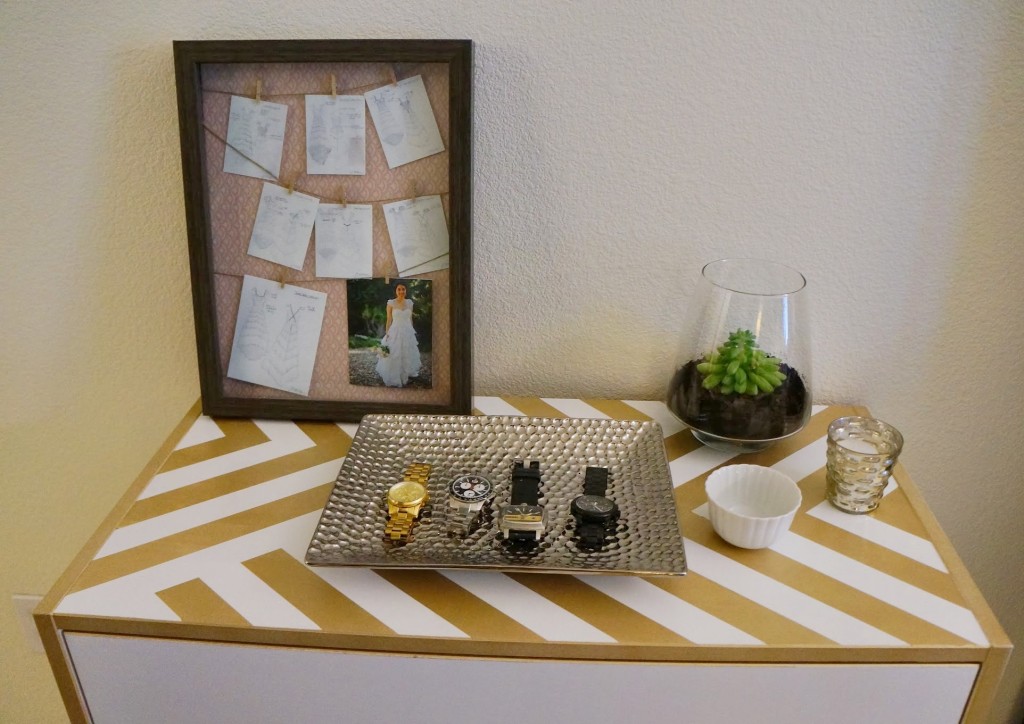
This is my design. To guide the lines, the width of the white is the same as the tape

Gold
I found this gold on sale at Home Depot for $5.25 (find it here)

Peeling
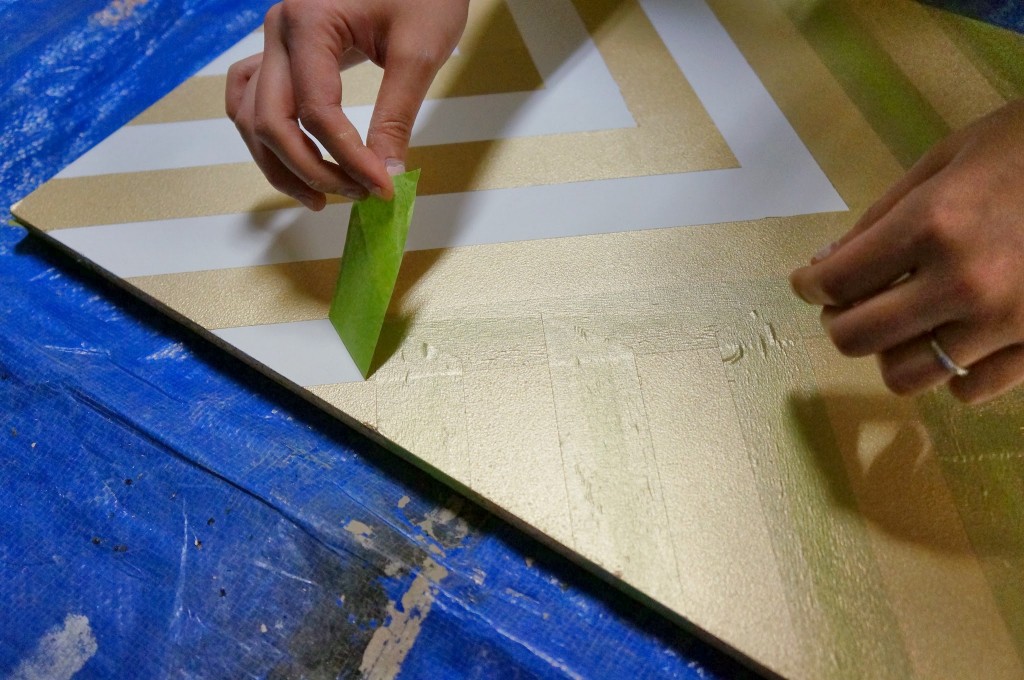
This is delayed gratification at its finest. Best feeling in the world is tearing off painter’s tape.
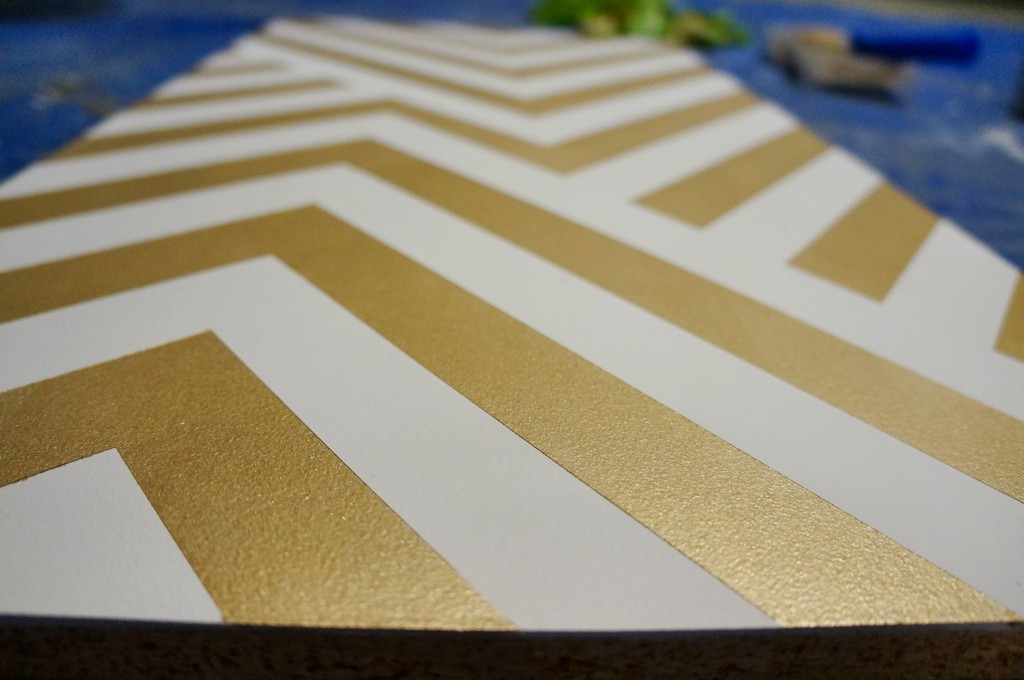
Design
Ta-Da!!!

Dresser Back
Reassembling the dresser – it also needed a back. Home Depot will custom cut wood for you. All I had to do was nail the back onto the dresser

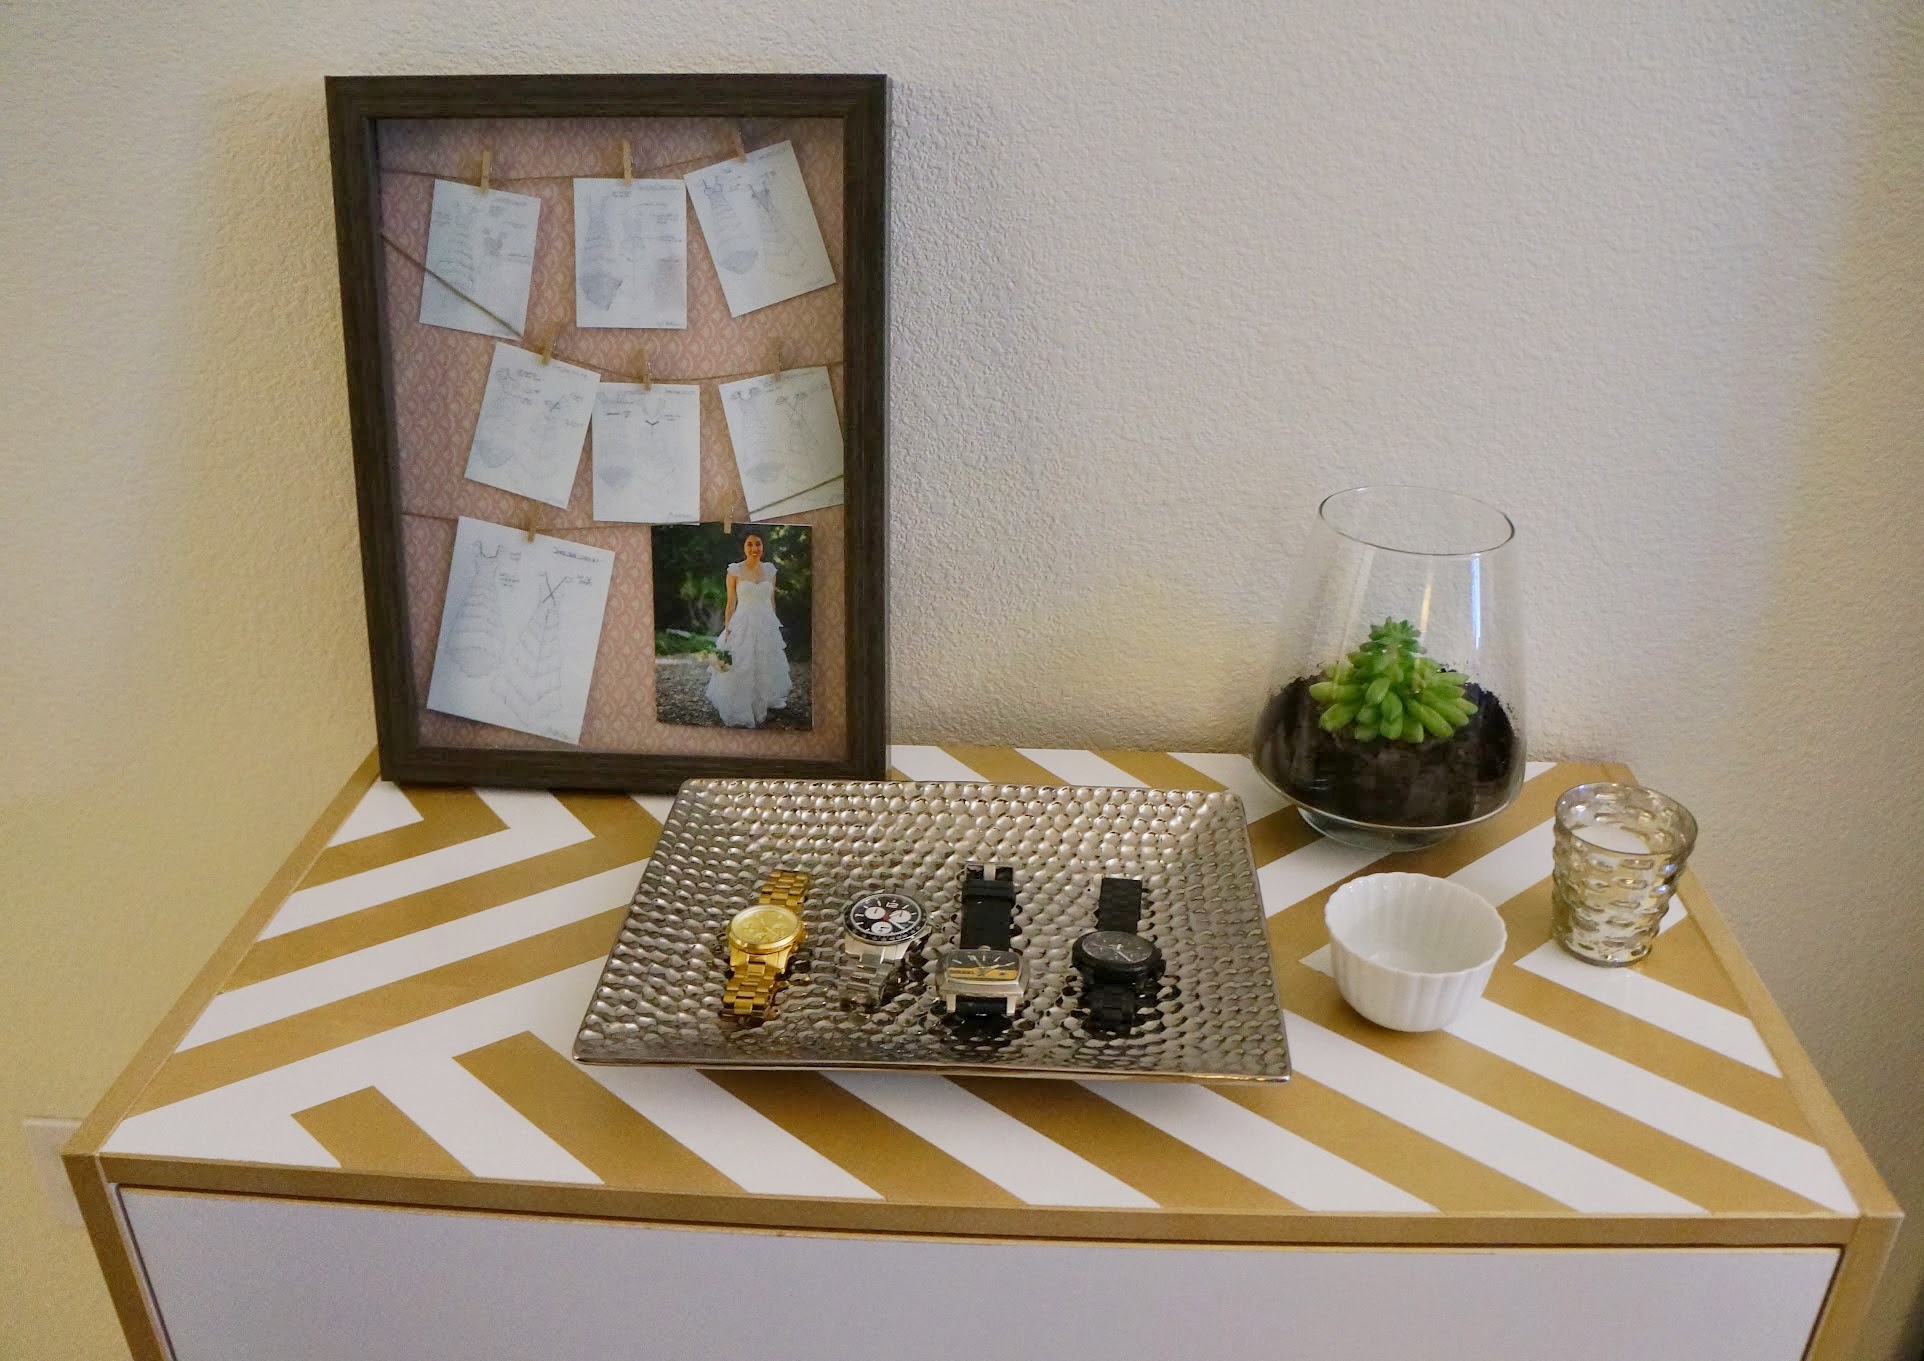
And now this beauty is in my room, ready for my clothes!

Complete

Final

I’m totally in love with this dresser and am proud of the end product. What do you think? Do you shop for furniture at the thrift store? How do you revamp it? And can you share some of your current DIY projects?

Obsessed with gold right now,
Jay

Reference: consider using Water Mold Fire Restoration

Brunch at Home

March means Spring is here. March also means it’s Mg’s birthday month! One of my best girlfriends also shares this birthday month too!  As you can imagine there’s tons of eating and splurging that goes on in March.

This past Saturday, I decided to cook brunch for the birthday boy and girl. Such a fun thing to do! Brunch in an intimate environment, save some money, and eat home cooked food. On the menu was crab cakes benedict, apple smoked bacon (from TJ’s, best bacon evarrr!), hash browns, fruit, and mimosas. Delicious and oh-so-filling!

Centerpiece
^^^ My sweet centerpiece. Holly’s present in the middle, with a gorgeous daffodil. Perfect for Spring!

Holly & David
Holly and David

MG&J
The Lams

Birthday girl
Birthday girl ^^^ Happy birthday Holly!

Birthday boy
My sweet Mingus ^^^

Here’s my crab cake recipe so that you can have your own brunch at home. It’s a classic recipe, without any fluff, just a lot of sweet, pure crab meat.

Ingredients:

  • 16 oz jumbo lump crab meat (You can purchase for $15 at Costco)
  • 1  egg
  • 1/4 cup mayonnaise
  • 1 1/2 teaspoon Dijon mustard
  • 1 teaspoon fresh lemon juice
  • 1/2 teaspoon Worcestershire sauce
  • 1 1/4 cups breadcrumbs (I used my homemade breadcrumbs, instructions here)
  • 1/4 cup onion, chopped
  • 1/4 cup green bell pepper, chopped
  • 2 tablespoons unsalted butter

Directions for crab cake:
1. In a large bowl, mix together the crab meat, mayo, mustard, lemon juice, Worcestershire sauce, breadcrumbs, onions, and pepper. Beat the egg and pour it into the crab mixture. Combine well. Then cover the bowl with plastic wrap and place into the fridge for 20 minutes.
2. High heat to heat up a large pan and add butter. Once the butter is melted, turn the heat down to medium, and place 1/3 cup of crab mix onto the pan. Shape each patty to your liking.
3. This next part is all about patience. Leave the crab cake on the pan for 5-6 minutes, until golden brown. Then very carefully flip each crab cake and cook the other side for 5-6 minutes. Set the cakes aside and let it cool for 1 minute. It’s ready to eat!

Crab Cakes

Pan Frying

Gorgeous

Done

Directions for crab cake benedict:

1.To make hollandaise, whisk 4 egg yolks and 1 tablespoon of fresh lemon juice together until light in color and fluffy. Mixture should thicken and double in volume. Use a mixer if you have one! It’ll make it easier. Melt half a cup of butter and let it cool but not solidify. Prepare a double boiler, pour in the egg yolks and continue whisking rapidly. You do not want your eggs to cook. Then slowly pour in the butter to the egg yolks – do not stop whisking! Add a pinch of cayenne and a pinch of salt. Once the hollandaise sauce is thickened and warm, it’s ready!
2. Toast an english muffin, then spread butter onto the muffin.
3. Now combine your ingredients – first the muffin, then the crab cake, add a poached egg, and a spoonful of hollandaise sauce. Brunch away!

Brunch

So much food! As you can imagine, we had food comas afterwards. We tried to fight it by walking to the local farmer’s market, but once it hit 3pm, it was nap time.

What’s your favorite brunch item? And also tell me your favorite brunch restaurant (because I may need to go check it out).

What did you do this weekend?
Jay
—–
Original hollandaise sauce recipe