It’s summer vacation time! Do you have any travel plans coming up? Cause I do! And I’m going to Europe!
On Friday I’m flying to Austin to attend my baby sister’s graduation. Guess she’s not a baby anymore… I’m so proud that she has gotten into her dream Master’s program at the University of Texas in Houston. \m/
To celebrate, WE’RE GOING TO EUROPE! I’m leaving on Friday to attend her graduation and then we’re going to Rome for our first stop. During our three weeks on vacation, we’re going to Rome, Florence, Venice, Barcelona, Dublin, Paris, and London. Whew… you can catch your breath now!
With summer vacations coming up, I put together a packing list. I’m usually the girl that packs half her closet for a 2 week trip. My thoughts – you want choices and decisions and multiple outfits! 6 pairs of shoes for a 2 week vacation sounds right to me but perhaps crazy to some.
If I could, I would bring this guy ^^^
BUT traveling to so many different countries in Europe means I’ll need to pack light in order to fit one carry on in those small cross-country planes. I’ve put much thought into what I should bring, and I want to share what I’m going to bring. Hopefully this will be super helpful for you if you’re going somewhere this summer too!
RULES:
1. Stick with the same color scheme!
There’s a reason why neutrals don’t go out of style. If you want a pop of color, bring a scarf. Keep your colors simple and you won’t regret your style decisions 10 years down the line.
2. Bring pieces that will match all items!
One shirt that matches all three bottoms gives you three outfits. One bottom that matches all your tops gives you 5 outfits. Possibilities are endless which means you can pack light.
3. Accessorize to change up from day to night.
Wear a fedora for day time with a dress, and switch the fedora with a chunky necklace for night time with the same dress. It’s as simple as that! Black shorts with a blouse for the day and switch to a clutch and wedges for a night look.
Take a looksee to find what I’ve put together. Links to purchase these items are found below, and they are extremely affordable! My splurges are on shoes, jewelry, and purses. I believe that those are items that should last.
I’m currently freelancing at Chemistry Club, doing what I do best, media. Yup, at it again. It’s advertising, and it’s what I know! I’m working part-time, Monday through Wednesday. I’m also working on a side project, interior decorating a dental office. Two part-times equal one full-time job right?
Here’s the front of the office and my workspace. This space used to be a firehouse so it has a really cool warehouse feel. There’s a fire pole to the left of the first picture!
Here’s my second job. I went into the office on Saturday to paint. It’s sneak peak to what I will one day share on the blog! When I’m painting, I’m in my true element!
And since now I have places to be and people to see, in other words, I’m actually leaving the house and not wearing PJs all day… gotta go shopping and get me some bling! I got two new beautiful gold rings and a statement necklace. Eepppp I love them!
And if all this isn’t new enough for you, I’m cat-sitting my cousin’s fluff ball! Chubs and Toby have become playmates now!
Have an awesome week! I’m leaving for Austin on Friday to attend my sister’s graduation. Then I’m going to Europe for three weeks! I’ll be on hiatus while on vacation. I’ll still be posting the rest of this week so come back to see what I’m up to!
Guess what everyone? I’m starting a freelancing job! It will be at an ad agency in the city, and I’ll be working part time, 3 days a week for now. It’s been a year and one month since I quit my last job (oh how time flies). Thankfully my time off hasn’t been wasted because I started this blog! If you’ve been following along, you know that I’ve been working on a bunch of house projects.
I am ready to go back to work though to stimulate my brain again! So grateful that it’s part time for now so I can slowly ease myself back to work. Excited for the opportunity! And don’t worry, I’ll still be posting on Mondays, Wednesdays, and Fridays.
As promised, today’s post will be my chorizo mussels recipe. Remember that osso buco recipe? The leftover broth becomes so flavorful, and it’s perfect for this meal.
It takes less than 15 minutes to prep and 10 minutes to cook.
1. Clean mussels by running through cold water and debeard (pull out the little fuzzies/stringy bits that are stuck on the shell). Throw away any mussels that have open/broken shells.
2. Boil the osso buco leftover broth, then add the chorizo into the pot and boil for 5 minutes. Once you’re ready to eat, put the mussels unto the pot and cook until shells open (about 5-8 minutes).
3. Serve with bread and enjoy!
Pretty awesome that you can make two meals with one pot! Plus, this meal basically is prepped and cooked in less than 30 minutes. Can’t ask for an easier dinner!
Do you like mussels? How do you like them prepared? Is this something you can cook at home?
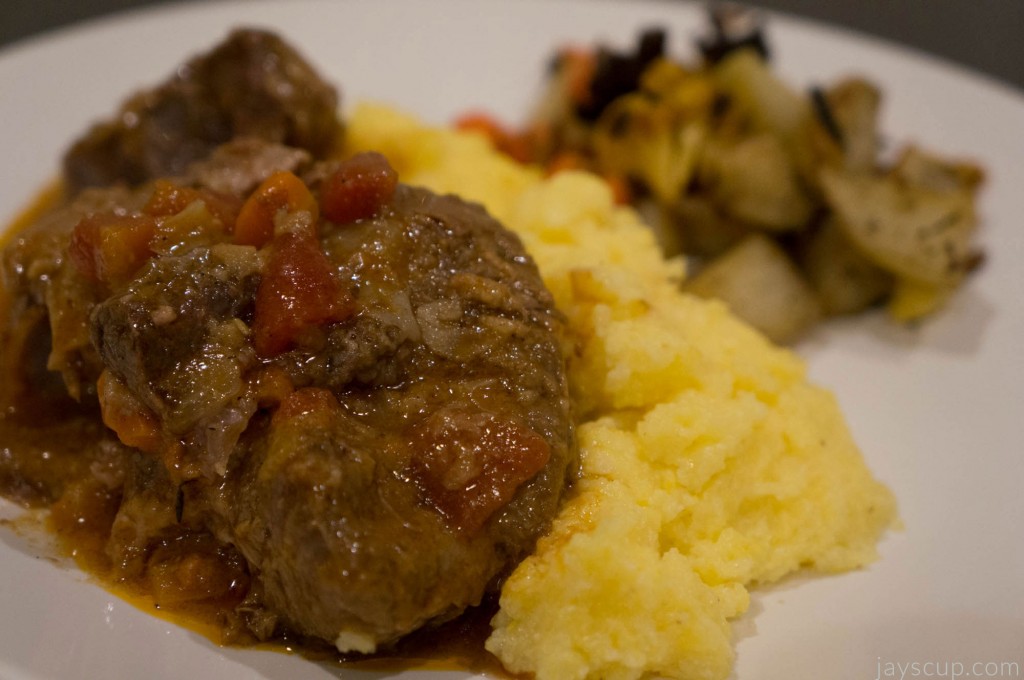
A friend came over once and made me osso buco. It was an amazing meal (though my kitchen was a disaster afterwards. Boys leave such crazy messes in the kitchen)! I couldn’t stop thinking about how yummy and tender the meat was, how creamy the polenta tasted, and how the amazing sauce tied it all together. Even better, the leftover pot of broth! I made chorizo mussels with it for dinner the next day. Two meals from one pot? Hell yes.
Both meals in one dinner? Double hell yes. I had a dinner party for 8 during Christmas time and this was the perfect meal! Get this, I had salad for the first course, osso buco for the second, mussels with bread for the third, and then dessert.
Osso buco is an Italian dish of braised veal shanks. Perhaps I’m in an Italian state of mind since I’ll be going to Italy in 2 weeks!
I’ll post my osso buco recipe today. On friday, come back for how to make chorizo mussels in the same broth!
This recipe is how I cook it, but others may prepare on a stove and then oven.
Ingredients:
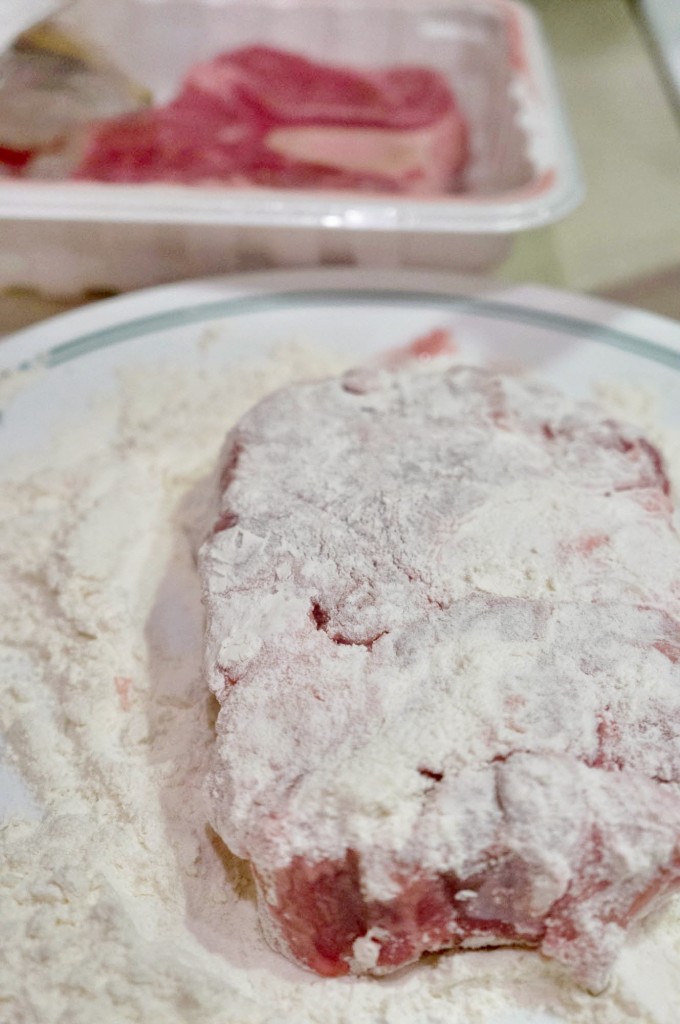
4 – 6 pieces of veal shanks (about 3 pounds)
1/2 cup diced carrot
1 medium onion, diced
4 cloves of garlic, chopped
3-4 sprigs fresh thyme
1 cup dry white wine
1-2 cups beef stock
1 (14.5 oz) can of diced tomatoes
Flour
Butter
Salt and pepper for tasting
Essential Cooking Tool: Pressure Cooker
Invest in a pressure cooker and I bet you’ll never use your crock pot again!
Directions:
1. Dust the veal shanks lightly with flour. Heat up butter in your pressure cooker until melted, and brown the veal shanks on medium/medium-high heat. Set veal shanks aside.
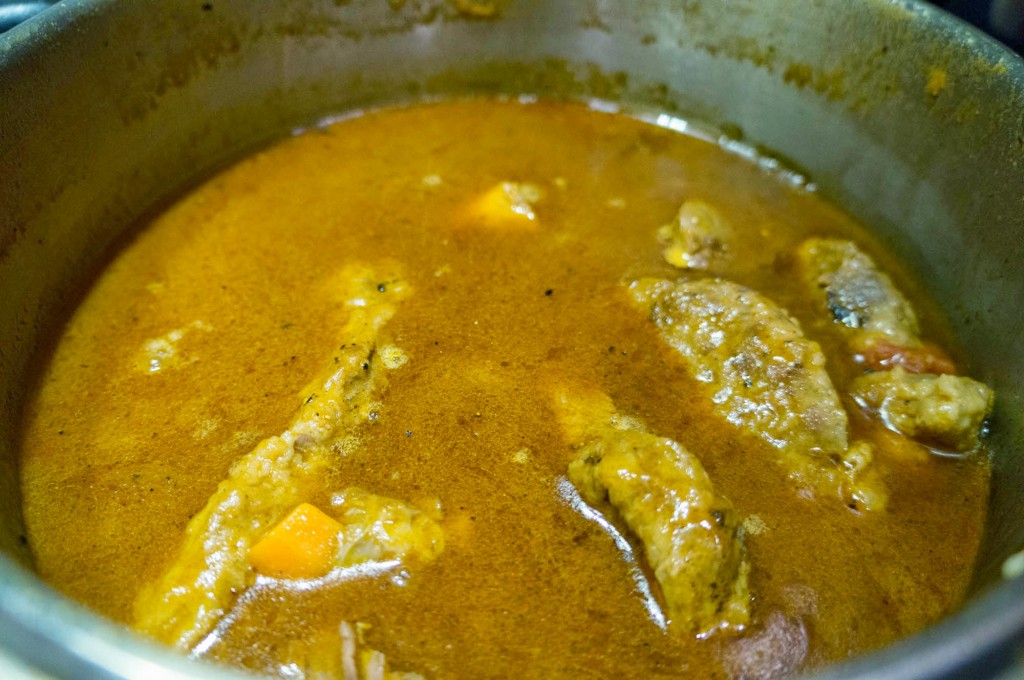
2. Add chopped garlic, carrots, and onion to the pressure cooker, and stir until onion is tender. Add the wine and scrap up all the browned bits in the cooker. Simmer for 15 minutes.
3. Pour in the tomatoes and beef stock, and add thyme. Season with salt and pepper. Then add the veal back into the pressure cooker.
4. Cook the veal in the pressure cooker for 45 minutes (according to your manual’s instructions).
5. Once cooked, serve with mashed potatoes or polenta.
Polenta directions: Bring 6 cups of water to a boil, add 2 teaspoons of salt, and whisk in 1 and 3/4 cups of cornmeal. Reduce the heat to low and cook until the mixture thickens and the cornmeal is tender. Stir often. Turn off the heat, and add 3 tablespoons of butter until combined and melted.
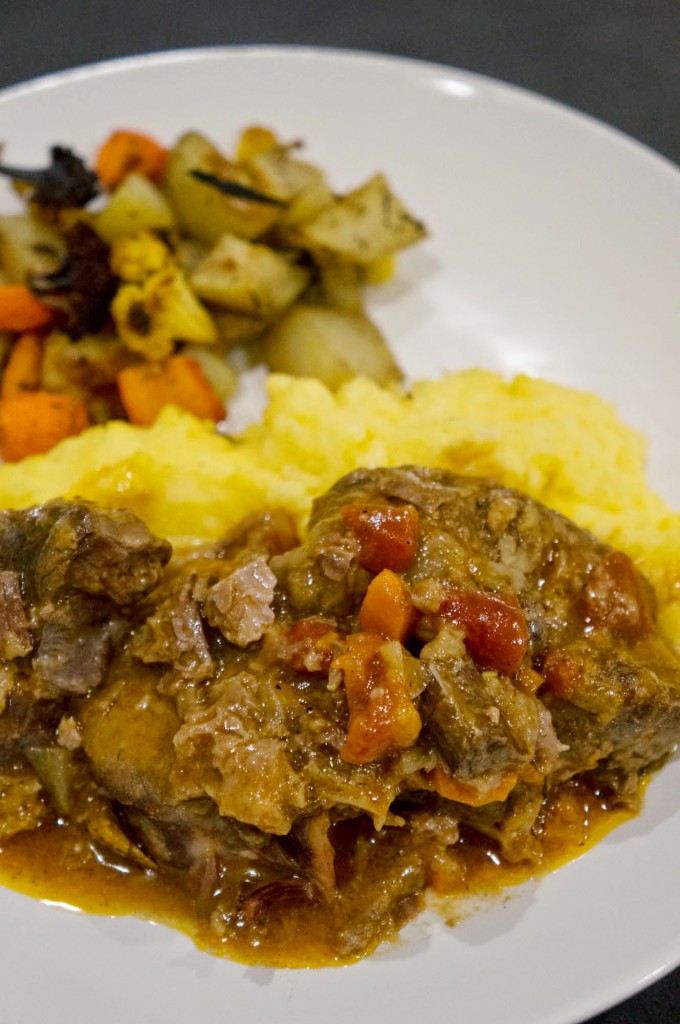
It’s a great meal to make when you have guests since you can easily make a huge pot of food. It’s also a fancy meal that will leave your guests impressed.
Have you ever had osso buco before? Where and did you like it? Is this a recipe you can recreate?
Remember to come back on Friday for my chorizo mussels using leftover broth from the osso buco.
Saturday started out with morning brunch with my main squeeze so I knew it would be a good day!
He’s been traveling a lot for work. When that happens we try to schedule some day dates on the weekends to catch up. He surprised me by taking me out to Oakland for some Chop Bar. The food is a mixture of new American and Mexican. Brunch was okay, but I want to try it for dinner!
We did a bit of home decor shopping and then went home to get ready for a boat party (yup, another one. Previous yacht party post here)! I know, I’m so fancy! Just kidding.
My church celebrated their 10 year anniversary this past weekend on a boat! It was a good time chatting up with friends and eating a nice BBQ dinner. Plus, the view of the city always makes my heart skip a beat.
As if sailing wasn’t enough, we went out clubbing afterwards. When in Rome, San Francisco… does that work here? I can’t go back to normal clubbing now that I’ve experienced VIP bottle service. We had to do it the right way! Which means, bottle service yet again!
This picture only means one thing; 2 bottles means a great night for this photographer! Yeah right. Do you even know MG? It was just too dark. Hahaha!
In the end we finally got a good pic. Except two of my girls are missing… because they are “resting” on the couch. Thehehe
All that meant Sunday was a day for church, napping, and hosting dinner for our friends. Excuse our mess! I just can’t keep the house clean.
On the left you have the girly girls painting nails and the crazy boys tickling each other. On the right you have Pastor Josh playing guitar with an audience.
I know I’m currently not working right now so you might be thinking what’s Friday to you? It’s a time to finally have a moment to spend with MG. It’s a time where things slow down a bit because I’m not working on projects. The best thing? It’s a time where people come over to my place and all we do is watch TV, snack, and relax. Even though I watch TV during the weekday, it doesn’t have the same “weekend” feel.
It’ll be another eventful Saturday this weekend. I’m going to a boat party again! I’m also going dancing again; I think the club bug bit me. Tehehe
Anyway, whoohoo it’s Friday! Let’s party!
What you’ll need:
Tissue paper in various colors
Scissors
Twine (or string or ribbon)
Directions:
1. Fold the tissue paper hamburger style in half, fold in half again, and in half again. Cut fringe while leaving 1-2 inches intact at the fold line. Don’t forget to cut fringe at the folded creases too!
2. Unfold paper and start rolling down the middle until completed and twist in half to create a loop.
3. Place the tassel over the twine, and wrap twine around to secure tassel. Continue until desired length.
So easy right? And so beautiful!
What do you think of these garlands? Is this something you can do?