The Crab Mountain Sandwich

Remember that crab roll from Fish in my previous post? It’s seriously the most expensive sandwich I’ve ever had. But totally worth it! Buttery crunchy bread, with loads of crabmeat! All that comes with a hefty price though, but it’s such a perfect lunch for Treat Yo’Self day.

I absolutely love crab. It’s my favorite food of all time. Some people hate cracking and peeling the crab, but I don’t even mind that part. Sometimes I will peel crab for MG to eat, and we joke that it’s the labor of love. The evening that MG asked me to marry him, he had ordered crab for dinner at my apartment in San Francisco. I was having a bad day at work, and he had purchased crab takeout from R&G Lounge to make me feel better. This is my favorite restaurant for crab in the Bay Area. Dinner would have been the perfect way to make my day. But a diamond ring too? I was beyond elated!!!

Yup, crab was part of my engagement story. That’s how much I love this little crustacean (anyone hate this word too? Sounds gross)!

So this crab roll, I can’t eat it frequently cause I would be dirt poor at $25 a sandwich. I can always day dream about it! To satisfy my cravings, I decided to embark on making my own crab roll. Super easy to do, and 6 crab rolls will cost you under $20. Let’s do this!

Finished

Crab Mountain Sandwich Recipe

Ingredients (5 ingredients only!):

  • 16 oz. can of crab meat (You can purchase for $15 at Costco)
  • Loaf of white bread
  • Butter
  • Garlic Salt
  • Pepper for taste

Directions (3-steps only!):

1. Heat up a pan on medium-high heat. Cut a slice of butter and melt it onto a pan. Toast a piece of bread on both sides until golden brown and crispy. Toast 6 slices of bread and set aside.
2. Add butter to the hot pan. Drain out the water from the can of crab, and add the crab meat into the melted butter to heat up the meat. Add garlic salt and pepper to season.
3. Scoop a large heaping of crab meat onto your toasted bread. Serve with fries or chips, and eat!

Crab Roll Ingredients
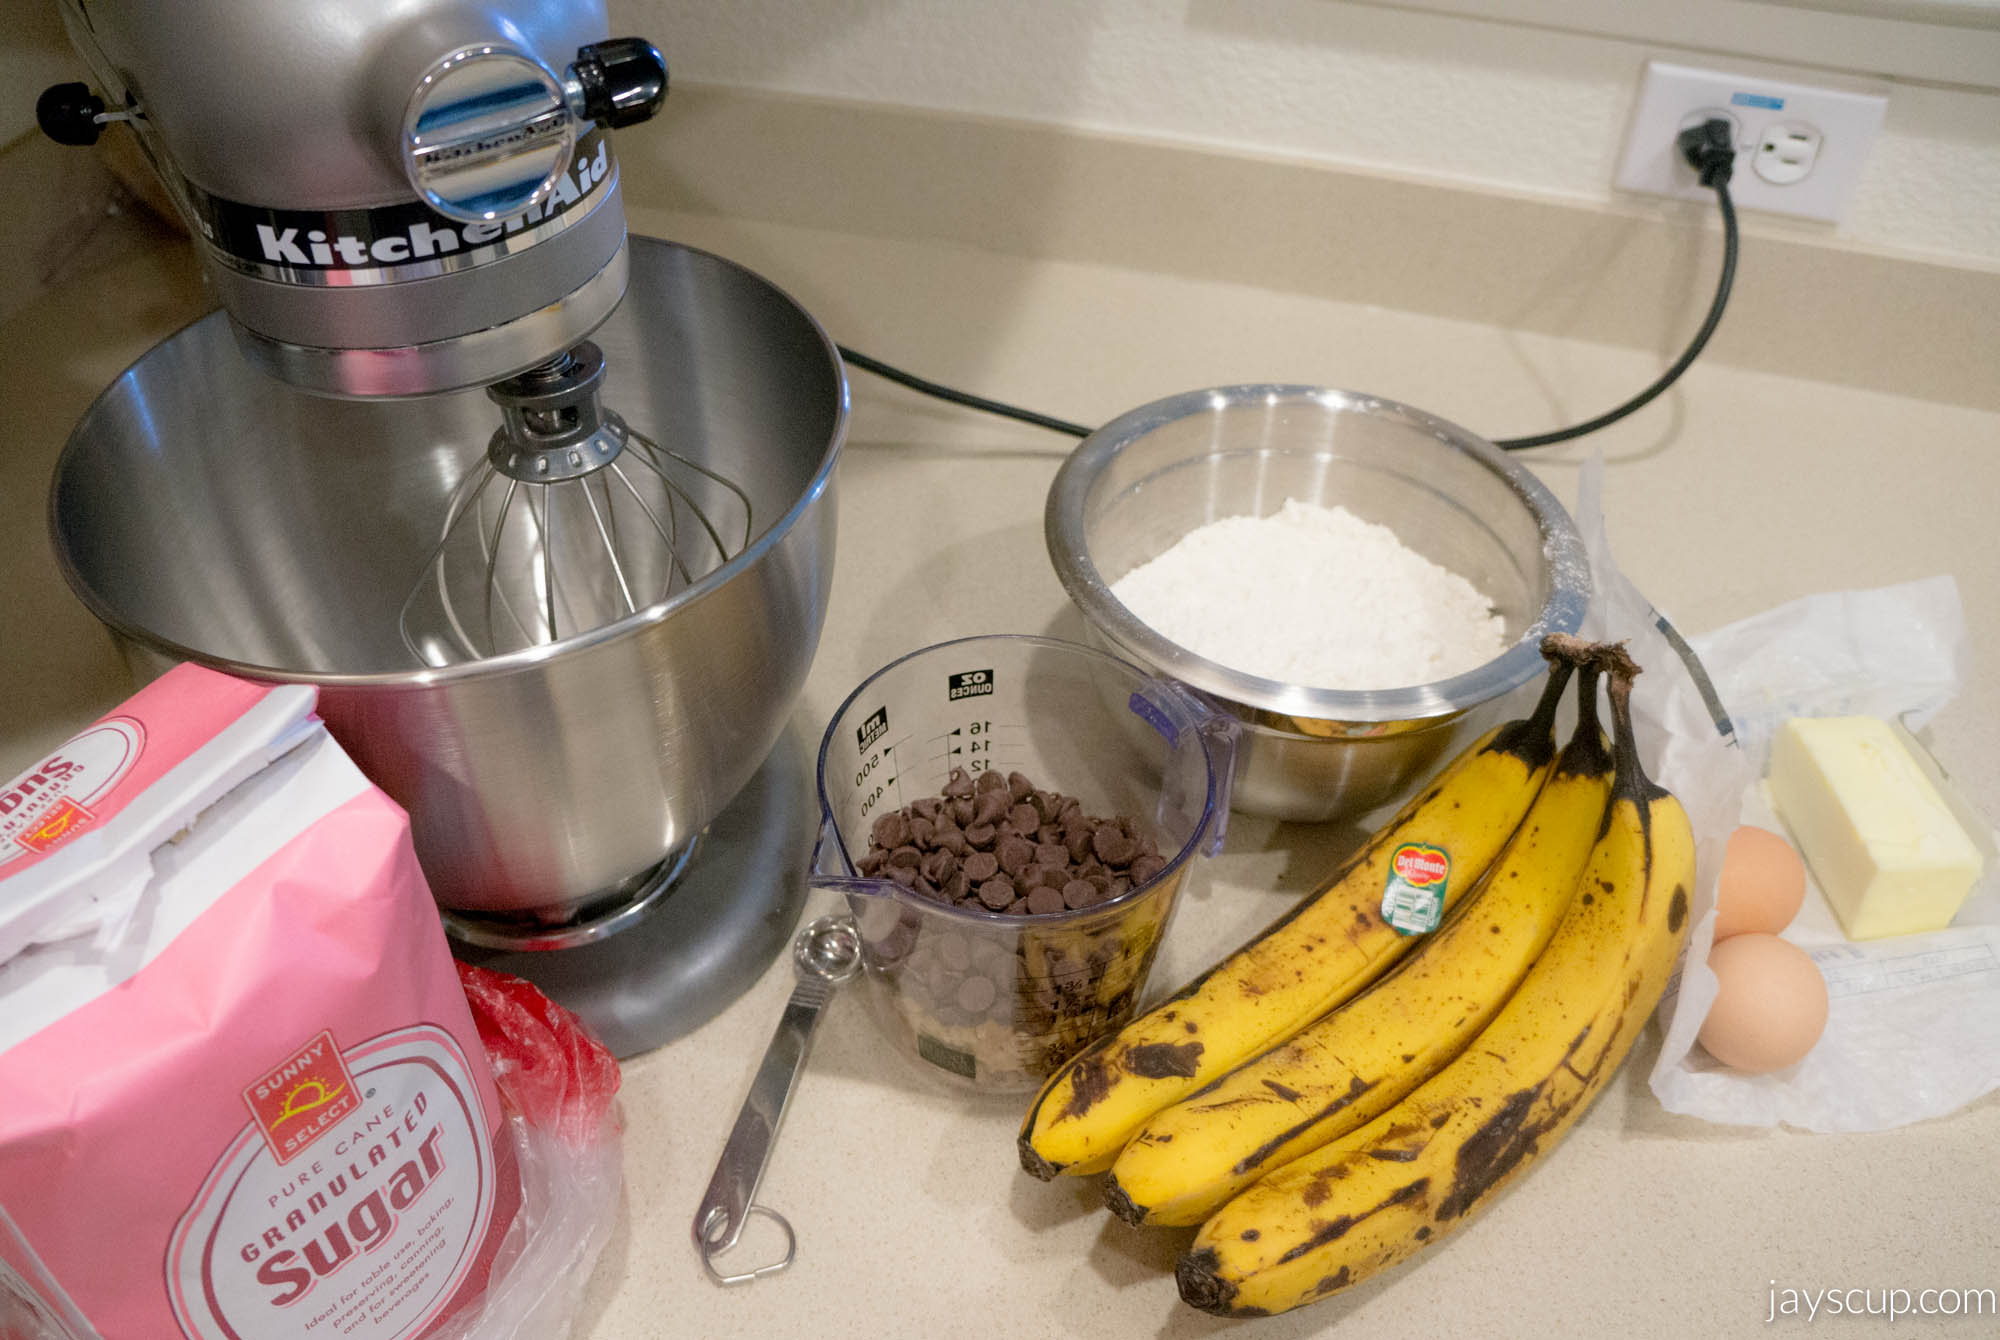
Ingredients for deliciousness

Toasted
I could eat toasted bread with butter all day… I wish it didn’t have calories
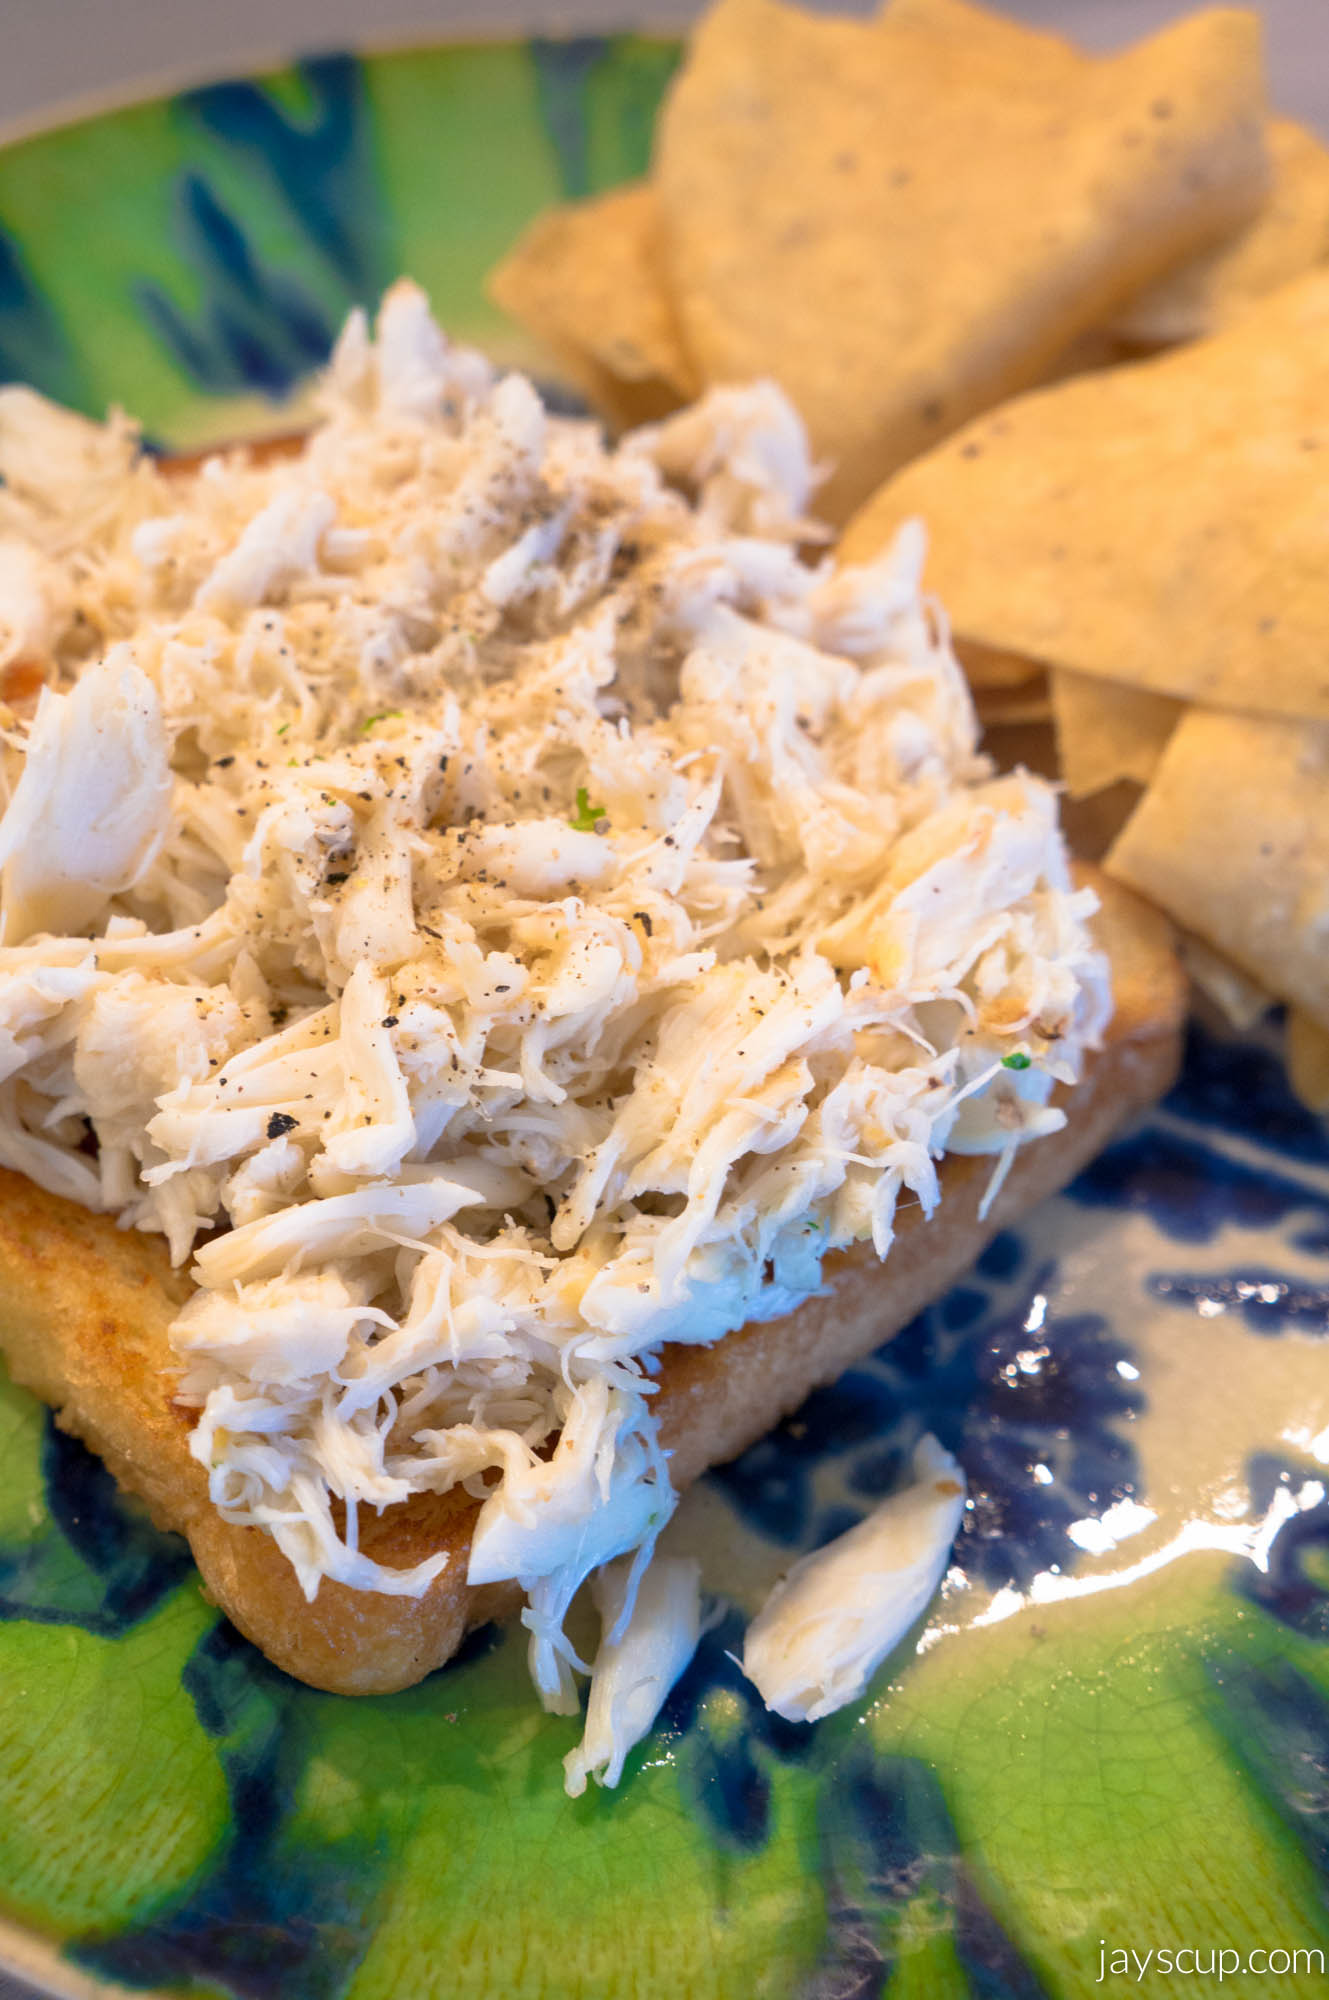
Done
Crab mountain ^^^

Bite
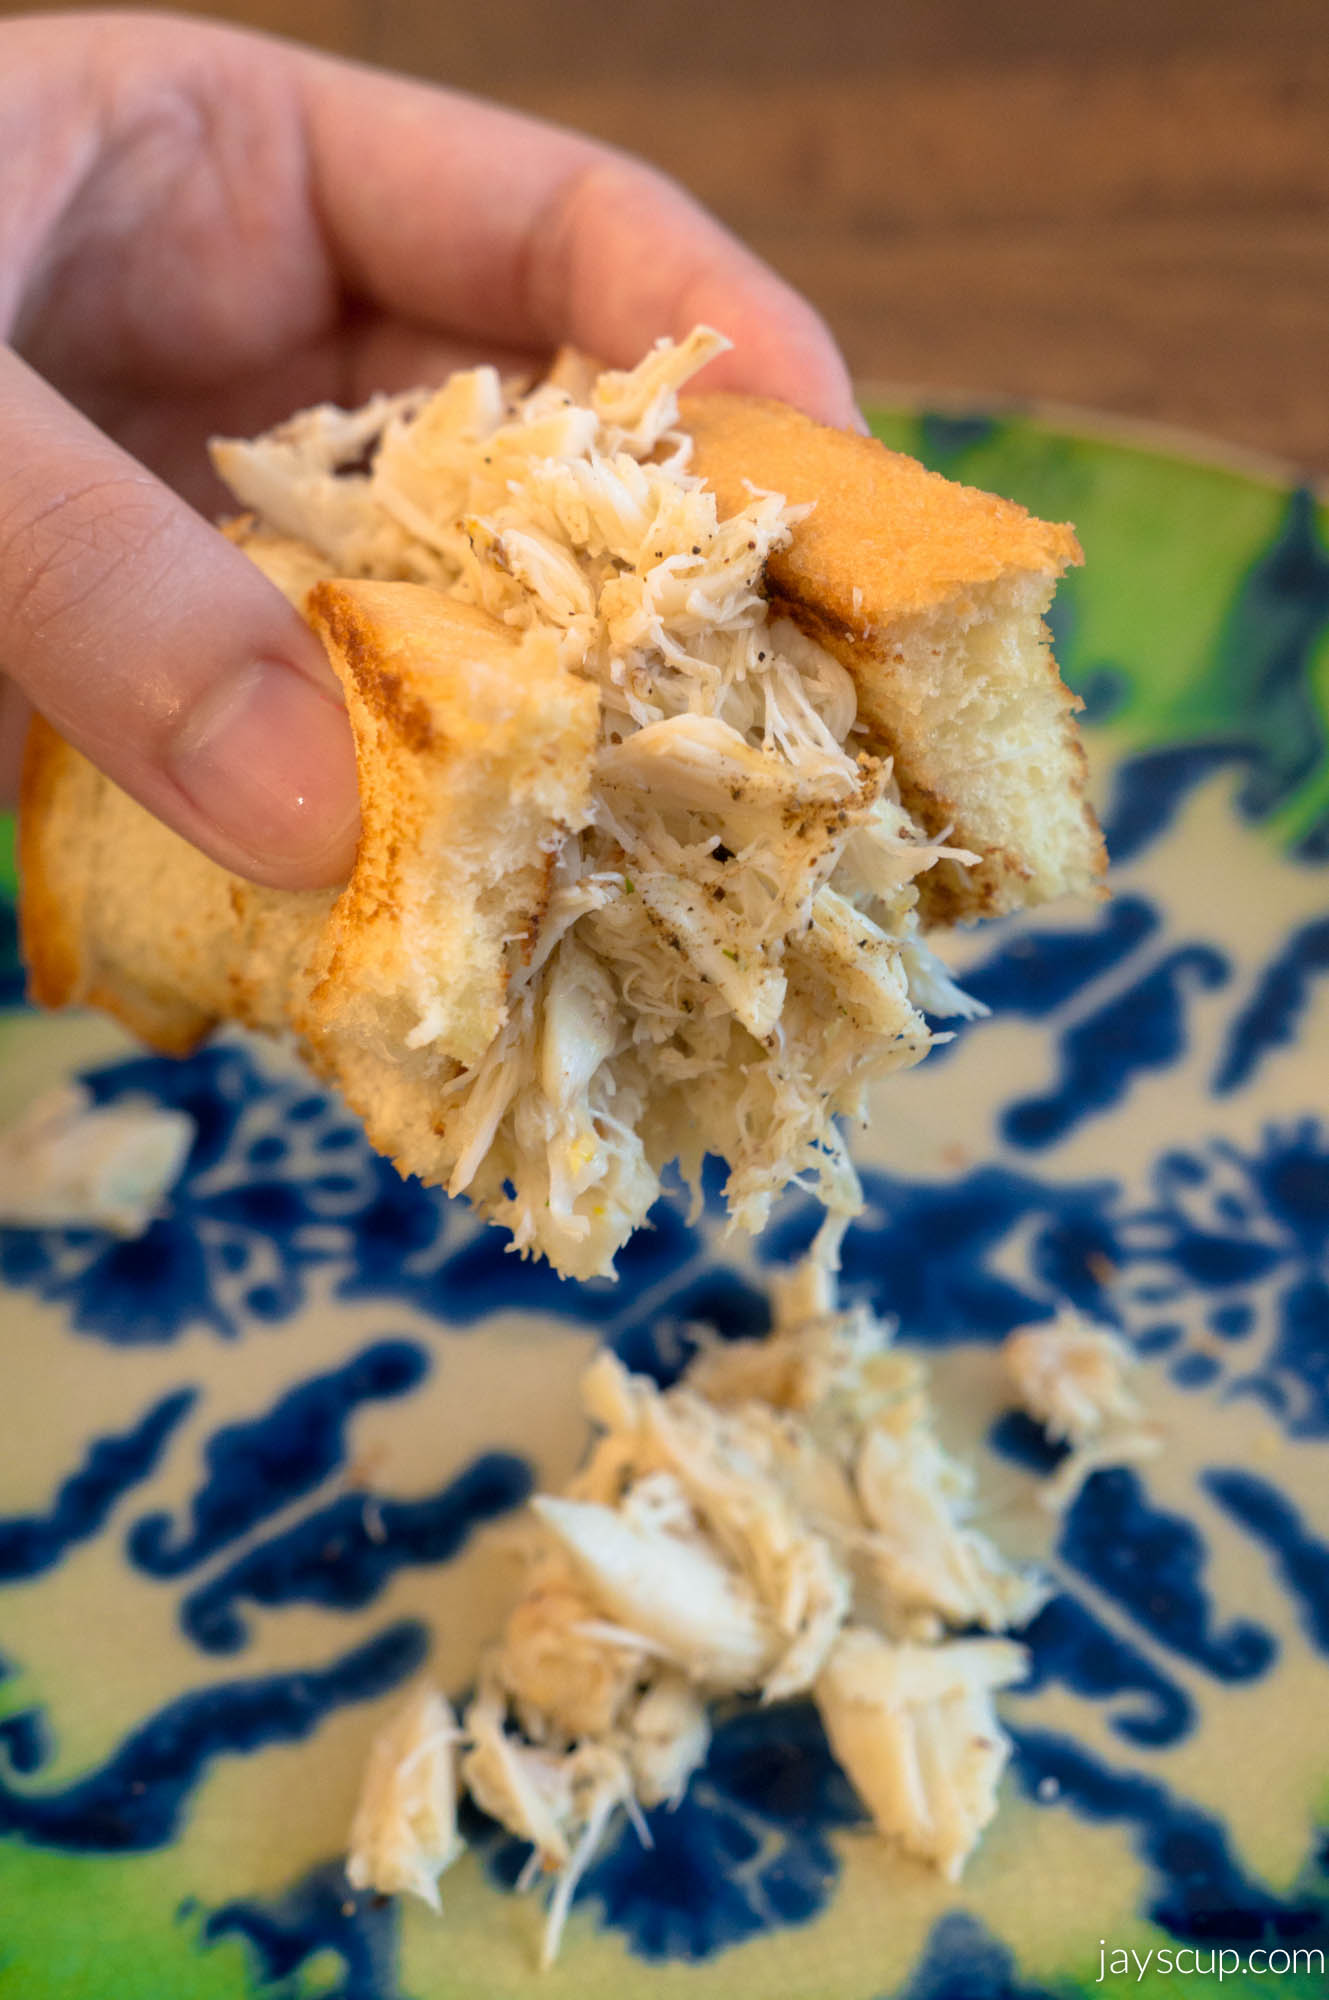
So simple and so satisfying!

Isn’t this such an easy lunch idea? Plus it’s only $20 to feed 6 people vs. a $25 sandwich at Fish. Hells to the yesss!

Do you like crab? Do you love it as much as meeee? What is your favorite crab recipe?

Crustacean lover (eww),
Jay

Fancy Grilled Cheese

Bread. Butter. Cheese. All delicious. Who doesn’t love a grilled cheese sandwich?

But I’m going to one-up this traditional sandwich. Fancy open faced grilled cheese sandwiches.

Up close

Here’s a recipe for my grown up grilled cheese sandwich. If you read the last post, you know that I made these treats for my Super Bowl party. It’s such a great food to have at a party because you can make it in bulk, and it won’t break the bank account! For under $20, you can easily feed 10 people with gourmet grilled cheese.

Ingredients: butter, bread, American cheese, onions, tomato, arugula, and a fried egg.

Directions:
1. Preheat the oven to 500°F.
2. Let’s prepare the bread. Melt butter and spread it onto both sides of the bread with a brush. Then pan fry the bread on both sides. Once golden, place the bread onto a baking sheet.
3. Add two slices of cheese onto the bread. Yes, I said two. Super cheesy!
4. Now the veggies. Caramelize the onions (cook them in olive oil until browned), then add sliced tomatoes on top.
5. Place the baking pan into the oven and bake for 3 minutes, until cheese is melted.
6. While it’s baking, fry an egg. I like my eggs runny and over easy.
7. Take the bread out, add the arugula, and finally add the egg.

Serve this baby up, and eat the deliciousness.

Fancy grilled cheese

Crispy, buttery bread is always satisfying. The caramelized onions add sweetness. The tomatoes give it some tartness. The arugula is peppery, and the egg is the perfect topping.

Ready

What do you think about this recipe? Is thing something you can create? What are some of your favorite grilled cheese recipes?

Are you hungry yet?
Jay

Baked Broccoli Chicken Rice Cups

I love baking!

Not just sweets, but savory foods too. I absolutely love making things in muffin pans. So easy to take on the go and to give away as treats too. It’s my new favorite thing to do!

I recently made some baked broccoli & chicken rice cups (with lots and lots of cheese) that I must share with you! Scrumptious little things!

Baked

It’s really the perfect recipe because I always have leftover rice in the fridge. I seem to always make too much of a starch since it expands. I make too much pasta. I mash too many potatoes. I cook too much rice. I could feed a family of 10! In my case, MG and I have leftovers for a week. Oops! Does that happen to you too? What’s a good trick/tip to measuring the right amount?

Anyway, back to these little cups! It’s a really simple recipe (5-steps), and I promise you’ll eat more than one!

Ingredients:

  • 2 cups of cooked white rice
  • 1 medium broccoli crown
  • 1 chicken breast, cooked and diced
  • 1/2 cup chicken stock
  • 1/4 cup ranch salad dressing
  • 2 eggs, beaten lightly
  • 3/4 cup grated cheese (I chose cheddar, but feel free to use your favorite kind)
  • 1 teaspoon of garlic salt
  • Salt and pepper, to taste

Directions:

1. Preheat the oven to 350° F.
2. Cut the broccoli crown into smaller than bite-size pieces, then cook the broccoli either by steaming or boiling. I like to do a quick boil (3-5 minutes tops). Drain the broccoli and set aside.
3. Mix together all the ingredients, but only half the cheese.
4.  Fill each of the muffin pans with the mixture, and sprinkle the remaining cheese on top.
5. Put the pan into the oven for 25-30 minutes, until the tops are golden brown and crisp.

Once the cups are ready, scoop each out and serve! Eat away!

MixMixing it all together

RawReady to go in the oven! 

Close up
Cooked and ready to be eaten

Final
Perfect cups! ^^^

Is this something you can do? What are some other recipes that you’ve come across/made in a muffin pan?

Happy eating,
Jay

Chicken Fig Salad

Have you decided to eat healthier, lose some of that holiday weight? Cause I am, and I’m in the same boat with you! After my month long vacation, I’ve gotten a bit pudgier. Ugh.

I’m still in Orlando, but I can’t wait to get home and get back into a regular diet. I always tell myself to control the sweets intake around the holidays, but it’s so hard! It’s a test, and I always fail. Anyone with me?

I wanted to share my favorite salad with you. It’s extremely easy to do. What? A salad? I’m never full off a salad… I know, I’ve thought the same way. But this one has chicken and an egg, and you’ll be satisfied. Give it a try, and it won’t disappoint.

Salad

Ingredients: Cooked chicken breast, salad mix (I like to use a spring mix or spinach salad), fried egg, figs, feta cheese, and balsamic vinegar.

Directions: On your plate, add salad mix, bite size pieces of chicken breast, slivers of fresh figs, a fried egg, feta cheese, and now sprinkle a teaspoon of balsamic vinegar (a little vinegar goes a long way).

Fig

If you’re having trouble finding figs, check out Whole Foods and/or Trader Joe’s. If figs aren’t available, other great fruit options are strawberries, apple slices, and blue berries. Bleu cheese can also replace feta if you want a stronger cheese.

Salad

Want to be extra healthy? Make a cup of sweet green juice and add that chia!

What do you think of this salad? Do you have a scrumptious (but also filling) salad recipe?

Onto healthy eating (when I get back into the Bay),
Jay

H-Town Food

I finally got my food on in Houston!

On Saturday, I had Torchy’s Tacos for lunch. Then ventured to go to Cloud 10 Creamery. Sadly they didn’t have the Fall favorite, Maple Butter, but I do love their egg custard and vanilla bean flavors. Lastly, I got to buy some Crave cupcakes. This might sound crazy, but cupcakes are not on the top of my dessert list, probably at the bottom. Usually cupcakes are too sweet… I do love the design of the Crave store though – lots of teal and brown, a display of vintage mixers, and people hand stamping the logo onto fondant. Pretty neat store!

Torchy's TacosAt Torchy’s and yes, it was awkward taking this pic because I have no idea who those people are! I wish I had that sign though

Cloud 10 Creamery
Egg custard ice cream is delicious. I need to learn this recipe!

CraveCrave cupcakes – so much detail in each cupcake 

Just for fun, a few friends and I also went to Rocket Fizz. This store displays hundreds of sodas (including Jelly Belly soda, Jones, and a bunch of other crazy flavors, like bacon, pumpkin pie, and ranch dressing). So fun!

Rocket FizzOverload of soda!!

SodaDid you want a meal in soda form?

On a Sunday morning, one must have Shipley donuts when in Sugar Land. Bought half a dozen and easily ate them all!

Shipley's

MG and I made a reservation at Backstreet Cafe in Montrose for a late afternoon brunch, and I’m so glad we ventured out that far. We had an amazing lunch – crimini mushrooms cooked escargot style, jalapeños pasta chicken alfredo, and steak benedict with tomato hollandaise. Wow! Aren’t you so jealous? Definitely one of the better brunches that I’ve had. The restaurant is in a house with a full bar downstairs, and it also has live music. If you’re ever in Houston, take my word and check this place out! Make sure you make a reservation because apparently everyone and their mom knows about this joint.

Backstreet CafeHow cute is this restaurant?

Backstreet Cafe - Mushrooms

Jalapeño Alfredo

Steak Benedict

What are some of your favorite places to go in Houston or Sugar Land? Any recommendations since I’m still going to be here for a few more days?

What did you eat this weekend?
Jay

Beet Juice

I’m proud to say I’m still juicing! Ever since I’ve taken my oath to be a bit healthier back in September, I’ve actually been trying to drink a glass of fresh juice a day. I can’t honestly say that I’ve felt a huge surge of energy or a difference in weight since I started juicing, but it definitely helps cleanse my system, if you know what I mean *wink*. That must be a good thing right?

I find cleaning the juicer machine to be such a pain. So instead of juicing every day, I actually make enough for four glasses. One glass for myself, another for my husband. Store two other ones in mason jars and leave them in the fridge for the next day. That way I have to clean the juicer every other day. Pretty genius, if I do say so myself.

We have so much leftover pulp that I’m trying to figure out whether or not I should start composting. We live in a town home with a patio but no backyard. Composting seems a bit silly to do since we don’t need fresh soil. But it would be an environmentally friendly way to dispose of waste. City folk, any tips?

Here’s another great juice recipe that I’ve put together – beet juice. Costco has some cooked organic beets in the fridge section. Go take a gander!

Beet Juice

Ingredients: 3 beets, 4 carrots, 1 cucumber, 2 apples, half a head of romaine lettuce, 2 kale leaves, 4 celery stalks

So delicious and nutritious!

Do you know of another great beet juice recipe? Please share!

Cheers to your health,
Jay

Perfect Banana Nut Chocolate Chip Muffins

Yay! I’m back home in Houston for the Holidays. I can’t believe its been over a year since I’ve been back. I love the feeling of walking into your childhood home and your parents greet you with open arms. Mama has already prepared a snack, and everything is familiar. Fresh laundry is going, the home is warm with the heater, and the household cat is meowing for attention. Home sweet home!

Before MG and I left our house, we wanted to get rid of perishable items in our fridge. Do you do this too? Or is this a crazy person’s idea? We had 2 eggs, 2 heads of celery, 1 pound of carrots, 4 heads of romaine lettuce, 3 oranges, 2 apples, half a watermelon, and 3 ripe bananas. That’s a lot to eat in two days! I basically juiced all the veggies and fruits, and ended up with 7 larges glasses of green juice. We actually finished it all (with the help of a friend)! I would call it a cleanse, but we ate a bunch of carbs and sweets so I guess I can’t lie to myself…

What I had left. 2 eggs and 3 super ripe bananas. This means only mean ONE thing. Who can guess it (hint, title)?

Banana Nut Chocolate Chip Muffins! Easy to eat and take on the plane. I’ve been trying to decide what I should bake to break in my KitchenAid! How perfect right?

Done

Here’s my deliciously fluffy, not sweet, perfectly baked banana nut chocolate chip muffin recipe.

Ingredients

Ingredients:

  • 1/2 cup softened butter
  • 1 cup sugar
  • 2 eggs, room temperature
  • 1 teaspoon vanilla extract
  • 3 RIPE bananas, mashed (super, super ripe)
  • 2 cups flour
  • 1 teaspoon baking soda
  • 1 teaspoon salt
  • 3 tablespoons brown sugar
  • 3/4 cup chocolate chips
  • 3/4 cup chopped walnuts

Baker’s tip: I highly encourage mixing your dry ingredients separately from your wet ingredients

Instructions:

1. Preheat the oven to 375 ° F.
2. Beat the butter and sugar together until light and fluffy.
3. Beat the eggs into the butter/sugar mixture.
4. Add vanilla.
5. In a separate bowl, mix together the dry ingredients (flour, baking soda, salt, brown sugar). Now combine everything into the wet mixture.
6. Mix in the mashed bananas. Add the walnuts and chocolate chips until thoroughly mixed.
7. Scoop mixture into muffin pan cups 3/4th full.
8. Bake for 20 minutes or until tops are golden brown.

These babies are the perfect snack. Gobble them up! Take them on the go with you. Share them with friends. Midnight snack? Yes, please!

Mixed
This mixture is quite delicious… I might have had a spoonful

Ready
Fill the cups 3/4th up

Muffins
Let them cool on a cooling rack so they are extra fluffy!

What kind of muffins do you like? I think banana nut is definitely my favorite, with chocolate gives it an extra plus. Do you have a favorite banana muffin recipe? Do share!

Snack time,
Jay

Roasted Chicken Recipe

Did you know that Costco sells two Whole Organic Chickens for around $20? Such a great deal!

Usually I make one for dinner, and I’ll freeze the second one until I need it.

Roasting

MG and I make a whole chicken on Sunday night, eat leftover chicken breast with pasta on Monday for dinner, and finish the leftover meat on a Tuesday with a chicken salad during lunch. One $10 chicken for three meals – can’t get any better than that right?

I also love to make a roasted chicken for a dinner party of 4 with some roasted veggies. Spending $15 for a dinner party – can’t complain about that!

Ingredients (only 4):

  • Whole chicken
  • Kosher salt
  • Freshly ground pepper
  • Thyme

Directions:

1. Preheat the oven to 450° F.
2. Using paper towels, dry the chicken really well inside and out. As dry as you can get.
3. Salt and pepper the outside and inside – be generous and coat evenly.
4. Now truss the chicken (Trussing is important. It keeps the tips from burning and the thighs keep the chicken from drying out).
5. Put the bird in a roasting pan. If you have extra bread, you can line the bottom of the pan with bread. This helps dry the heat even more for an extra crispy chicken. However, bread is totally optional.
6. Roast the chicken for 60 minutes, then broil for 5-10 for a crispy skin.
7. Remove the chicken from the oven and sprinkle thyme.
8. Let the chicken rest for 15 minutes on a cutting board.
9. Remove the twine and cut the chicken. Cutting the chicken is such an art form that I’m still learning. First you break off the middle wing pieces. Then you remove the legs and thighs, and the next cut I make is the middle of the breast captivity. I haven’t mastered cutting the oysters out from the backbone. One day I will…
10. Serve and eat!

This chicken is so juicy. The skin is crispy. And it’s such a cheap meal. Yum!

Salting and pepperTrussed and salted 

ReadyReady for the oven

In the Oven
Done roasting!

RestingRemember to let it sit and rest for 15 minutes before cutting into it

DoneThe end product doesn’t look beautiful, but it tastes heavenly! 

Chicken is such a universal meat – you can make casseroles, pair it with salads, cook it in pasta, add it to stir frys, or simply eat it plain. What are some of your favorite chicken dishes? Also what are some ways you make chicken? Please share your recipe!

Who’s hungry?
Jay

When you have lots of bread… make crumbs!

How was your Thanksgiving? Give me the details on what you ate! Did you also go shopping afterwards to walk off some of that food?

MG and I decided to go to the stores at 10pm to digest. This season there isn’t much that is our on wish list, so we didn’t purchase anything, but it was super fun to people watch.

Now that Thanksgiving is over, you may have a bunch of dinner rolls left over. Or maybe you have so many leftovers that your bread is going stale because who wants sandwiches when you can have turkey and stuffing with a side of green bean casserole for lunch.

Instead of throwing all that bread away, make bread crumbs!

Bread Crumbs

Ingredients:

  • Half a loaf of bread or 10 rolls, torn into 1-inch pieces
  • 1 tablespoon Italian seasoning
  • 1/2 teaspoon garlic powder
  • 1/4 teaspoon salt

Directions:

1. Preheat the oven to 300 degrees F.
2. Place all of the ingredients into a blender or Magic Bullet. Pulse until the bread becomes crumbs.
3. Spread the crumbs evenly on a baking pan and bake until the crumbs are crisp and begin to brown (about 5 minutes).
4. Cool the crumbs.
5. Transfer to an airtight container and store at room temperature (for up to 2 weeks) or store in the freezer (for up to 6 months).

Crumbs

Crumbs
Mine are going in the freezer

Bread crumbs are so versatile. You can make crab cakes, fried eggplant or zucchini fries, baked fish, veggie patties, or even meatloaf. What are your favorite recipes that include bread crumbs?

Don’t let food go to waste! What other leftovers do you have? Let’s come up with a solution!

Happy Friday,
Jay
—–
Original recipe

Jay’s Vanilla Ice Cream Recipe

If you could only choose one ice cream flavor for the rest of your life, what would it be? Mine… easy, vanilla. You can’t get sick of the flavor, and it can always be paired with something else (cookies, brownies, cake, pie, coffee).

Cookie sandwich
Even Chubaloo wanted something sweet!

I bought a Cuisinart ice cream maker this past summer and have been making my own ice cream since then. I’ve made an assortment of flavors including strawberry, avocado, coffee, and vanilla. Making your own ice cream is a little pricer than purchasing ice cream from the store since you’re using raw ingredients. Also, the ice cream cannot last you months in the freezer, like store bought. But homemade ice cream tastes so delicious and creamy. It’s also bit healthier too since there are no artificial additives or preservatives. Plus it’s fun to make up your own recipes!

I’ve been trying to perfect my vanilla recipe so that it’s not too sweet but extra vanilla-y. After batches of batches of vanilla ice cream (too much ice cream? darn. first world problem), I’ve finally accomplished it! Time to bust out that homemade vanilla extract again.

ingredients

Ingredients:

  • 2 eggs
  • 3/4 cup of granulated sugar
  • 1 tablespoon of vanilla extract
  • 1 cup of whole milk
  • 2 cups of heavy whipping cream

Directions:

1. Beat eggs until light and fluffy (about 2 minutes).
2. Add sugar and mix well.
3. Combine vanilla and mix.
4. Add the whole milk, then add the heavy whipping cream. Mix it all together.
5. Pour mixture into your ice cream maker. Follow your ice cream maker’s instructions (I simply turn on the machine and leave it churning for 20 minutes, then put the ice cream in the freezer for a few hours).

So simple!

Vanilla

Do you have an ice cream machine at home? What kind of flavors do you make?

Pie a la mode

With pecan pie, pumpkin pie, and all kinds of other sweet treats, ice cream is a must!

Happy Thanksgiving!
Jay