A New Look For My Wall Rack

If you’ve been reading along, you know I’m a bargain hunter. Hunting for goodies at thrift stores, Cost Plus World Market, and Marshall’s for home decor is my hobby! Okay, maybe not but I really enjoy doing it.

One knows that you can never have enough wall racks in your bedroom. I have two but it’s weird how my clothes still like to leave a path on the floor of where I walk. Does that happen to you too? Strange right?

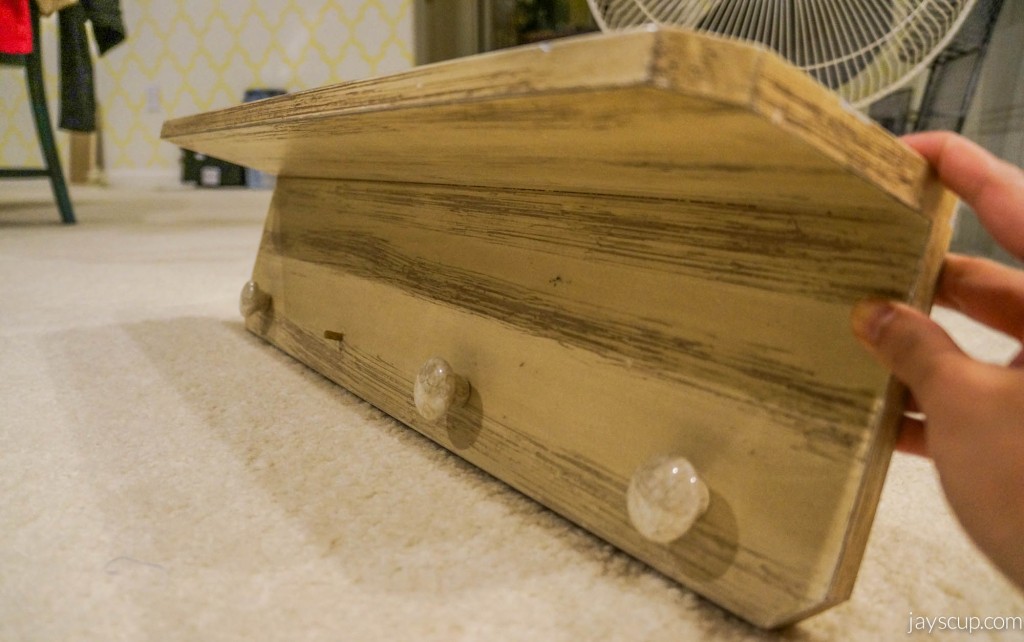
Recently I came across a wall coat rack at Marshall’s for $10 in the clearance area. It was on sale because someone had put some nail polish paint on the corner and a knob was missing. I couldn’t pass up such a good deal and had to have it!

Marshall's Find

All I saw was potential!

Marshall's rack

I love the grain of the boards and the marbling of the knobs. I didn’t reuse the knobs for this project, but I’m going to save them for something else. Nowadays there are so many decorative knobs. The Anthropology knobs are swoon-worthy, but for $8 a knob, that’s almost the price of my wall rack! Nope… cannot. Fortunately I went to Cost Plus World Market and came across adorable knobs for $1.99 a piece. Done!

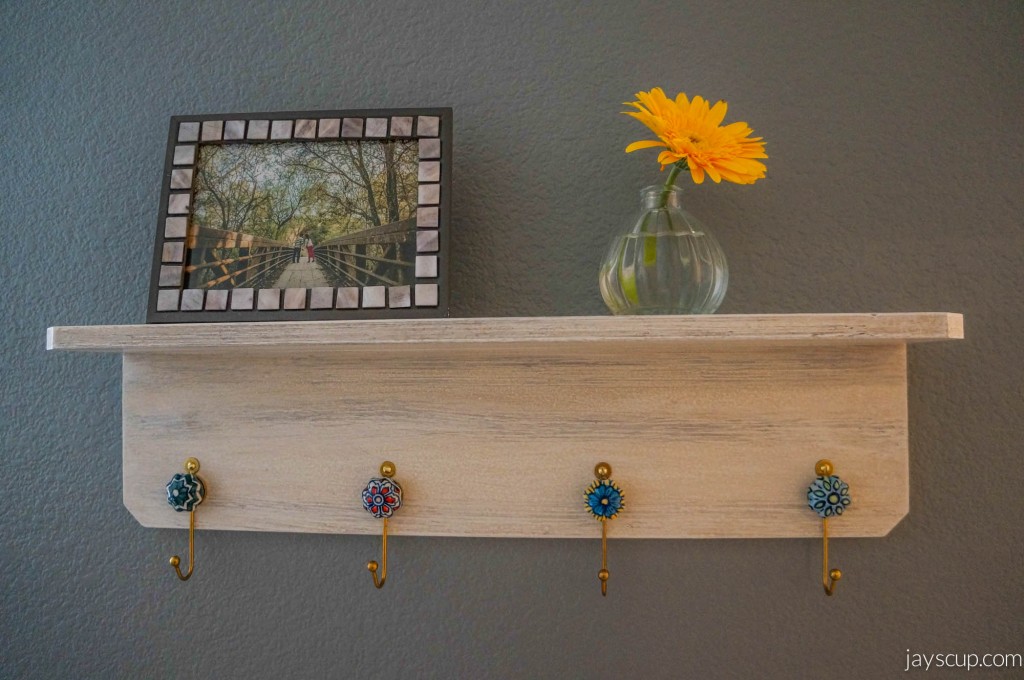
Knobs I love the colors of these knobs and how they are different. The blue helps bring them all together.

First off, I sanded down the rack so that new paint could stick and so that the nail polish paint was gone. I put a fresh coat of paint on the wall rack, a light and sheer white to make it a lighter color. The sheerness also allows the grain detail to show through. Then I took off the old knobs and screwed in the new colorful ones. This is the final product:

Done!

It’s hanging in our bedroom, and it’s the first thing you see when you walk in. I just need to be careful to not put my delicates on the rack so that guests don’t see!

What do you think of the revamped wall rack? Is this something you can do? How many coat racks do you have in your bedroom, and do you need more too?

Happy deal hunting,
Jay
—–
White Frost Acrylic Paint by FolkArt

Reece’s Pieces & More Pieces

Candies

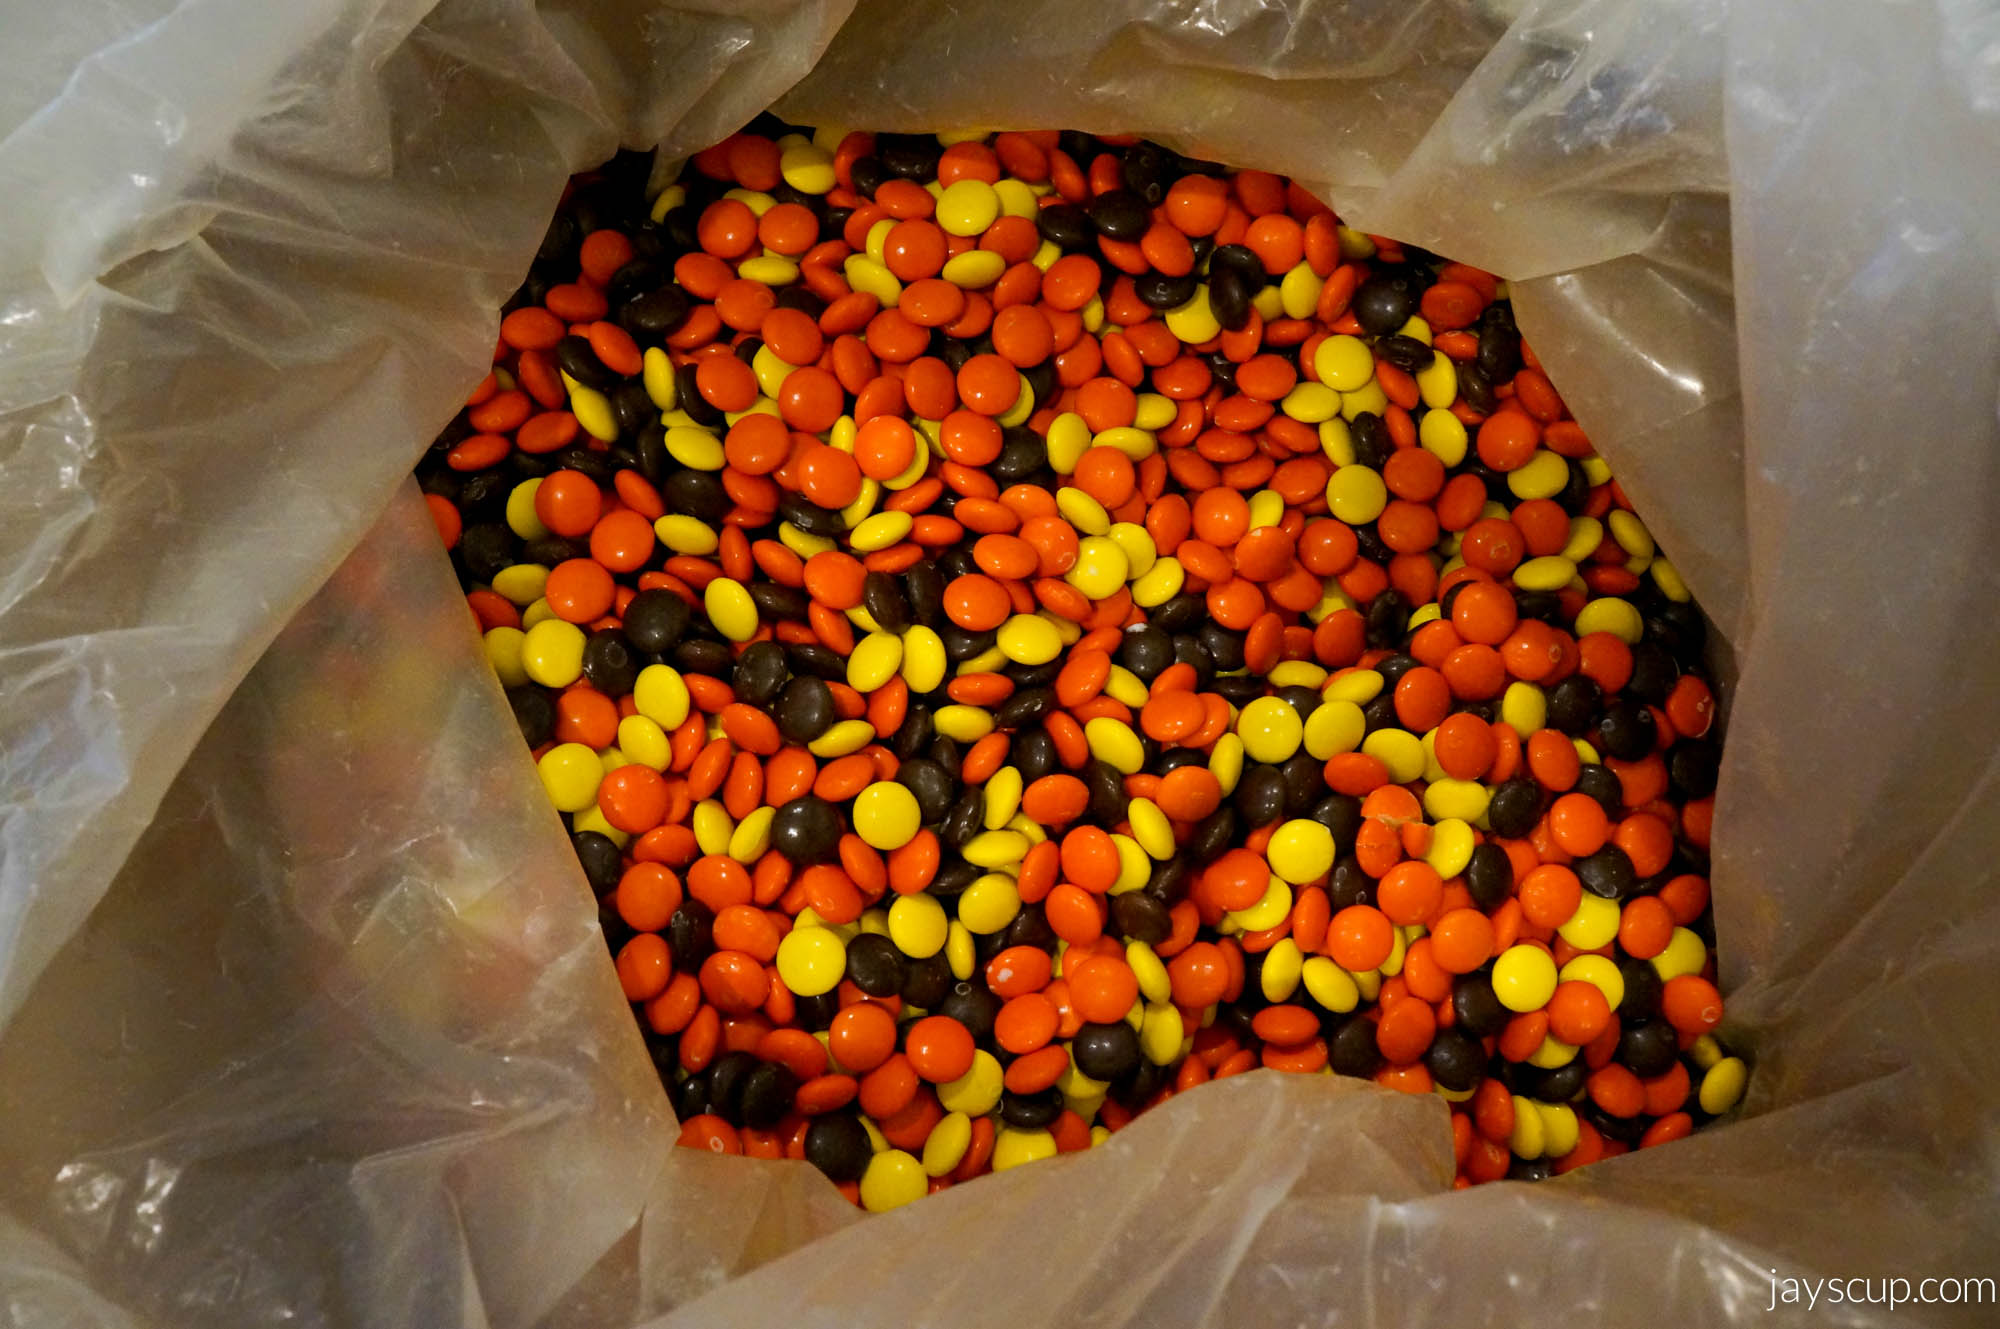
Cleaning is fun when you find random surprises. The best is when you find money! Though I didn’t come across any cash, I did find a 25lb box of Reece’s Pieces. You might not be so lucky, unless you had a roommate that owns a yogurt shop. Because that’s what happened to us and fortunately winner, winner, chicken dinner… err Reece’s Pieces, you know what I mean.

25lb box

Obviously snacking is a good choice for these little, circular goodies. Also baking!!!

If you don’t bake often, here are a few helpful tips.

  • Mix the dry ingredients separate from the wet ingredients.
  • Butter and eggs should always be at room temperature.
  • In case you’ve forgotten to take the butter and eggs out to sit, you can heat the butter in the microwave in 5 second bursts until it’s softened. You can also submerge the eggs in warm water for 5 minutes for room temperature.
  • Freeze the dough if there’s too much! That way you can always bake cookies when guests come over or if you’re craving freshly baked cookies.

Onward to two delicious cookie recipes for you to try.

CookiesRegular Reece’s Pieces cookies on the left. Reece’s Pieces Muesli Cookies on the right (I call them my healthy cookies).

Reece’s Pieces Cookies
(makes 4 dozen large cookies)

Ingredients:

  • 2 cup and 1/4 cup flour
  • 1 teaspoon baking soda
  • 1 teaspoon salt
  • 1 cup butter (at room temperature)
  • 3/4 cup granulated sugar
  • 3/4 cup brown sugar
  • 1 teaspoon vanilla extract
  • 2 eggs (at room temperature)
  • 2 cups Reece’s Pieces

Directions:

  1. Preheat oven to 350°F.
  2. Beat the eggs, then add the vanilla extract.
  3. Mix the flour, baking soda, and salt together in a separate bowl.
  4. Mix the granulated sugar and brown sugar together. Then blend the butter into the sugar until light and fluffy.
  5. Blend the eggs and vanilla into the sugar mixture. Add in the dry ingredients.
  6. Mix in the Reece’s Pieces.
  7. Form dough balls onto a baking sheet. I like to make bite-sized cookies, so I use a 1 teaspoon measuring spoon to help me form the dough balls.
  8. When the oven is ready, put the tray into the oven and bake for 7-10 minutes, or until golden brown.
  9. Eat them!

Reece’s Pieces Muesli Cookies
(makes 2 dozen large cookies)

Ingredients:

  • 1 cup of muesli
  • 3/4 cup of flour
  • 1/2 cup of butter (at room temperature)
  • 3/4 cup of brown sugar
  • 1.5 cups of Reece’s Pieces
  • 1/2 teaspoon baking soda
  • 1/2 teaspoon salt
  • 1/2 teaspoon vanilla extract
  • 1 egg (at room temperature)

Directions:

  1. Preheat oven to 375°F.
  2. Beat the eggs, then add the vanilla extract.
  3. Mix the flour, baking soda, and salt together in a separate bowl.
  4. Mix the granulated sugar and brown sugar together. Then blend the butter into the sugar until light and fluffy.
  5. Blend the eggs and vanilla into the sugar mixture. Add in the dry ingredients.
  6. Mix in the muesli and Reece’s Pieces.
  7. Form dough balls onto a baking sheet.
  8. Bake for 7-10 minutes, or until golden brown.

These recipes are amazing. When I make them, my husband can eat a dozen in a sitting, and people are always grabbing for more!

With so many Reece’s Pieces, I had to make a Reece’s Pieces cake too.  I baked chocolate cake from the box, put on frosting, and then places the Reece’s Pieces on top. This is going to be such a hit for Fall.

CakeIsn’t it so pretty?

Cake

What else should I make with Reece’s Pieces? Any ideas?

Get in my belly,
Jay

Homemade Vanilla Extract

It’s Fall, which means we’re heading towards the season of food, food, and more food! I’m ready for the pumpkin, the cinnamon, and the peppermint! Baked goods galore!

Fall-2012

If you bake at home you know that many, actually more than many, recipes call for vanilla. Did you know that the vanilla extract you buy at stores is watered down with simple syrup? I think paying $5 at the grocery store for a 2 ounce bottle of watered down extract is so expensive!

So I want to let you in on a little secret. Vanilla extract is extremely easy to make at home. It takes a bit of time for it to sit, but after you’ve made the extract, it will last you up to 5 years!

Ingredients:

Instructions:

1. Cut one vanilla bean lengthwise, leaving about an inch intact on the ends. Do the same for the other two beans.
2. Place all three beans into a mason jar, and fill the jar with vodka until the beans are submerged.
3. Close the lid tightly, and let the jar sit in a dark area for 2 months (mine are in a cabinet under the sink). Shake the jar about once a week.
4. Once two months are up, it’s ready for use! Every time the extract is used, pour more vodka into the jar to ensure that the beans are always submerged.

Homemade Vanilla

The second picture looks like I got some weird pets right? Ha!

Tips:

  • Use cheap vodka! I tested Smirnoff vs. Kettle One, and it does not make a difference.
  • Different beans have different flavors. Madagascar, also known as Bourbon vanilla, has a strong flavor and it’s very fragrant (this is what I bought). Mexican vanilla has a bit of a richer taste.
  • Use a permanent marker and write down the date of when you made the vanilla on the lid so that you know when 2 months have passed. Plus, it’ll be helpful for when your 5 years is up.

It’s perfect timing to make the extract now because in two month it will be November! Primetime for sweets! Another reason to make the extract? No more going to the grocery store for vanilla for 5 years.

Are you going to try this? What are some of your favorite recipes that require vanilla extract?

Secrets, secrets are no fun,
Jay

A Different Kind of Slider & Fries

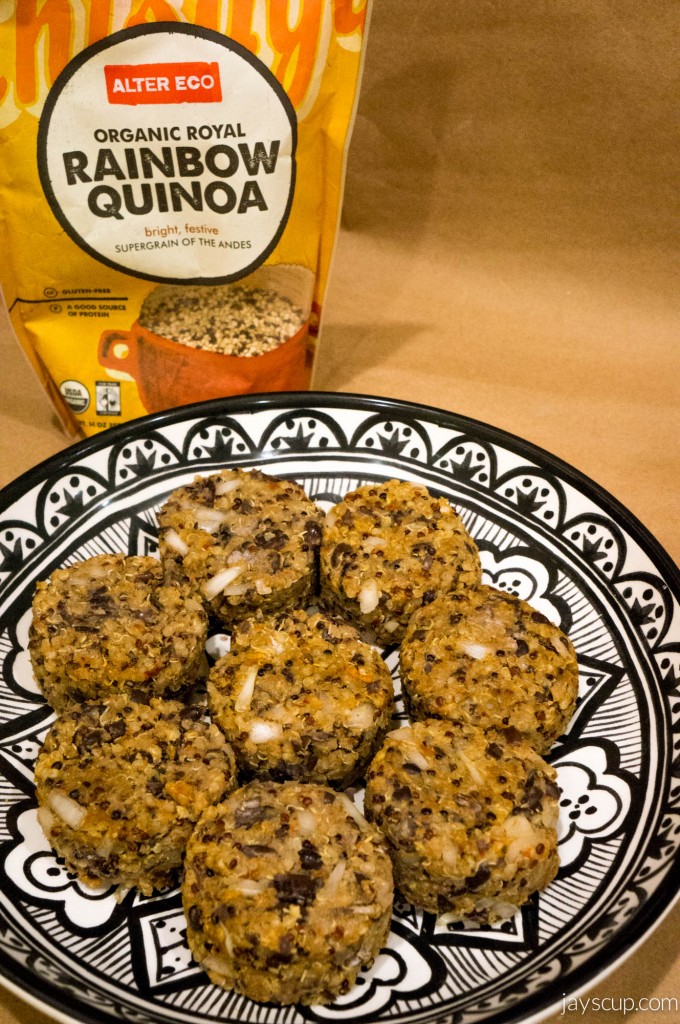
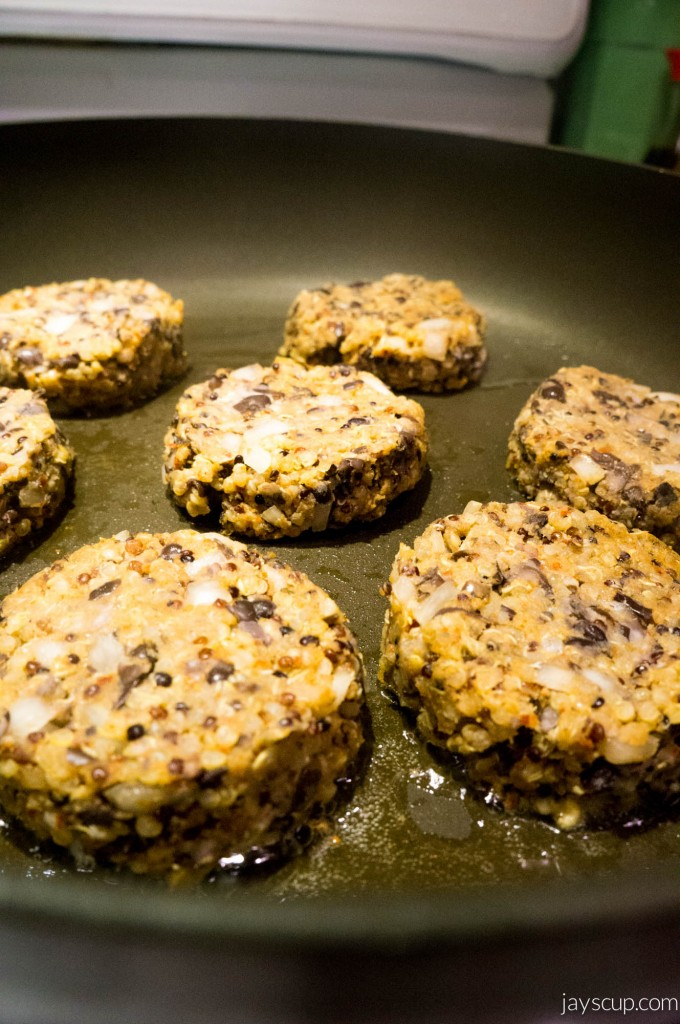
MG and I are still going strong on our healthy eating (healthier living post), granted it’s only been a week. We are loving the foods that we consume, and the best part is that we don’t hate ourselves after a meal. Speaking of meals, I have created a variation of your typical slider and fries, Quinoa Sliders and Eggplant Fries with a Side of Garlic Aioli. It sounds a bit crazy, I know. But it’s scrumptious! Here’s the recipe for the quinoa patties:

Quinoa patties
Quinoa from my Trade as One subscription!

Ingredients:

  • 1/4 cup of quinoa
  • 1/2 cup of chicken broth
  • 1 can of black beans (rinse, drained, and mashed with a fork)
  • 1/2 cup of bread crumbs
  • Half and onion, chopped
  • 1 clove of garlic (minced)
  • 1 1/2 teaspoons of cumin
  • 1/2 teaspoon of salt
  • 1 teaspoon of hot sauce
  • 1 egg (beaten)
  • Olive oil for cooking

Quinoa patties cooking

Directions:
1. Boil the quinoa and chicken broth in a pot. Reduce heat to medium-low, cover the pot, and simmer until the broth has been absorbed and the quinoa is as tender (about 15 minutes). If you want the quinoa to be more tender, add some more broth and continue to cook until broth is absorbed.
2. Mix the cooked quinoa, mashed black beans, egg, bread crumbs, onion, garlic, salt, hot sauce, and cumin together. I like to use my hands!
3. Form patties by scooping up the mixture in a 1/4 measuring cup.
4. Heat up the olive oil in a large skillet, and place the patties onto the pan. Squish the patties with your fingers just a bit to thin them out.
5. Cook the patties thoroughly (about 2.5 minutes on each side).

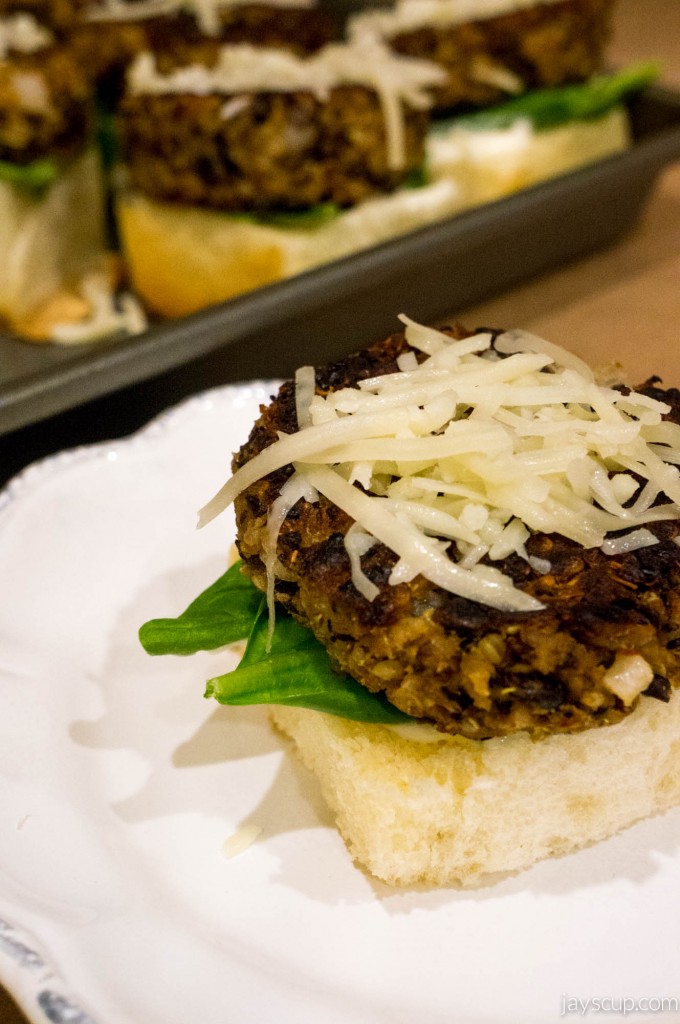
Quinoa sliders!

With the quinoa patties, I made sliders by using sweet Hawaiian Bread. The sliders are low-carb because I’m using half of the bread roll. Spread mayo, ketchup, and mustard on the bun, add some spinach then the patty, and finally sprinkle some cheese on top. Mmmm Mmmm Mmmm!

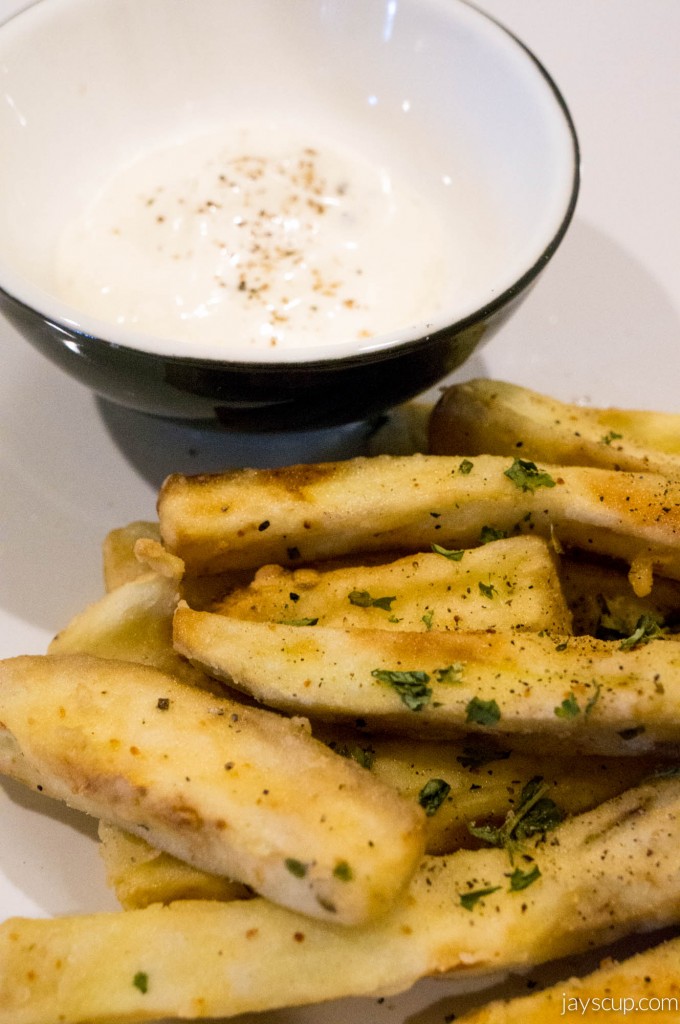
Of course with sliders, you have to have fries! I came across a recipe for eggplant fries, and I had an eggplant laying around. How perfect is that? I tweaked the original recipe a bit because I only had dried herbs. These things are so good, I want to make them for snacking!

Eggplant Fries

Ingredients for eggplant fries:

  • Medium-sized eggplant
  • 3/4 cup all-purpose flour
  • 1 teaspoon garlic powder
  • 1/2 teaspoon dried oregano
  • 1 teaspoon dried rosemary
  • 1 teaspoon dried parsley
  • Salt and pepper
  • Oil for frying

Garlic aioli (1/2 cup): Mix all ingredients below and chill for 30 minutes before serving.

  • 2 cloves garlic, minced
  • 1/4 cup and 2 tablespoons mayonnaise
  • 1 tablespoon lemon juice
  • 1/4 teaspoon salt
  • 1/4 teaspoon black pepper

Instructions for eggplant fries:
1. Peel eggplant and slice it into sticks. Salt the eggplant sticks generously and let them sit for about 30 minutes. This osmosis process helps take out the bitterness of eggplants. Afterwards, rinse the eggplant with cold water and dry them with a paper towel.
2. Combine the flour and all the seasonings.
3. Then cover each eggplant stick with the flour mixture.
4. Heat oil over medium heat in a deep pot, and fry the eggplant in small batches until golden (about 2 minutes).
5. Remove the sticks from the oil, and place them onto a paper towel. Sprinkle with some pepper, and serve hot with garlic aioli.

If you make this for a dinner party, I bet you they will be surprised that it’s so healthy! I know my guests were!

Enjoy your meal,
Jay
—–
Original eggplant fries recipe
Original aioli recipe

Flaming Cake & Revamped Goodies

Not every weekend needs to be an epic one. Sometimes, one needs to stay home to rest and buy groceries/run errands (basically my entire Saturday afternoon) and do some house things (basically my Sunday).

Three very serious and awesome things happened this weekend.

One:  this cake.

Baked Alaska
Coffee ice cream, fudge brownie, torched/flaming meringue, and bittersweet chocolate. Get it! Get it!

I went to Vault 164 in San Mateo with some friends on Friday night for dinner and drinks. The restaurant has a really scrumptious menu and fun cocktails, also very reasonable prices. I’d recommend you check it out if you’re ever in the area.

DIY projects are usually posted on Wednesdays, but I have a special treat right now. Since I am thrilled to show you some of my projects that I worked on over the weekend, I’ll be posting a DIY today!

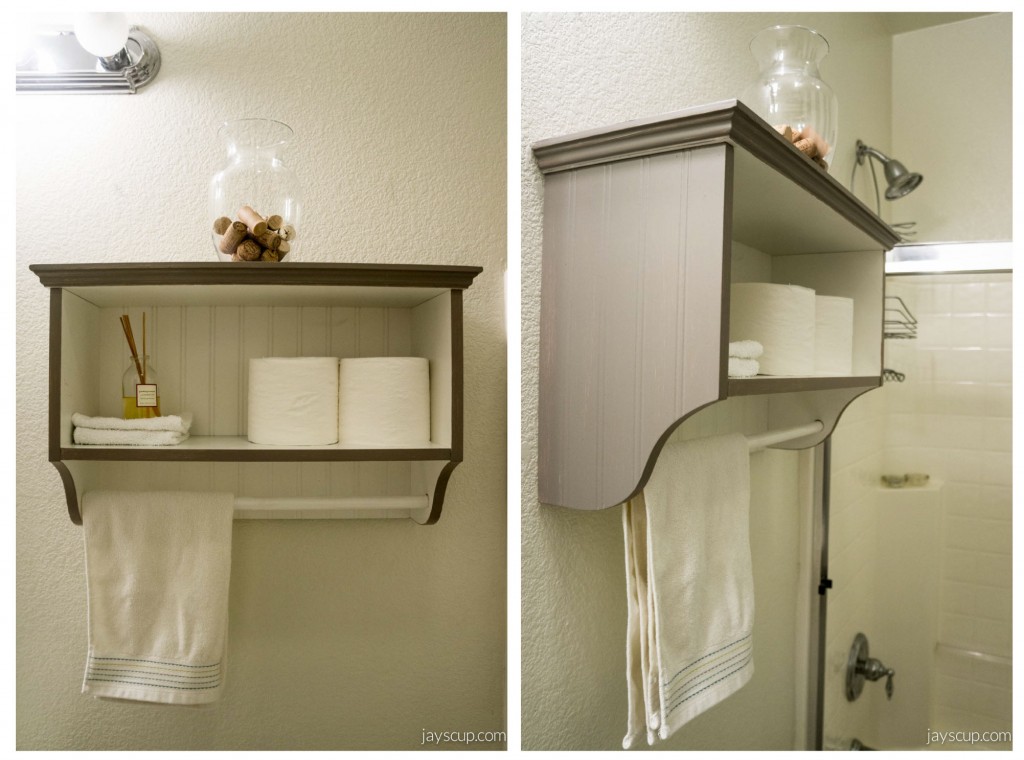
Back on track… second very serious and awesome thing: I painted my storage unit for the bathroom! Do you remember what it looked like before? Since Chubs now owns the cabinet under the sink (his litter box is there), we had no place to put extra toilet paper. That could be a very awkward situation for guests, so you’re welcome everyone that comes over!

Bathroom Unit

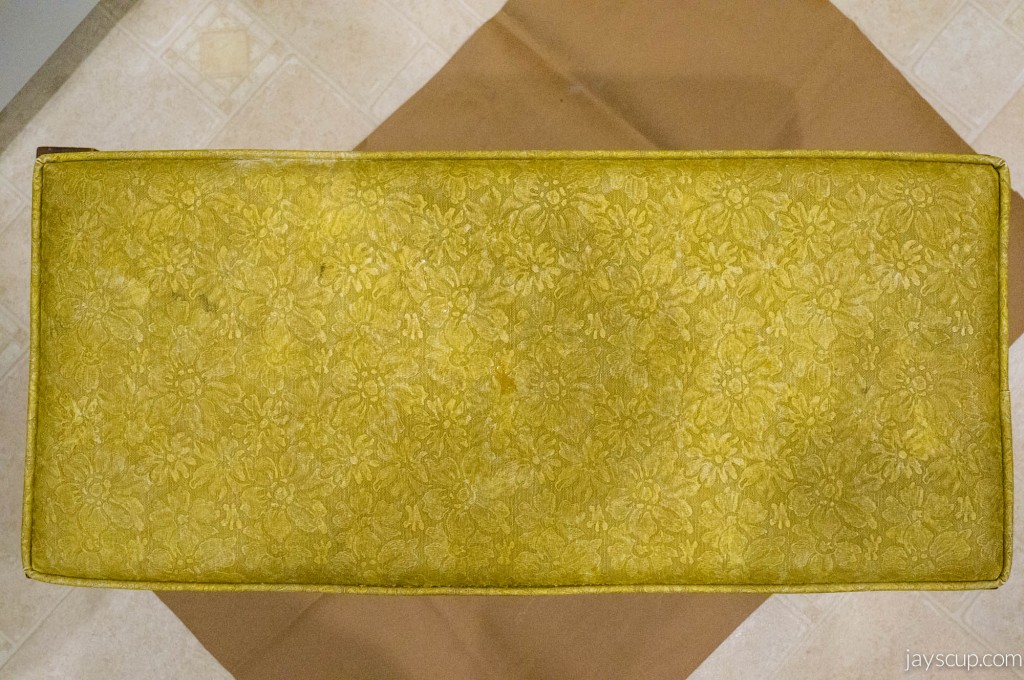
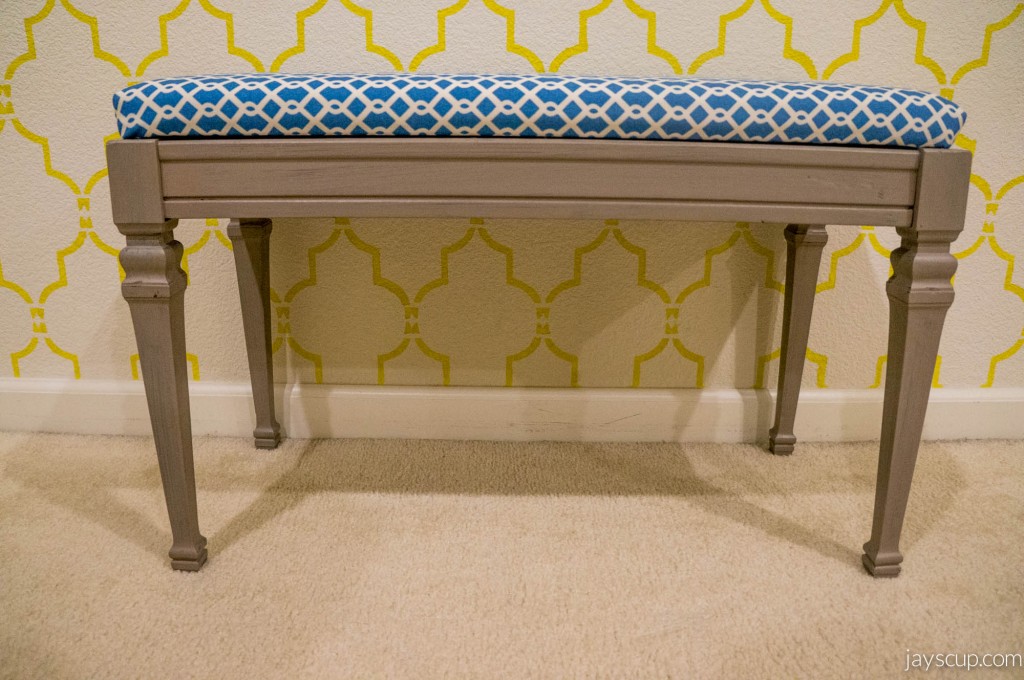
Third and best thing that happened: I finally revamped that bench I bought at Salvation Army! Remember this bench that had so much potential? Remember how I paid only $15 for it? I’ve finally repainted and reupholstered it!

Bench - Before

Bench Top - BeforeIt’s so old! Look at those stains…

I’m excited to reveal this! Drumroll please!

DSC01785

What do you think? I’ll be putting this downstairs in our foyer. Can’t wait for people to walk in and see this beautiful piece!

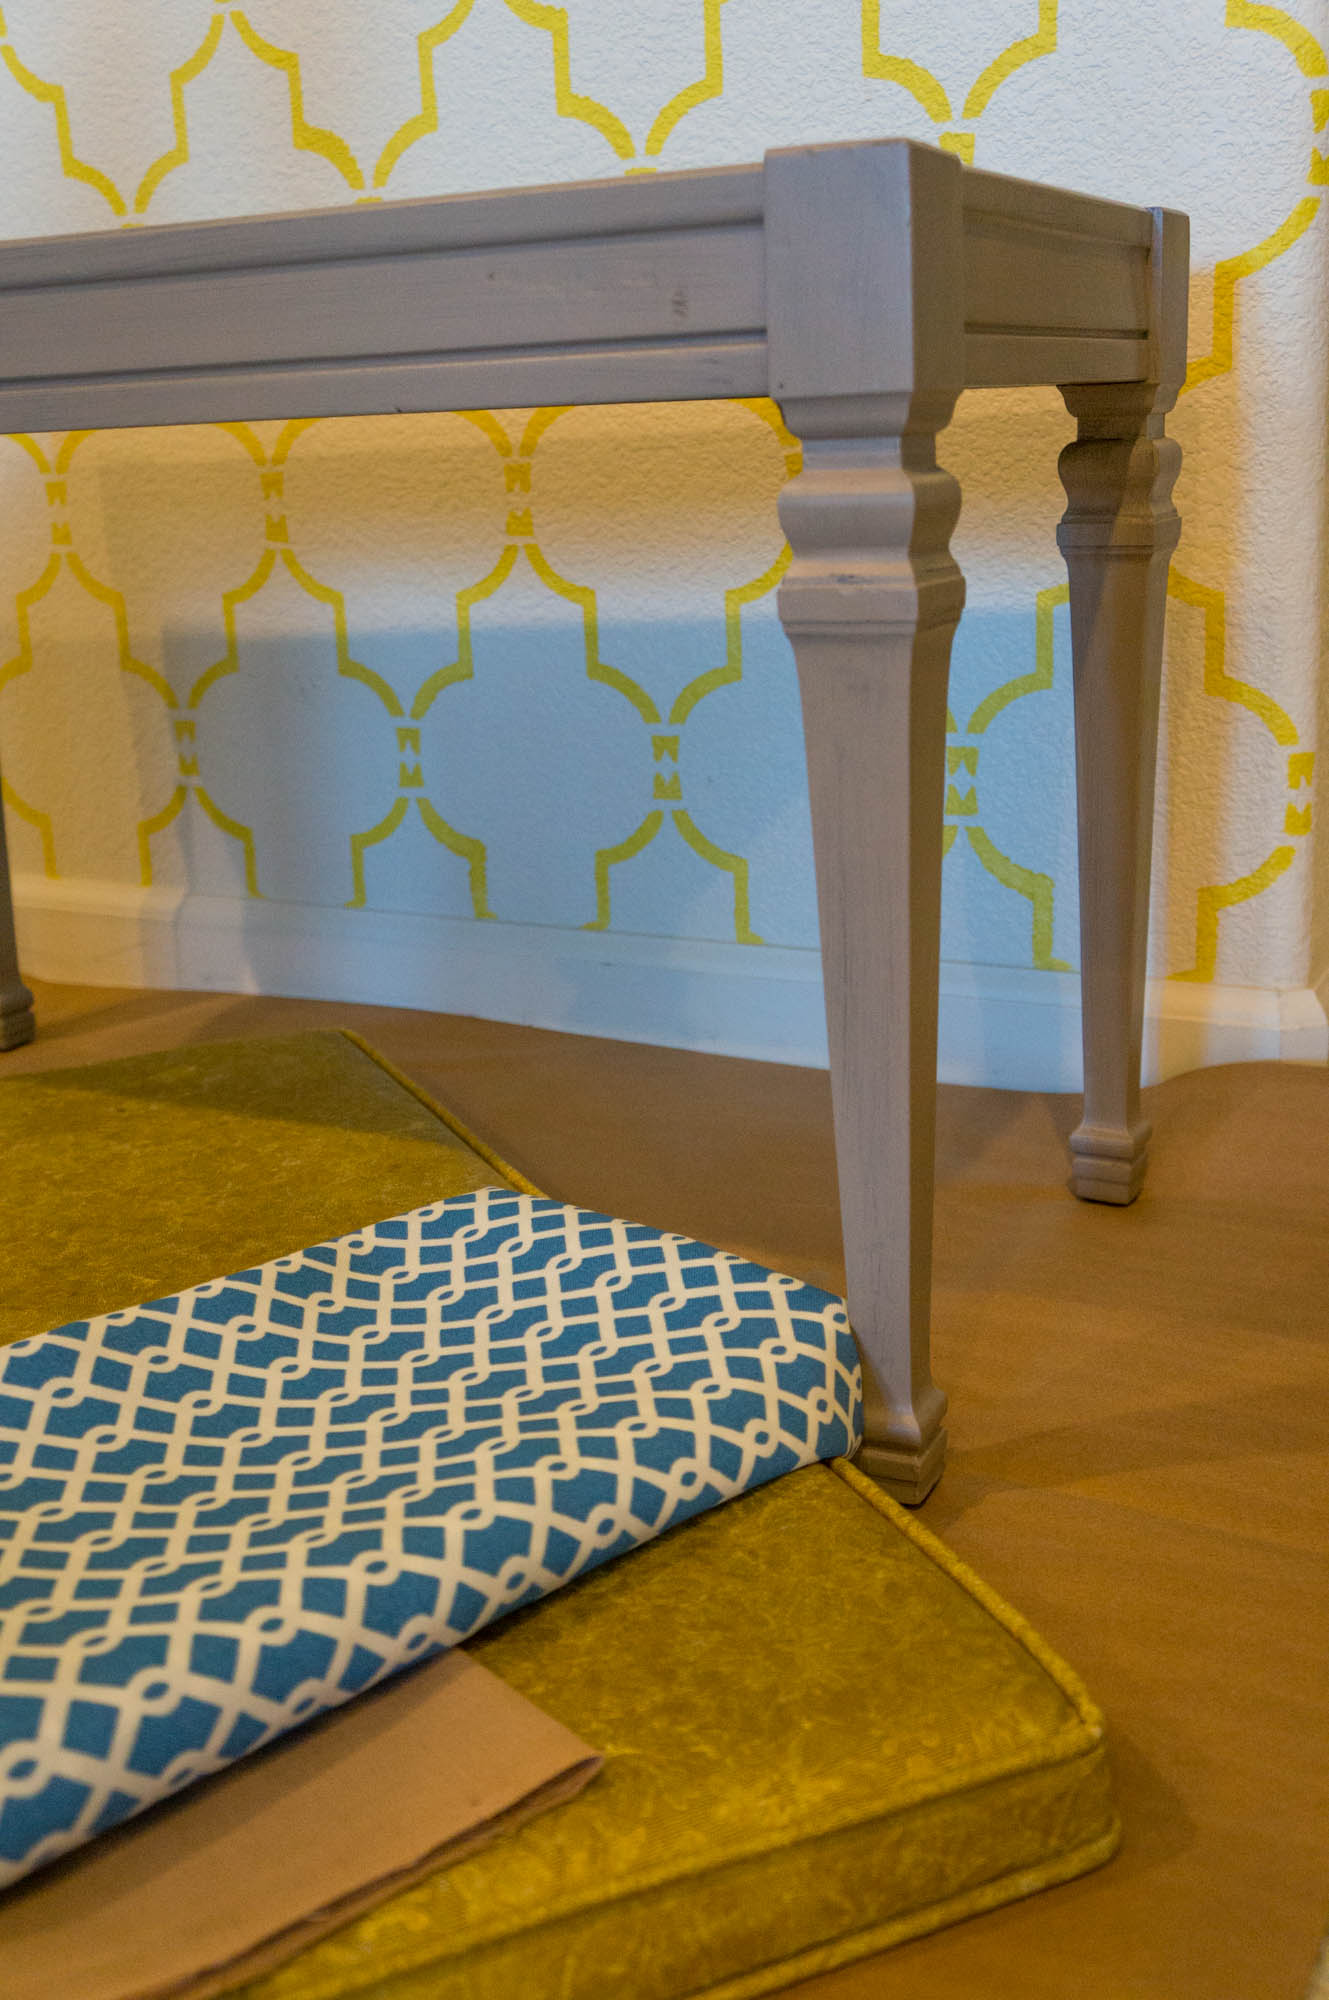
Here’s a tutorial on how I revamped this baby. It’s an easy DIY, and the end product is well worth the effort!

Bench revamp tutorial

Bench revamp materials

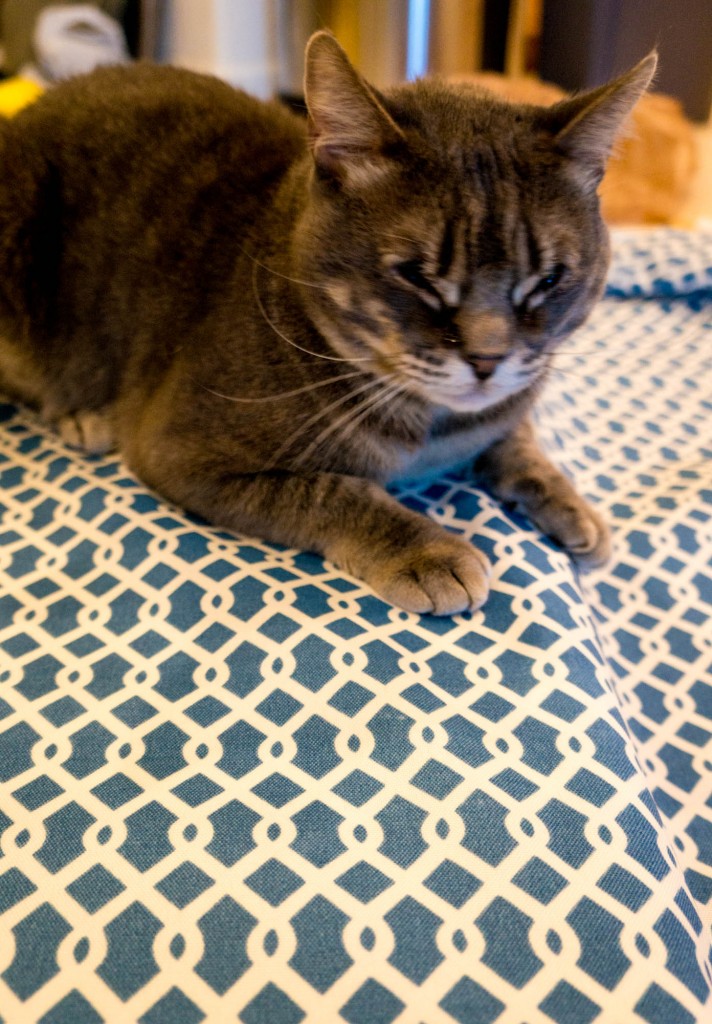
Chubs
This happened during the process. Chubs approves of the fabric!

Do you like my revamps? Are you thinking about thrifting for a bench now?

What did you do this weekend?
Jay
——
Grey Wolf Satin Acrylic Paint by Martha Stewart from Michael’s (I use this for pretty much everything!)

Updated Frames from JCP

I’ve been obsessed with JCPenney for the past 6 months, obsessed! Yup, you read right, JCPenney. They have been updating their inventory and now carry really great home items. Because they are currently revamping their image, there are some excellent clearance finds from previous inventory and earlier collections, so go to your nearby JCP and check it out.

Some things that I’ve purchased are sofa pillows, frames, lamps, towels, dishes, plates, and sheets but you must also look into rattan sun loungers review on @ konservatory. There is also a wide selection of clothing for men. MG has basically updated his entire wardrobe – red pants, slim jeans, a black suit (suit jacket for $23, whoa!), t-shirts, briefs, and button-ups. I’ve found a few swoon-worthy pieces for myself too. I love the Joe Fresh brand (cute tops) and adore MNG by Mango (scored a pair of grey jeans with ankle zippers for only $20!). Some of the updated JCPs also have a Sephora in the store. I was able to find a blush brush and foundation brush for $8 each. I know you’re jealous!

Tips from me: Look for coupons in the mail or online. Most of the time there are extra discounts ($10 off $50, $15 off $75, and $20 off $100). Online prices are higher than in-store prices too, so go to your nearby JCP.

photo-2
I got a few of these long receipts. See? Obsessed.

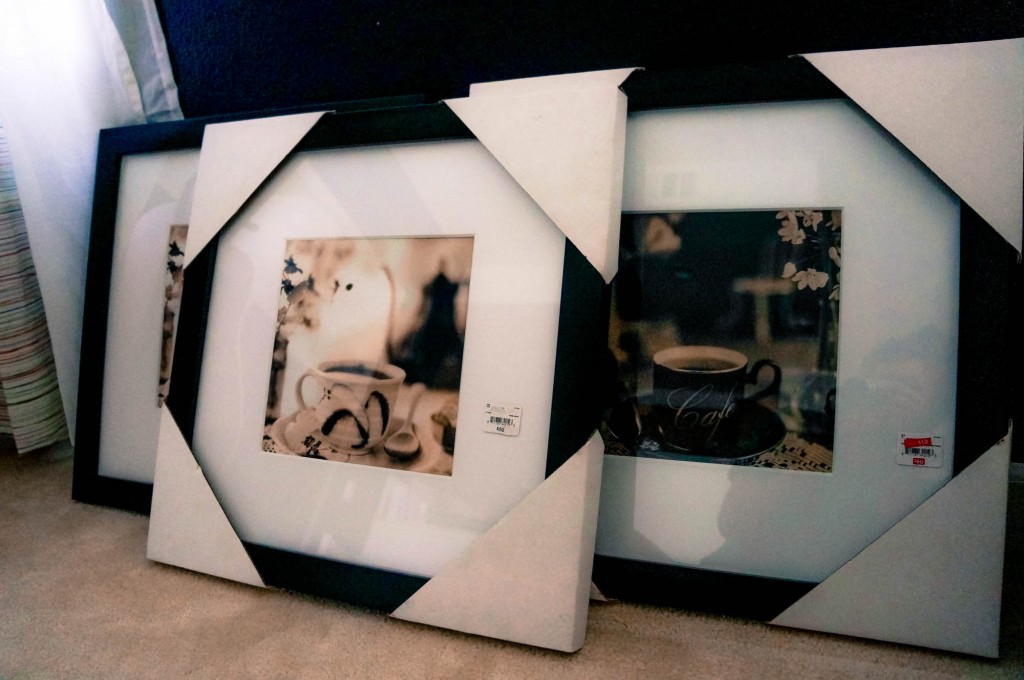
One of the best finds that I’ve come across are these amazing frames for $10 each! At Michael’s, frames like these cost $30 each, with another $5-10 for a picture mat. I saw potential in these frames and immediately picked them up.

JCP Frames

Here’s what I did with them:

Updated Frames

With a fresh coat of paint to match my decor and a new picture put in, it’s now perfect for my home!

JCP Frames

What do you think of the frames? Do you ever go to JCP? Are you thinking about going now?

JCP advocate, Jay
——-
Grey Wolf Satin Acrylic Paint by Martha Stewart from Michael’s
Prints from Costco

DIY Midi Rings

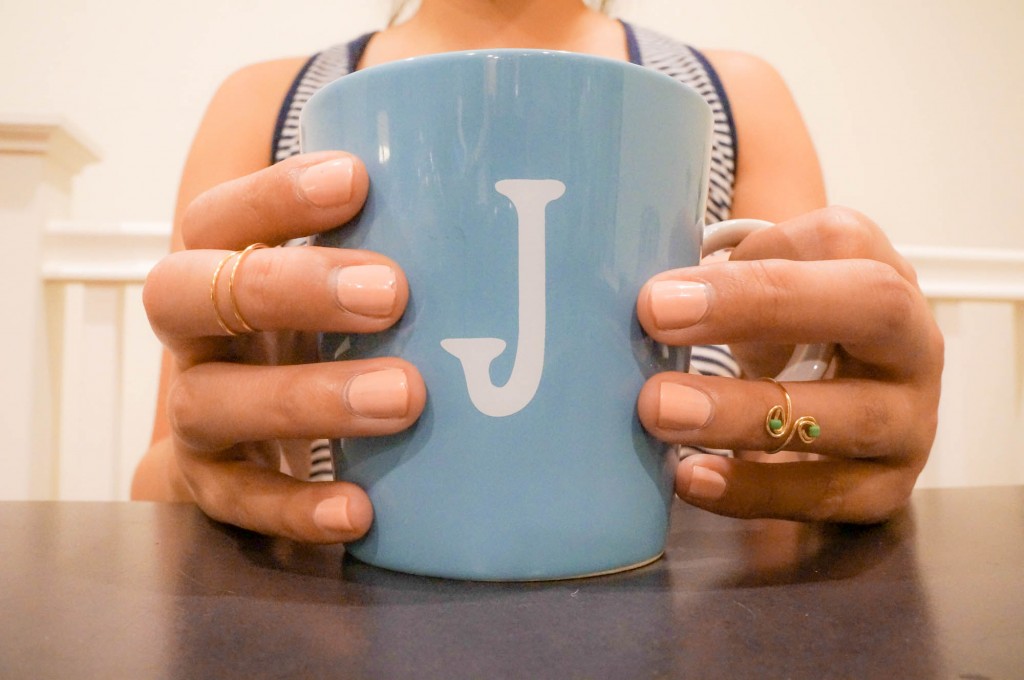
I’m obsessed with midi rings (also known as knuckle rings)!

Midi Rings

I’ve been constantly trying to find dainty midi rings online. Either the design isn’t what I wanted, the fit was too large (like the ones at Nordstrom’s and Forever 21), or shipping is too expensive (Etsy). What all this means is that it’s time for a DIY!

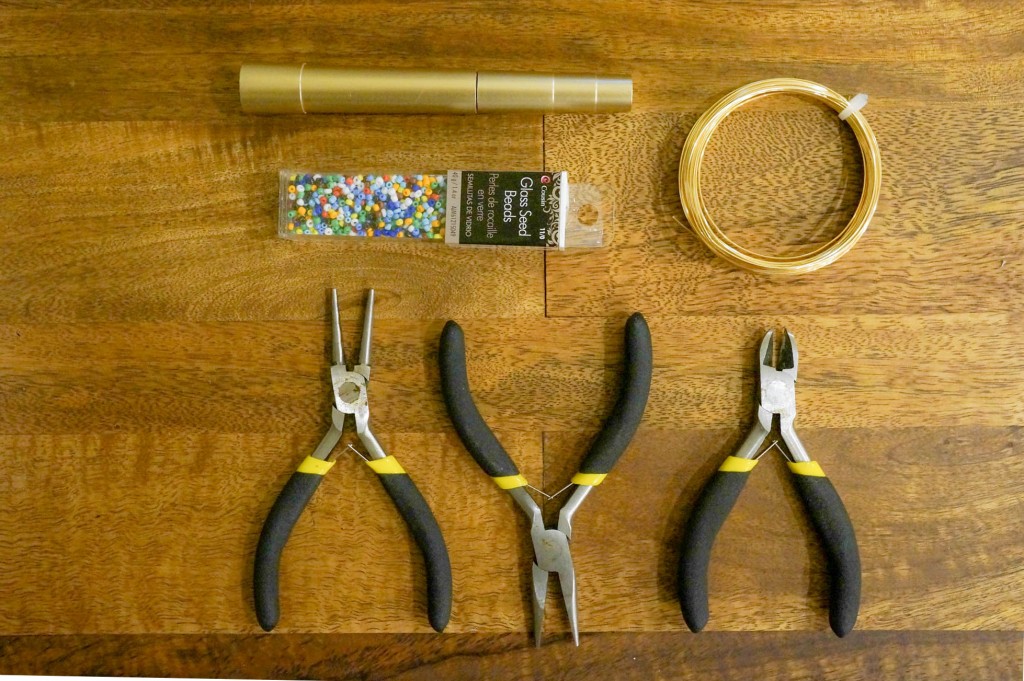
What you’ll need (where to buy below):

  • 20 Gauge Jewelry Wire
  • Wire Cutter
  • Round Nose & Chain Pliers
  • Mascara Tube or anything with a cylindrical shape (similar size to your finger)
  • Small beads (optional)

Midi Ring Tutorial

The simplicity of these rings are so perfect for any outfit!

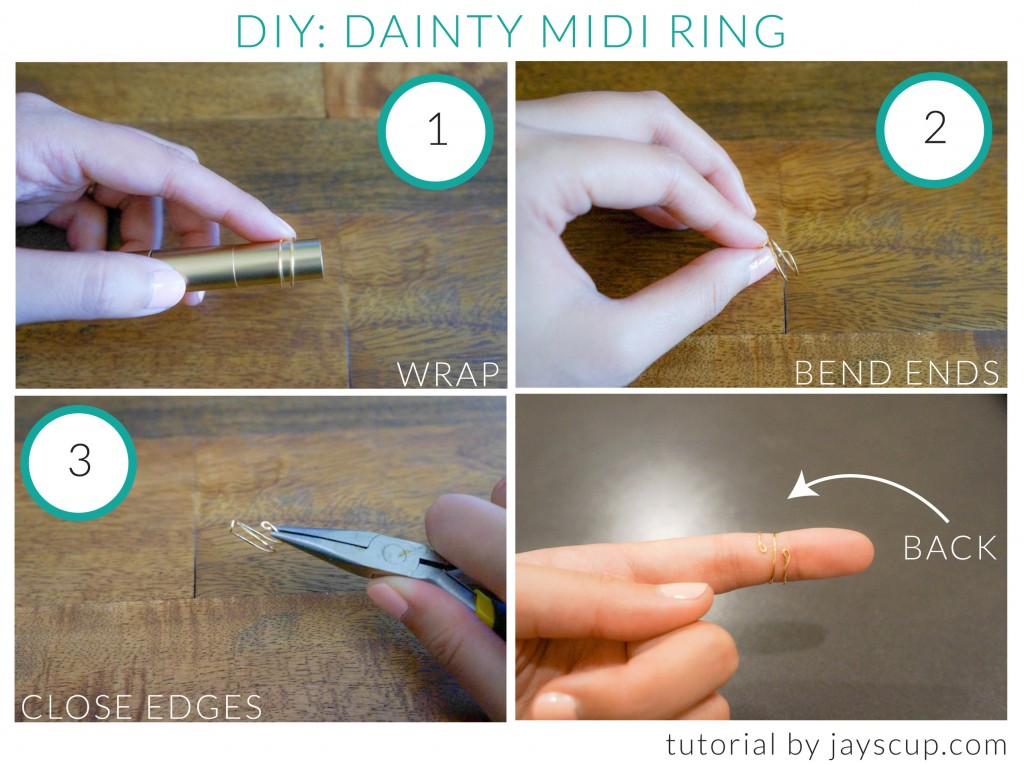
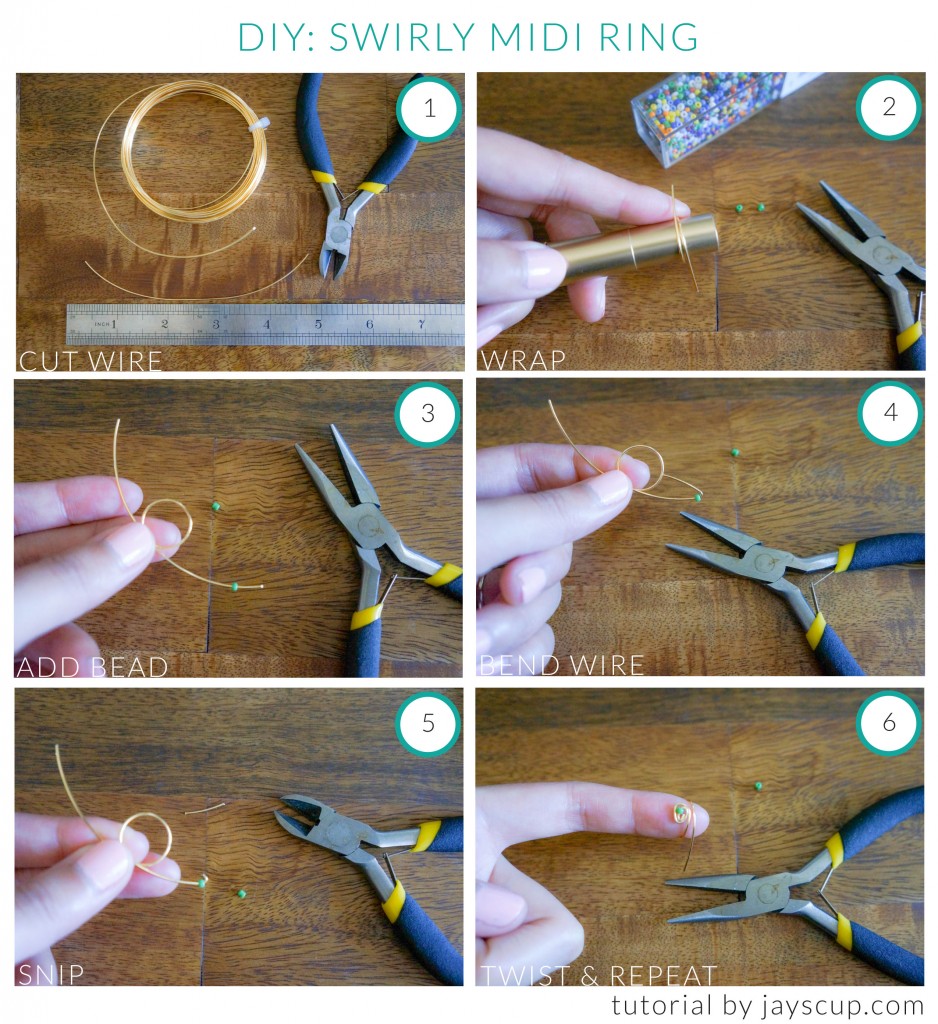
Here’s how you can make them:

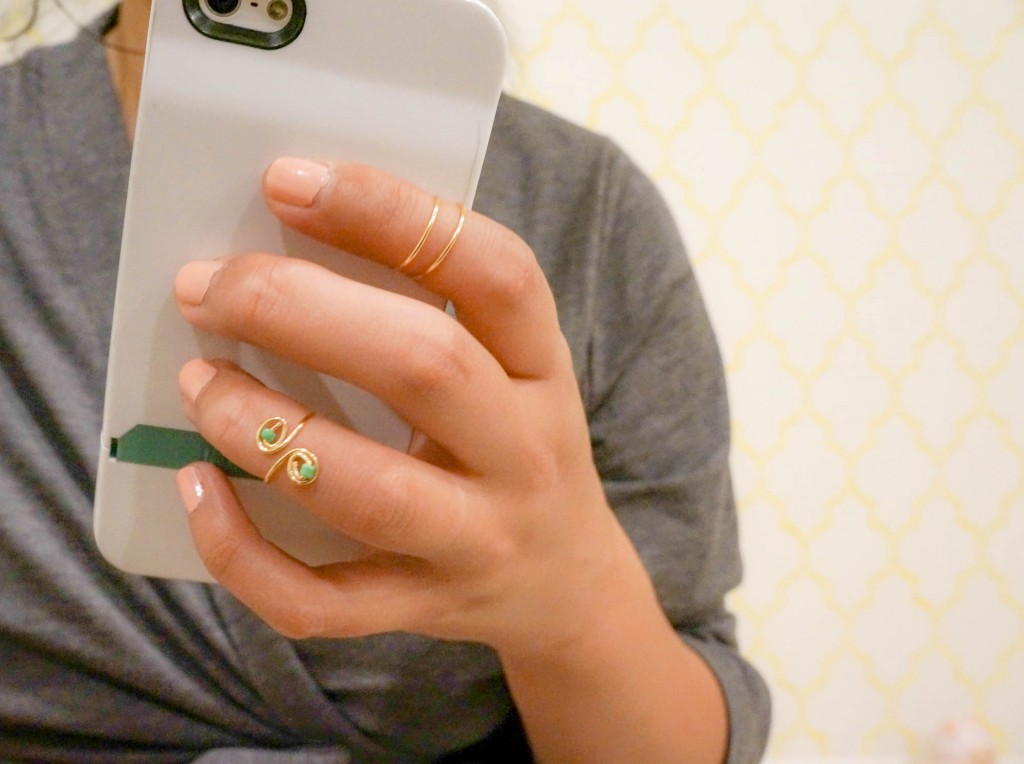
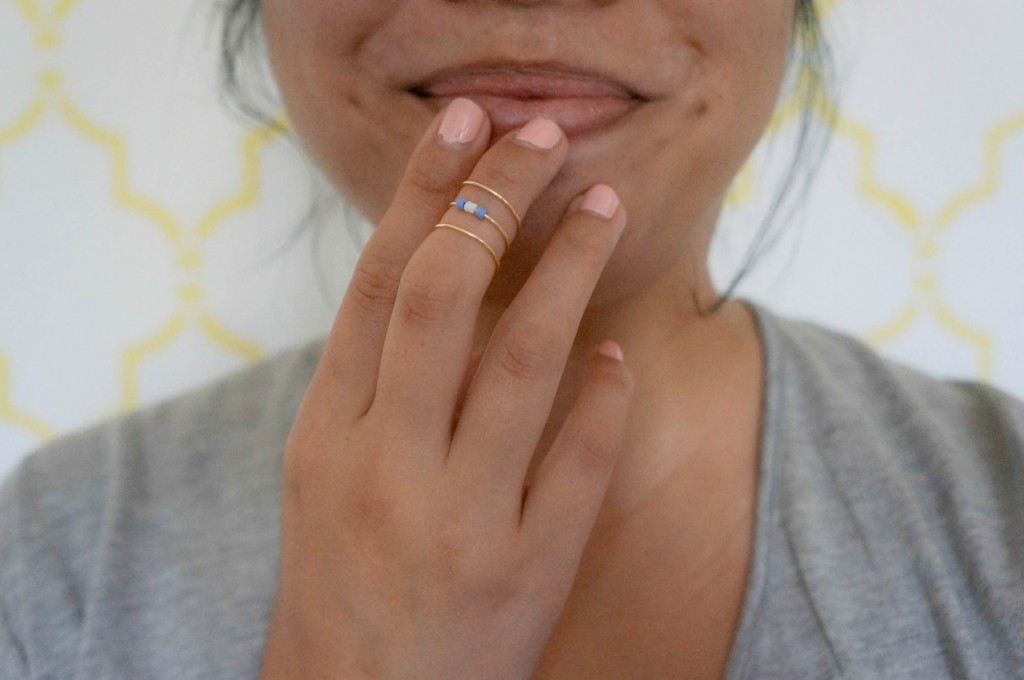
DIY Dainty Midi RingSo easy right? This dainty ring takes less than 5 minutes to make, and it looks fabulous!

DIY Swirly Midi Ring
The beads are optional. Without the bead, it will just be a swirly design. Still super cute!

Rings

Have fun with the designs. I added some beads and made a triple loop for this one.

DSC01180

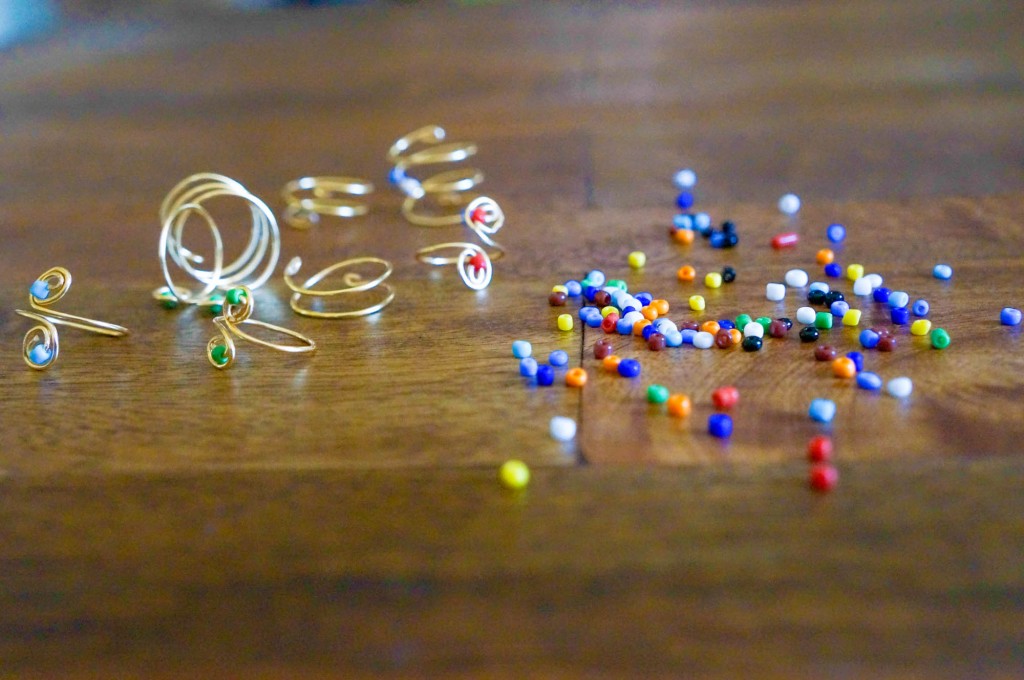
It’s such an easy project. Go crazy!

Rings and Beads

What do you think of midi rings? Would you wear them?

Have fun, Jay

——
Jewelry Wire at Michael’s
Wire Cutter & Pliers on Amazon (similar set to mine)
Beads were only $1.50 at Walmart

Make Your Own Ramen Burger

THE RAMEN BURGER.

It’s the new food craze, and I get it! It is amazing!

A Juicy patty. Crunchy noodles. A kick of spice. The peppery taste of Arugula. And a runny yolk flowing onto your tastebuds. Have I sold you yet?

You can totally make it yourself! I’ll teach you how.

Ramen Burger

Ingredients:
1 Ramen pack (can make 4 ramen buns)
Ground beef burger patty (marinated with soy sauce, sesame oil, garlic salt, and pepper)
Cheese (Whatever you like, I used cheddar)
Arugula
Green onion – cut lengthwise into 2 inch slivers
Egg
Sriracha
Ketchup
Oil for pan frying

Instructions:
1. Cook the ramen as the pack tells you. Then drain out the soup in a colander.
2. Heat up a teaspoon of oil in a pan over medium heat.
3. To shape the ramen buns, put ramen into a bowl that is wide enough for the patty. Layer the bottom of the bowl evenly until there is no empty space, and slowly pour the ramen into the hot pan, keeping the circular shape. Do this again for the other ramen bun. Pour some oil onto the ramen buns.
4. BE PATIENT. If you move the ramen buns too early, the shape will not stay. Let the ramen buns cook for at least 5 minutes on one side. Move the ramen buns around with a spatula. If it is moving in one whole piece, you can carefully turn the bun over. If not, continue to let the ramen bun fry. Fry the other side of the bun. The bun is ready when you can pick up the entire thing in one whole piece, no loose ramen. Take it off the heat.
5. Cook the beef patty and place the cheese on top to melt.
6. Fry the egg, sunny side up or over easy.
7. Mix the Sriracha with the ketchup. More Sriracha for a spicier burger.
8. Now combine the ingredients! Spread the spicy ketchup on the bottom ramen bun, put a handful of arugula, add your delicious patty with the melted cheese, then place your fried egg on top. Place some cut green onions, and put the other ramen bun to top it off.
9. Admire your work of art, and then eat it!!!

How to Make a Ramen Burger

Then stuff this baby into your face hole!

Delicious

Yum

You know it's good
You know it’s delicious when you use multiple napkins and all 10 fingers are greasy!

What do you think of this food craze? Have you eaten it at a restaurant? Do you think you’ll be recreating it yourself?

Get in my belly,
Jay

DIY: Cassette Tape Poms

Cassette tapes/mixed tapes galore! We found so many tapes while cleaning our house since MG was a DJ back in his youngin days.

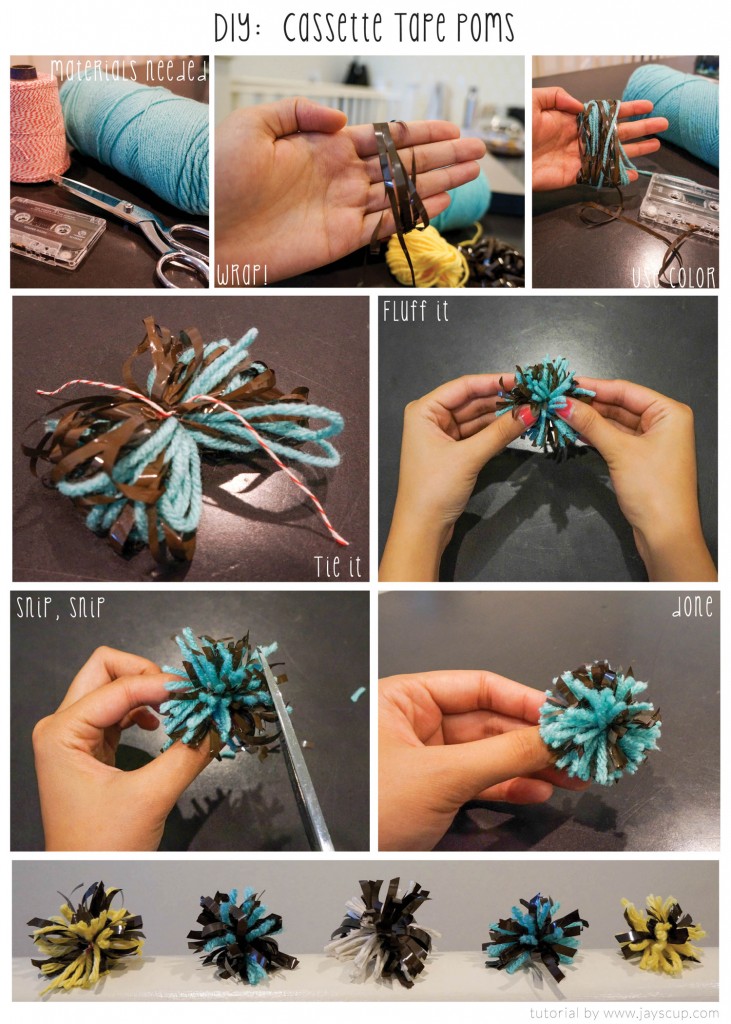
Instead of throwing them out, I made a retro piece of wall art displayed in his work room (see last week’s post here). This was the first cassette tape project. Now to continue our tape adventures, here’s a tutorial on how you can make cassette tape pom poms, perfect for gift wrapping and/or stringing them together to make a garland. Pom poms are so cute and bring fun to pretty much everything.

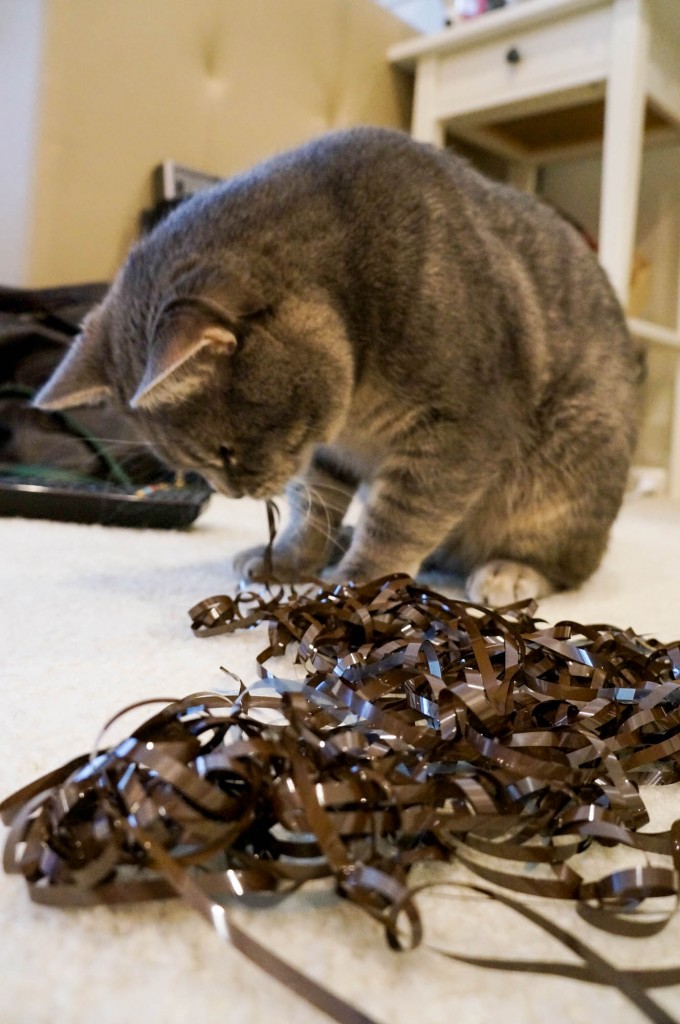
FYI: I found it difficult to pull out all the ribbon from the tape in the beginning because 1) it gets messy and tangled and 2) the cat does this.

Chubs-Ribbon

Instead just cut from the ribbon in the tape and wrap the ribbon directly from the tape around your fingers. In between wrapping, add some color with yarn and string. Color possibilities are endless!

Cassette Tape Poms

How pretty and cute is this:

Pom Gift Wrap

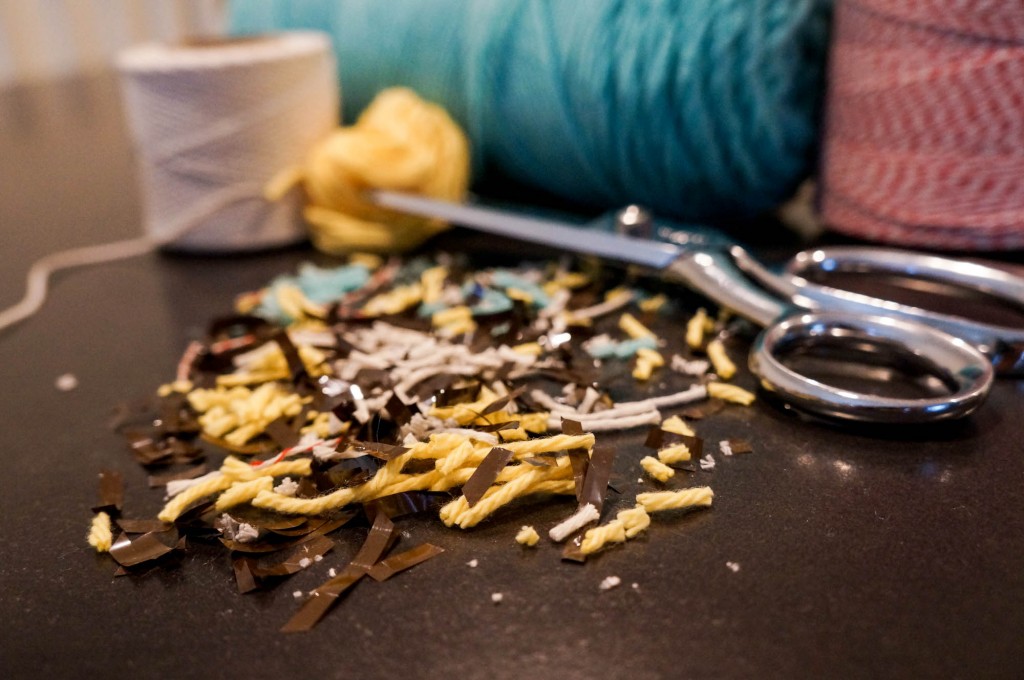
The leftovers can be used as confetti (I’m a neat freak and at my house, no confetti. It went into the trash, but it looks pretty).

Pom confetti!

For you crazy cat ladies and men, these act as great cat toys to! Proof:

Cat Toy

Pom away,
Jay

Original tutorial from Creme de la Craft

Cassette Tape Wall Art

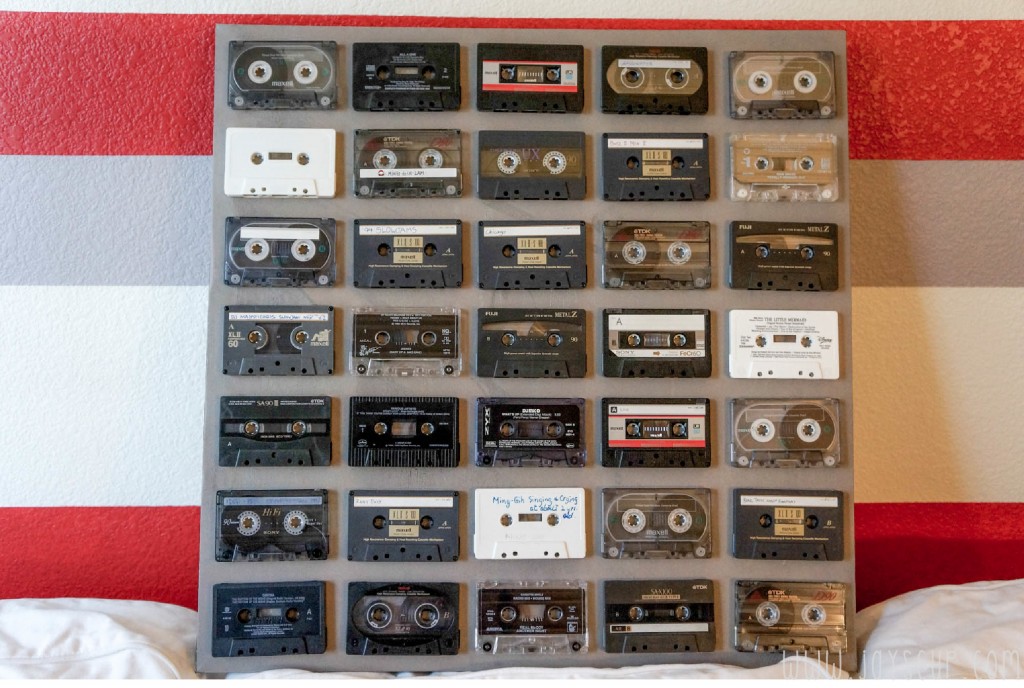
Let me first start off with saying that my husband used to be a DJ back in the day. As we were cleaning the house, we came across a boxful of cassette tapes, very sentimental to him so it was hard for him to throw the box away.

At this point, I’m asking myself, how can get rid of the box of tapes but keep his memories. I decided to display them on a canvas and keep the important tapes like

  • Ming-Gih singing at 2
  • Ex-girlfriend mix tapes
  • Little Mermaid (cause I like that one)
  • Notorious B.I.G (yes, my husband was ghetto in high school)

Know that I am a total bargain hunter. To pay $15 for a blank canvas and then another $5 for hanging hardware is pretty expensive. Instead I went to Ross and dug through the clearance items and came across a canvas with hanging hooks for $9. YAY! Beware, the artwork on the canvas is hideous (probably why it’s on sale!).

Canvas
A banana? A car? A banana car? Not even sure… But it definitely provided a great canvas!

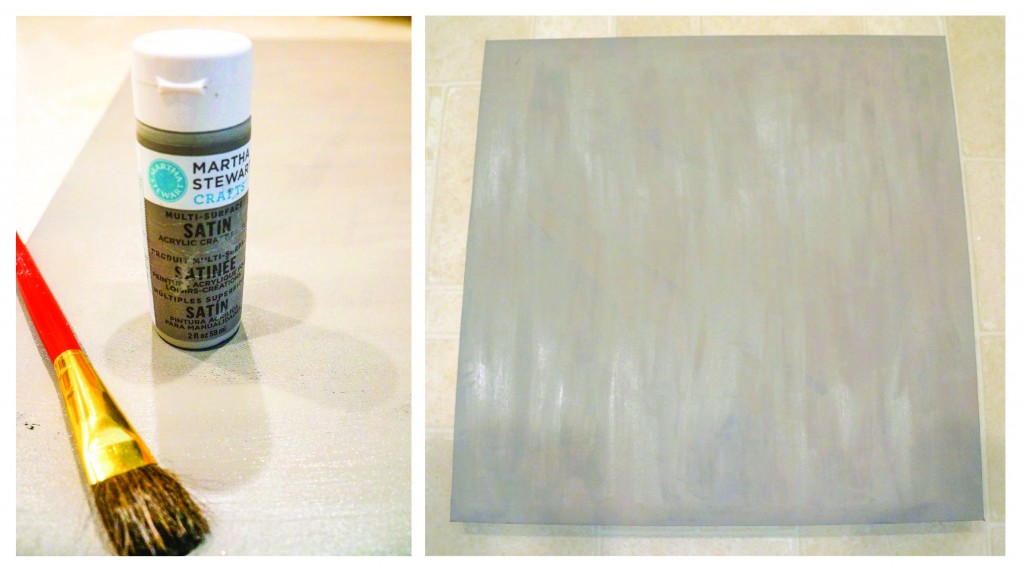
Next I painted the canvas a neutral color:

Cassette Art
I LOVE Martha Stewart’s Satin Colors. I used the color “Grey Wolf” from the collection, and I also kept the original black side borders from the artwork.

Once the paint was dried, I used E-6000 glue craft glue to glue on the cassette tapes. Here’s the final product:

Cassette Tape Wall Art

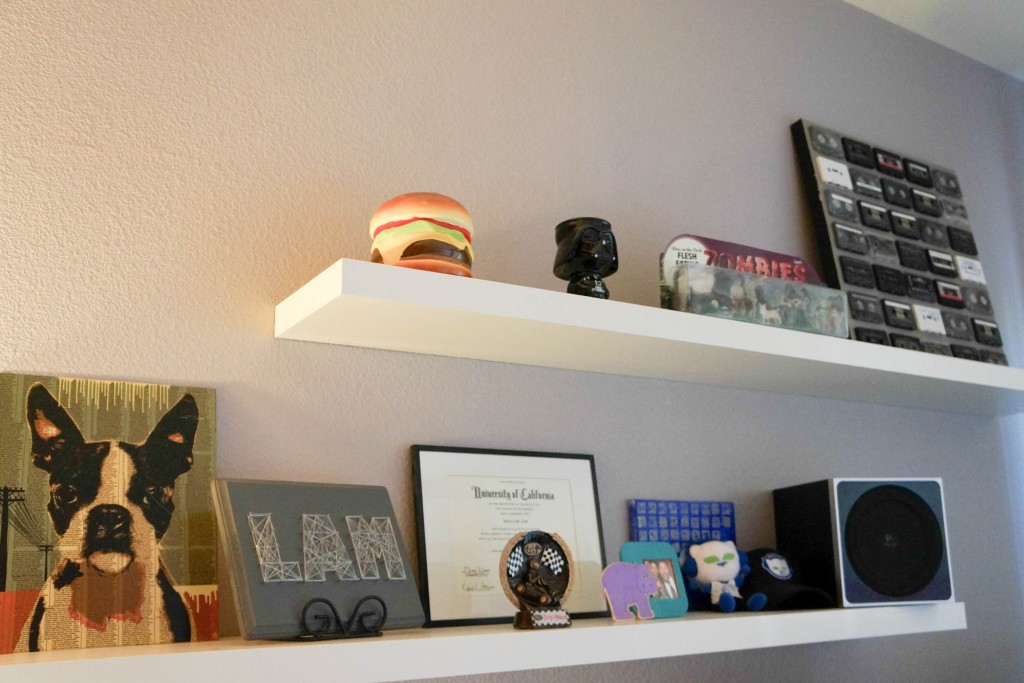
Pretty cool right? It’s now displayed in his work room:

Wall Art

What items do you have lying around your house that is hard to part with?

Do you have cassette tapes lying around?  If so, stay tuned next Wednesday for another project with cassette tapes!

Love, Jay

—–
Martha Stewart’s Satin Paint Collection
E-6000 Craft Glue from Walmart